
TimeMass filaments are 70% water.
Yes, really. Ask ChatGPT how’s that even possible.
We make our own polymerized alcohols in-house, our materials are unique, not your dishwasher’s PVA.
Still skeptical? Good.
Our 7 patents, our partnership with Nestle, or our crowdfunding campaign could light up our tech’s value, yet having our filaments in your hands is the ultimate skepticism’s antidote.
Our 4-Dimensional filaments
Filters
No results found
No results match your search. Try removing a few filters.
High-end filaments
Developed by Timeplast & String Cubed INC.
Sublimation
-
What if a material could transform, disappear, or reshape itself—on demand? TimeMass - Sublimation is a revolutionary microwave-sensitive filament that bypasses the liquid phase, shifting directly from solid to gas. Engineered with sublimation-prone compounds and a high water content, this material responds aggressively to microwave frequencies, enabling controlled vaporization, collapsible structures, and reactive mechanical components.
A New Dimension of Design & Experimentation
- Microwave-Triggered Disappearance – Watch as structures vanish in seconds when exposed to specific heat conditions, leaving behind no messy residue.
- Precision-Controlled Void Creation – Design temporary supports, chambers, or scaffolds that remove themselves at the perfect moment.
- Reactive, Self-Collapsing Mechanisms – Develop pistons, pressure-release valves, or dissolving seals that respond to thermal input.
- Accelerated Future Simulation – Simulate how objects will deform over centuries under exposure to sunlight, geological radiation, or heat by rapidly accelerating their decay process. Researchers, material scientists, and engineers can now study long-term environmental effects in real time—compressing 1,000 years of exposure into minutes.With TimeMass - Sublimation, traditional design limits evaporate—literally.
Where Science Meets Innovation
- Self-Disassembling Prototypes – Create temporary support structures that remove themselves without manual post-processing.
- Smart Manufacturing & Tooling – Use vaporization to clear out internal cavities in 3D-printed molds, forming complex hollow geometries.
- Special Effects & Theatrical Props – Design disappearing objects for immersive experiences, magic tricks, or experimental art installations.
- Transient Mechanical Components – Build heat-activated pistons or self-erasing message systems, perfect for experimental engineering.
- Environmental Aging Simulation – Speed up centuries of degradation to predict how materials, structures, or artifacts will react to extreme environments over time.
- Zero-Waste Printing – No need for dissolving chemicals or breakaway supports—just heat and gone.Engineered for the Future of Fabrication
By harnessing microwave frequencies as an activation trigger, TimeMass - Sublimation unlocks a new class of transient, responsive, and self-removing designs. Whether you're an innovator, engineer, or artist, this filament disrupts conventional 3D printing, replacing permanence with precision-controlled impermanence.
For those who dream of materials that change, disappear, and evolve—TimeMass - Sublimation brings the future into focus, then lets it fade away.
Evolving sculptures, where sections vanish upon activation.
Microwave-driven actuators for experimental soft robotics.
Disappearing piston chambers that create vacuum-driven motion.
Vaporization-based energy release designs.
-
Click here to access our new and improved TimeMass GPT Assistant. Just tell it your printer model and the TimeMass filament you're using—it will instantly recommend the exact parameters you need to start printing successfully.
Using a Bambu Lab printer?
Click here to download our updated Bambu Lab profile. All printing parameters are fully optimized and tested—just load the file and start printing.1. Introduction
These parameters are designed to help avoid printing issues; however, temperatures and speed timings can be adjusted based on your specific goals. For example, if you prefer a less rigid result, we recommend using a lower temperature. This section outlines a complete slicing and printing profile for TimeMass Sublimation, tailored for printers with a 0.8 mm nozzle. If the print is not being successful, please lower the nozzle temperature by 10°C and start over until an optimal print is achieved. Please check the manual for printing parameters.2. Temperature Settings
2.aNozzle Temperature: 230°C — Optimal for flowability while avoiding decomposition (which begins around 250°C).
2.bBed Temperature: 75°C — Ensures strong first-layer adhesion and prevents moisture bubbling.
2.cNozzle Temperature Range: 230–245°C — Timeplast melts around 165°C but prints best at 240°C for precise viscosity control.3. Cooling Settings
3.aNo Cooling for First Layers: 3 layers — Prevents shrinkage due to rapid cooling of moisture-rich filament.
3.bFan Minimum Speed: 0% for the first 100 seconds — Allows heat retention during early layers.
3.cFan Maximum Speed: 15% starting at 8 seconds — Avoids overcooling that can lead to warping.
3.dKeep Fan Always On: OFF — Allows vapor to escape and avoids internal fogging.
3.eSlow Down for Cooling: ON — Improves surface finish with controlled cooling.
3.fForce Cooling for Overhangs: OFF — Overcooling can deform bridges in Timeplast.
3.gFan for Overhangs: 15% — Only for essential cooling in complex areas.
3.hPre-Start Fan Time: 2 seconds — Minimizes pressure differential during the first layer.4. Volumetric Flow
4.aMax Volumetric Speed: 12 mm³/s — Based on a melt flow index of ~15 g/10min, allows high-speed printing.
4.bRamming Speed: 3 mm³/s — Prevents bubbles or popping from pressure spikes.5. Retraction and Flow
5.aRetraction Distance: 0.4 mm — Minimal retraction required for soft filaments to avoid stringing.
5.bRetraction Speed: 15 mm/s — Slow enough to avoid pulling molten plastic.
5.cPressure Advance: 0.05 — Compensates for nozzle lag at high flow rates.
5.dFlow Ratio: 92% — Slight under-extrusion avoids swelling and surface artifacts.6. Precision Settings
6.aGap Closing Radius: 0.1 mm — Tolerant of gaps in thicker walls.
6.bArc Fitting: ON — Reduces G-code size and smooths curve transitions.
6.cElephant Foot Compensation: 0.1 mm — Offsets squishing in the first layer caused by large bead sizes.7. Walls and Shells
7.aWall Loops: 2 — Minimum for strength when using a 0.8 mm nozzle.
7.bDetect Thin Walls: ON — Ensures tight geometries aren’t skipped.
7.cTop/Bottom Shell Layers: 3 — Provides good coverage; increase if watertightness is needed.
7.dTop/Bottom Thickness: 1.2 mm — Equals 1.5x the nozzle size for solid strength.
7.eTop/Bottom Pattern: Monotonic — Distributes tension evenly and improves surface finish.8. Geometry and Movement
8.aWall Order: Inner before Outer — Creates cleaner outer surfaces.
8.bInfill First: OFF — Maintains precise outer dimensions.
8.cSmooth Speed Transition: ON — Prevents ringing caused by abrupt speed changes.
8.dSmooth Coefficient: 80 — Ideal damping for soft materials.
8.eAvoid Crossing Wall: ON — Minimizes stringing across part walls.
8.fMax Detour for Crossing: 10 mm or 5% — Balances time with print cleanliness.9. Layer and Width Settings
9.aLayer Height: 0.3 mm — Optimal for strength and resolution using a 0.8 mm nozzle.
9.bInitial Layer Height: 0.35 mm — Slightly higher to improve adhesion.
9.cLine Widths (all): 0.8 mm — Matches nozzle diameter for consistent extrusion.10. Seam Settings
10.aSeam Position: Aligned or Back — Use aligned for mechanical consistency, back for visual appeal.
10.bSmart Scarf Seam: ON — Automatically adjusts seam location to reduce visual impact.
10.cSeam Angle: 155° — Standard seam angle for clean transitions.
10.dSeam Steps: 10 — Smooths seam path and improves visual finish.11. Infill Settings
11.aWall/Infill Overlap: 10% — Prevents infill from deforming soft exterior walls.
11.bInfill Combination: ON — Consolidates paths for efficiency.
11.cDetect Floating Shells: ON — Ensures unsupported vertical structures are printed reliably.
11.dSparse Infill Density: 20–25% — Balanced rigidity vs. material use.
11.eSparse Pattern: Grid — Stable and efficient for flexible geometries.12. Speed Settings
12.aTravel: 160 mm/s — Fast but safe against backlash.
12.bInitial Layer: 15 mm/s — Prevents nozzle from skimming and ensures bed adhesion.
12.cOuter Wall: 60 mm/s — Controlled speed for surface quality.
12.dInner Wall: 90 mm/s — Slightly faster without compromising control.
12.eSmall Perimeter: 35 mm/s — Reduced speed for detailed geometry.
12.fTop Surface: 40 mm/s — Improves finish on topmost layers.
12.gInfill: 100–120 mm/s — Takes advantage of high flowability.13. Acceleration Settings
13.aNormal Print: 2000 mm/s² — Prevents ringing in soft filaments.
13.bTravel: 4000 mm/s² — Enables fast movement without harsh transitions.
13.cInitial Layer: 300 mm/s² — Gentle movement prevents lifting from the bed.
13.dOuter Wall: 1500 mm/s² — Improves outer surface clarity.
13.eInner Wall: 2000 mm/s² — Balanced for structural components.
13.fTop Surface: 1500 mm/s² — Ensures smooth detailing.14. Adhesion and Brims
14.aSkirt Loops: 2 — Helps prime nozzle and start cleanly.
14.bBrim Width: 6 mm — Helps hold soft materials down.
14.cBrim Gap: 0.15 mm — Allows for easy removal without tearing.15. Prime Tower and Flush Settings
15.aPrime Tower: ON — Purges moisture and early flow inconsistencies.
15.bTower Width: 40 mm — Prevents collapse due to heat.
15.cBrim Width (Tower): 4 mm — Adds stability to the purge base.
15.dFlush Into Support: ON — Discards unwanted early flow safely.16. G-Code Start Script
M900 K0.05 ; Pressure Advance M106 S0 ; Fan off G92 E0 G1 E15 F300 ; purge line G92 E0
17. Additional Notes
17.aDry filament at 155 F for 2 hours before use.
17.bStore with desiccant.
17.cKeep extruder door open to allow vapor to escape.
17.dAvoid long dwell times at high temperatures.If you need any other assistance, feel free to reach out to us anytime at timeplast@timeplast.com — we’ll be happy to help.
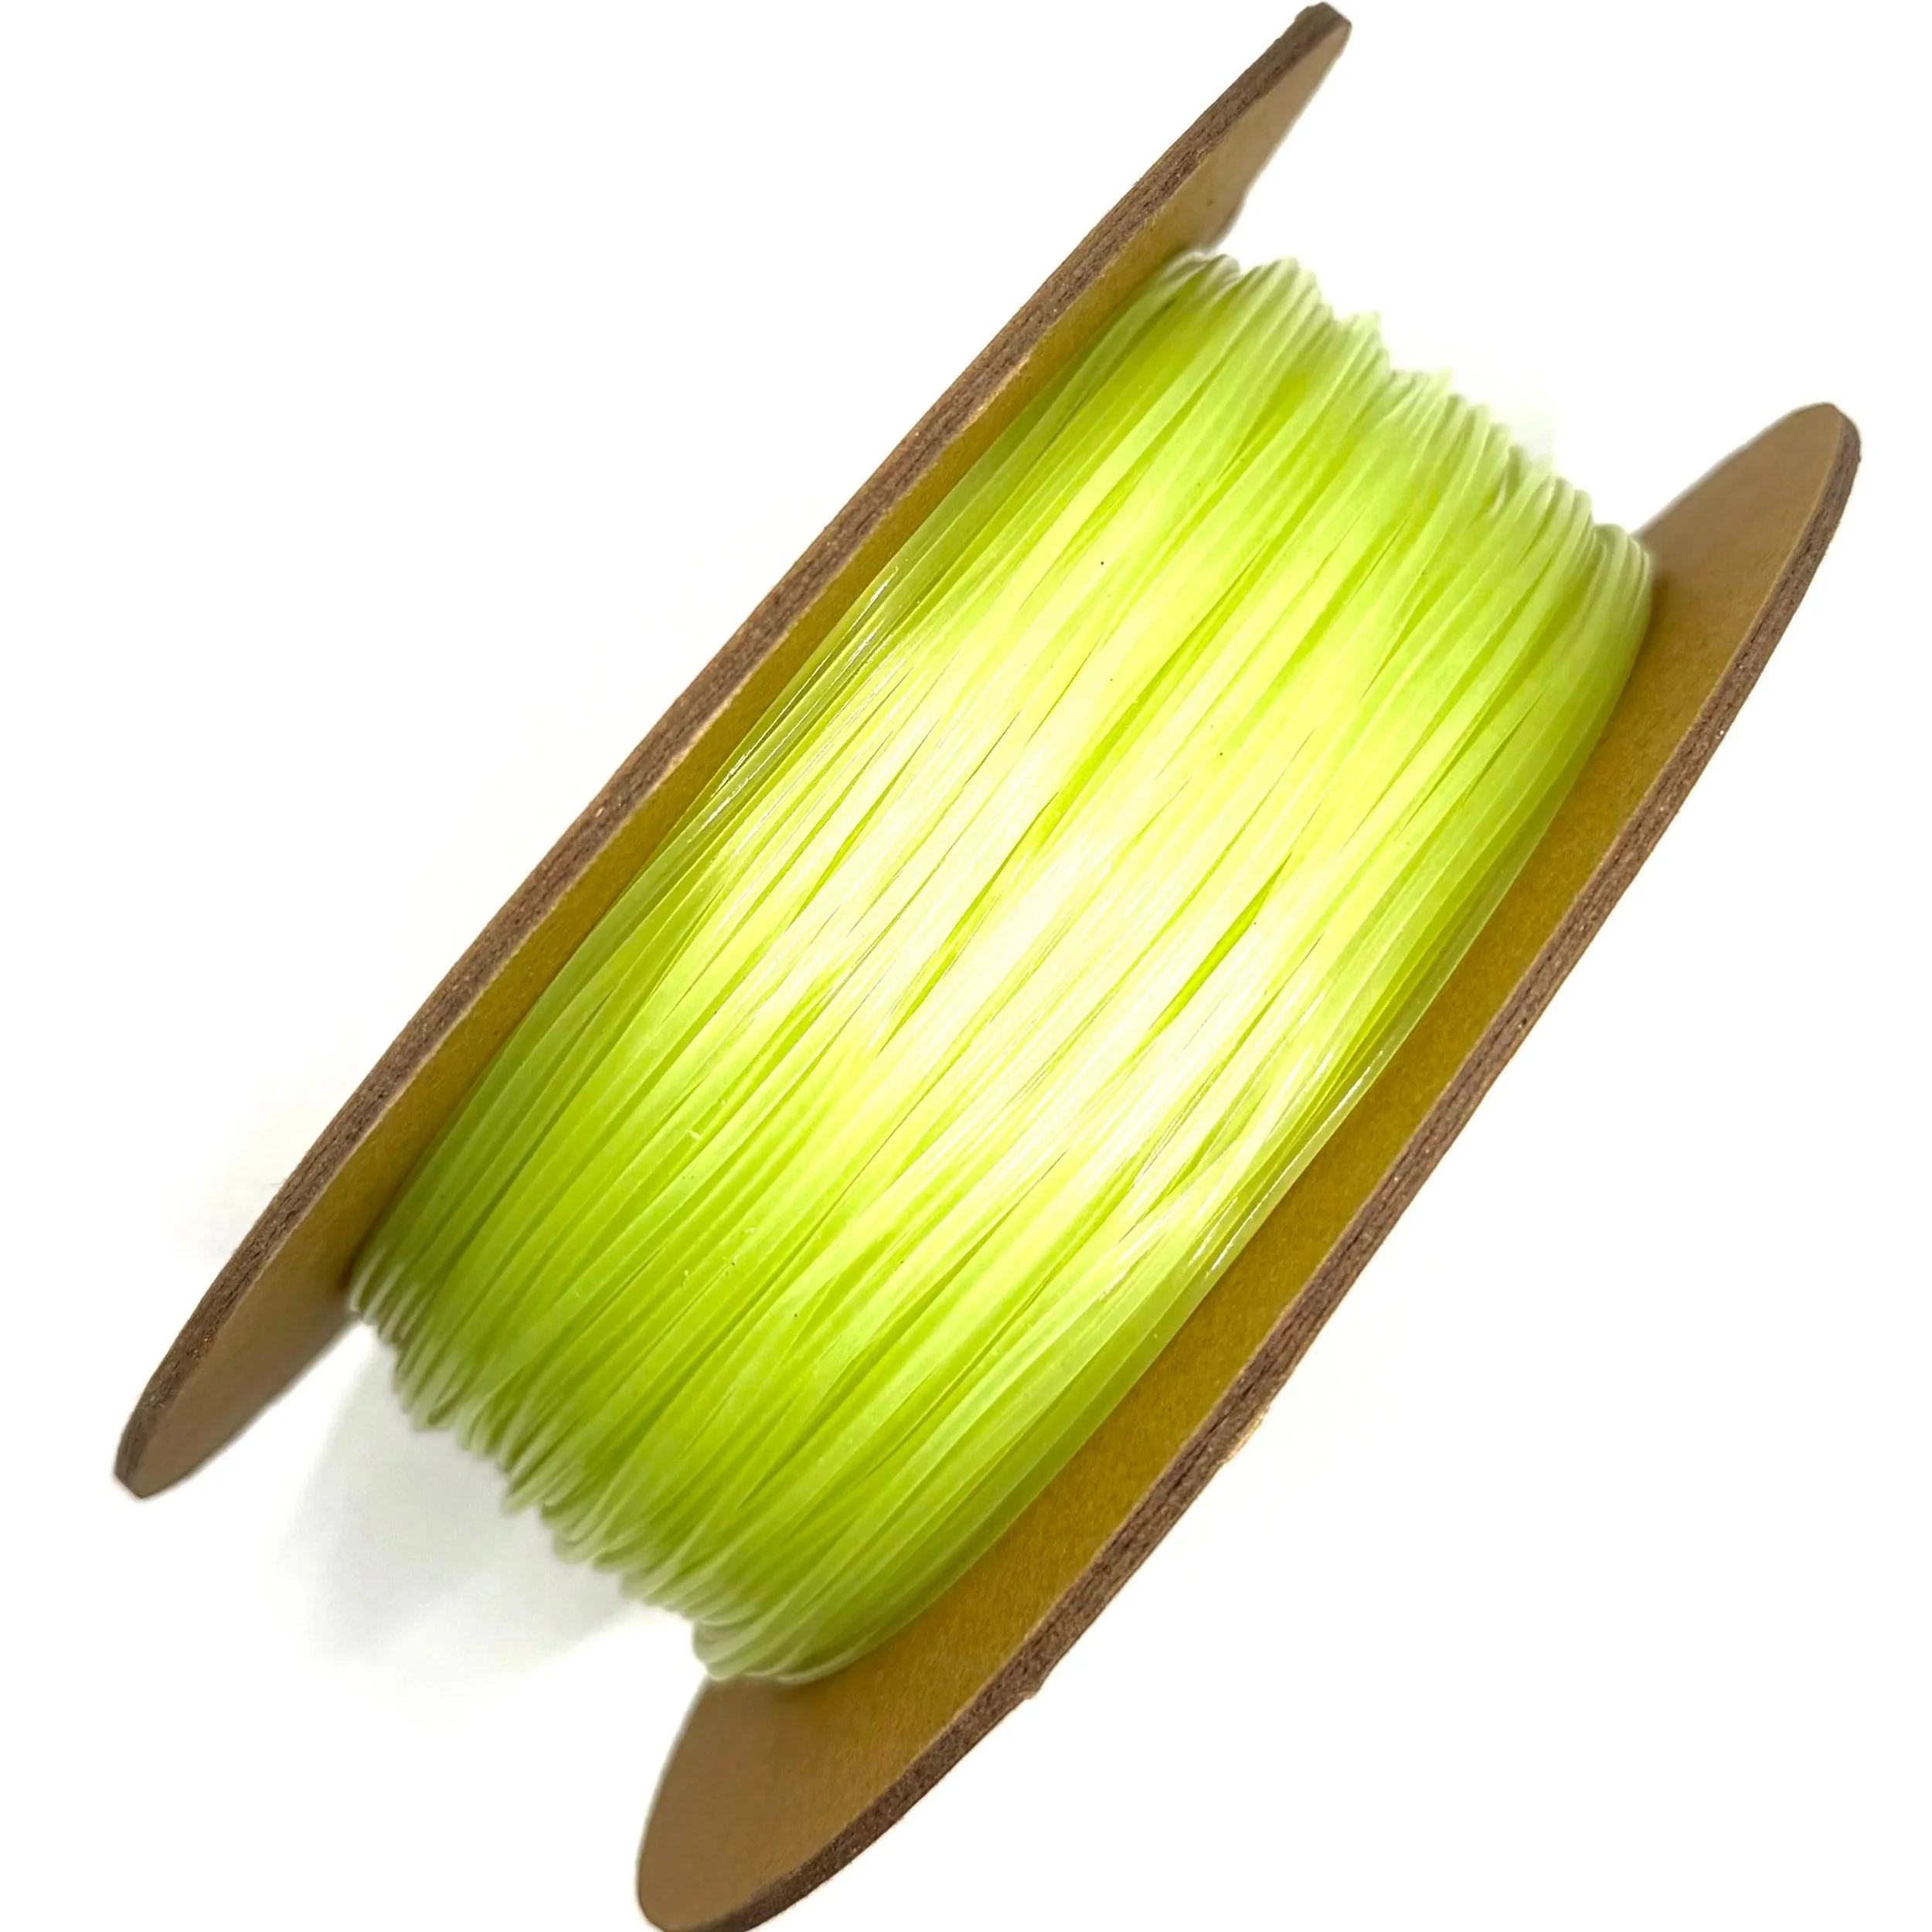
Fiber
-
-
Click here to access our new and improved TimeMass GPT Assistant. Just tell it your printer model and the TimeMass filament you're using—it will instantly recommend the exact parameters you need to start printing successfully.
Using a Bambu Lab printer?
Click here to download our updated Bambu Lab profile. All printing parameters are fully optimized and tested—just load the file and start printing.1. Introduction
These parameters are designed to help avoid printing issues; however, temperatures and speed timings can be adjusted based on your specific goals. For example, if you prefer a less rigid result, we recommend using a lower temperature. This section outlines a complete slicing and printing profile for TimeMass Sublimation, tailored for printers with a 0.8 mm nozzle. If the print is not being successful, please lower the nozzle temperature by 10°C and start over until an optimal print is achieved. Please check the manual for printing parameters.2. Temperature Settings
2.aNozzle Temperature: 230°C — Optimal for flowability while avoiding decomposition (which begins around 250°C).
2.bBed Temperature: 75°C — Ensures strong first-layer adhesion and prevents moisture bubbling.
2.cNozzle Temperature Range: 230–245°C — Timeplast melts around 165°C but prints best at 240°C for precise viscosity control.3. Cooling Settings
3.aNo Cooling for First Layers: 3 layers — Prevents shrinkage due to rapid cooling of moisture-rich filament.
3.bFan Minimum Speed: 0% for the first 100 seconds — Allows heat retention during early layers.
3.cFan Maximum Speed: 15% starting at 8 seconds — Avoids overcooling that can lead to warping.
3.dKeep Fan Always On: OFF — Allows vapor to escape and avoids internal fogging.
3.eSlow Down for Cooling: ON — Improves surface finish with controlled cooling.
3.fForce Cooling for Overhangs: OFF — Overcooling can deform bridges in Timeplast.
3.gFan for Overhangs: 15% — Only for essential cooling in complex areas.
3.hPre-Start Fan Time: 2 seconds — Minimizes pressure differential during the first layer.4. Volumetric Flow
4.aMax Volumetric Speed: 12 mm³/s — Based on a melt flow index of ~15 g/10min, allows high-speed printing.
4.bRamming Speed: 3 mm³/s — Prevents bubbles or popping from pressure spikes.5. Retraction and Flow
5.aRetraction Distance: 0.4 mm — Minimal retraction required for soft filaments to avoid stringing.
5.bRetraction Speed: 15 mm/s — Slow enough to avoid pulling molten plastic.
5.cPressure Advance: 0.05 — Compensates for nozzle lag at high flow rates.
5.dFlow Ratio: 92% — Slight under-extrusion avoids swelling and surface artifacts.6. Precision Settings
6.aGap Closing Radius: 0.1 mm — Tolerant of gaps in thicker walls.
6.bArc Fitting: ON — Reduces G-code size and smooths curve transitions.
6.cElephant Foot Compensation: 0.1 mm — Offsets squishing in the first layer caused by large bead sizes.7. Walls and Shells
7.aWall Loops: 2 — Minimum for strength when using a 0.8 mm nozzle.
7.bDetect Thin Walls: ON — Ensures tight geometries aren’t skipped.
7.cTop/Bottom Shell Layers: 3 — Provides good coverage; increase if watertightness is needed.
7.dTop/Bottom Thickness: 1.2 mm — Equals 1.5x the nozzle size for solid strength.
7.eTop/Bottom Pattern: Monotonic — Distributes tension evenly and improves surface finish.8. Geometry and Movement
8.aWall Order: Inner before Outer — Creates cleaner outer surfaces.
8.bInfill First: OFF — Maintains precise outer dimensions.
8.cSmooth Speed Transition: ON — Prevents ringing caused by abrupt speed changes.
8.dSmooth Coefficient: 80 — Ideal damping for soft materials.
8.eAvoid Crossing Wall: ON — Minimizes stringing across part walls.
8.fMax Detour for Crossing: 10 mm or 5% — Balances time with print cleanliness.9. Layer and Width Settings
9.aLayer Height: 0.3 mm — Optimal for strength and resolution using a 0.8 mm nozzle.
9.bInitial Layer Height: 0.35 mm — Slightly higher to improve adhesion.
9.cLine Widths (all): 0.8 mm — Matches nozzle diameter for consistent extrusion.10. Seam Settings
10.aSeam Position: Aligned or Back — Use aligned for mechanical consistency, back for visual appeal.
10.bSmart Scarf Seam: ON — Automatically adjusts seam location to reduce visual impact.
10.cSeam Angle: 155° — Standard seam angle for clean transitions.
10.dSeam Steps: 10 — Smooths seam path and improves visual finish.11. Infill Settings
11.aWall/Infill Overlap: 10% — Prevents infill from deforming soft exterior walls.
11.bInfill Combination: ON — Consolidates paths for efficiency.
11.cDetect Floating Shells: ON — Ensures unsupported vertical structures are printed reliably.
11.dSparse Infill Density: 20–25% — Balanced rigidity vs. material use.
11.eSparse Pattern: Grid — Stable and efficient for flexible geometries.12. Speed Settings
12.aTravel: 160 mm/s — Fast but safe against backlash.
12.bInitial Layer: 15 mm/s — Prevents nozzle from skimming and ensures bed adhesion.
12.cOuter Wall: 60 mm/s — Controlled speed for surface quality.
12.dInner Wall: 90 mm/s — Slightly faster without compromising control.
12.eSmall Perimeter: 35 mm/s — Reduced speed for detailed geometry.
12.fTop Surface: 40 mm/s — Improves finish on topmost layers.
12.gInfill: 100–120 mm/s — Takes advantage of high flowability.13. Acceleration Settings
13.aNormal Print: 2000 mm/s² — Prevents ringing in soft filaments.
13.bTravel: 4000 mm/s² — Enables fast movement without harsh transitions.
13.cInitial Layer: 300 mm/s² — Gentle movement prevents lifting from the bed.
13.dOuter Wall: 1500 mm/s² — Improves outer surface clarity.
13.eInner Wall: 2000 mm/s² — Balanced for structural components.
13.fTop Surface: 1500 mm/s² — Ensures smooth detailing.14. Adhesion and Brims
14.aSkirt Loops: 2 — Helps prime nozzle and start cleanly.
14.bBrim Width: 6 mm — Helps hold soft materials down.
14.cBrim Gap: 0.15 mm — Allows for easy removal without tearing.15. Prime Tower and Flush Settings
15.aPrime Tower: ON — Purges moisture and early flow inconsistencies.
15.bTower Width: 40 mm — Prevents collapse due to heat.
15.cBrim Width (Tower): 4 mm — Adds stability to the purge base.
15.dFlush Into Support: ON — Discards unwanted early flow safely.16. G-Code Start Script
M900 K0.05 ; Pressure Advance M106 S0 ; Fan off G92 E0 G1 E15 F300 ; purge line G92 E0
17. Additional Notes
17.aDry filament at 155 F for 2 hours before use.
17.bStore with desiccant.
17.cKeep extruder door open to allow vapor to escape.
17.dAvoid long dwell times at high temperatures.If you need any other assistance, feel free to reach out to us anytime at timeplast@timeplast.com — we’ll be happy to help.

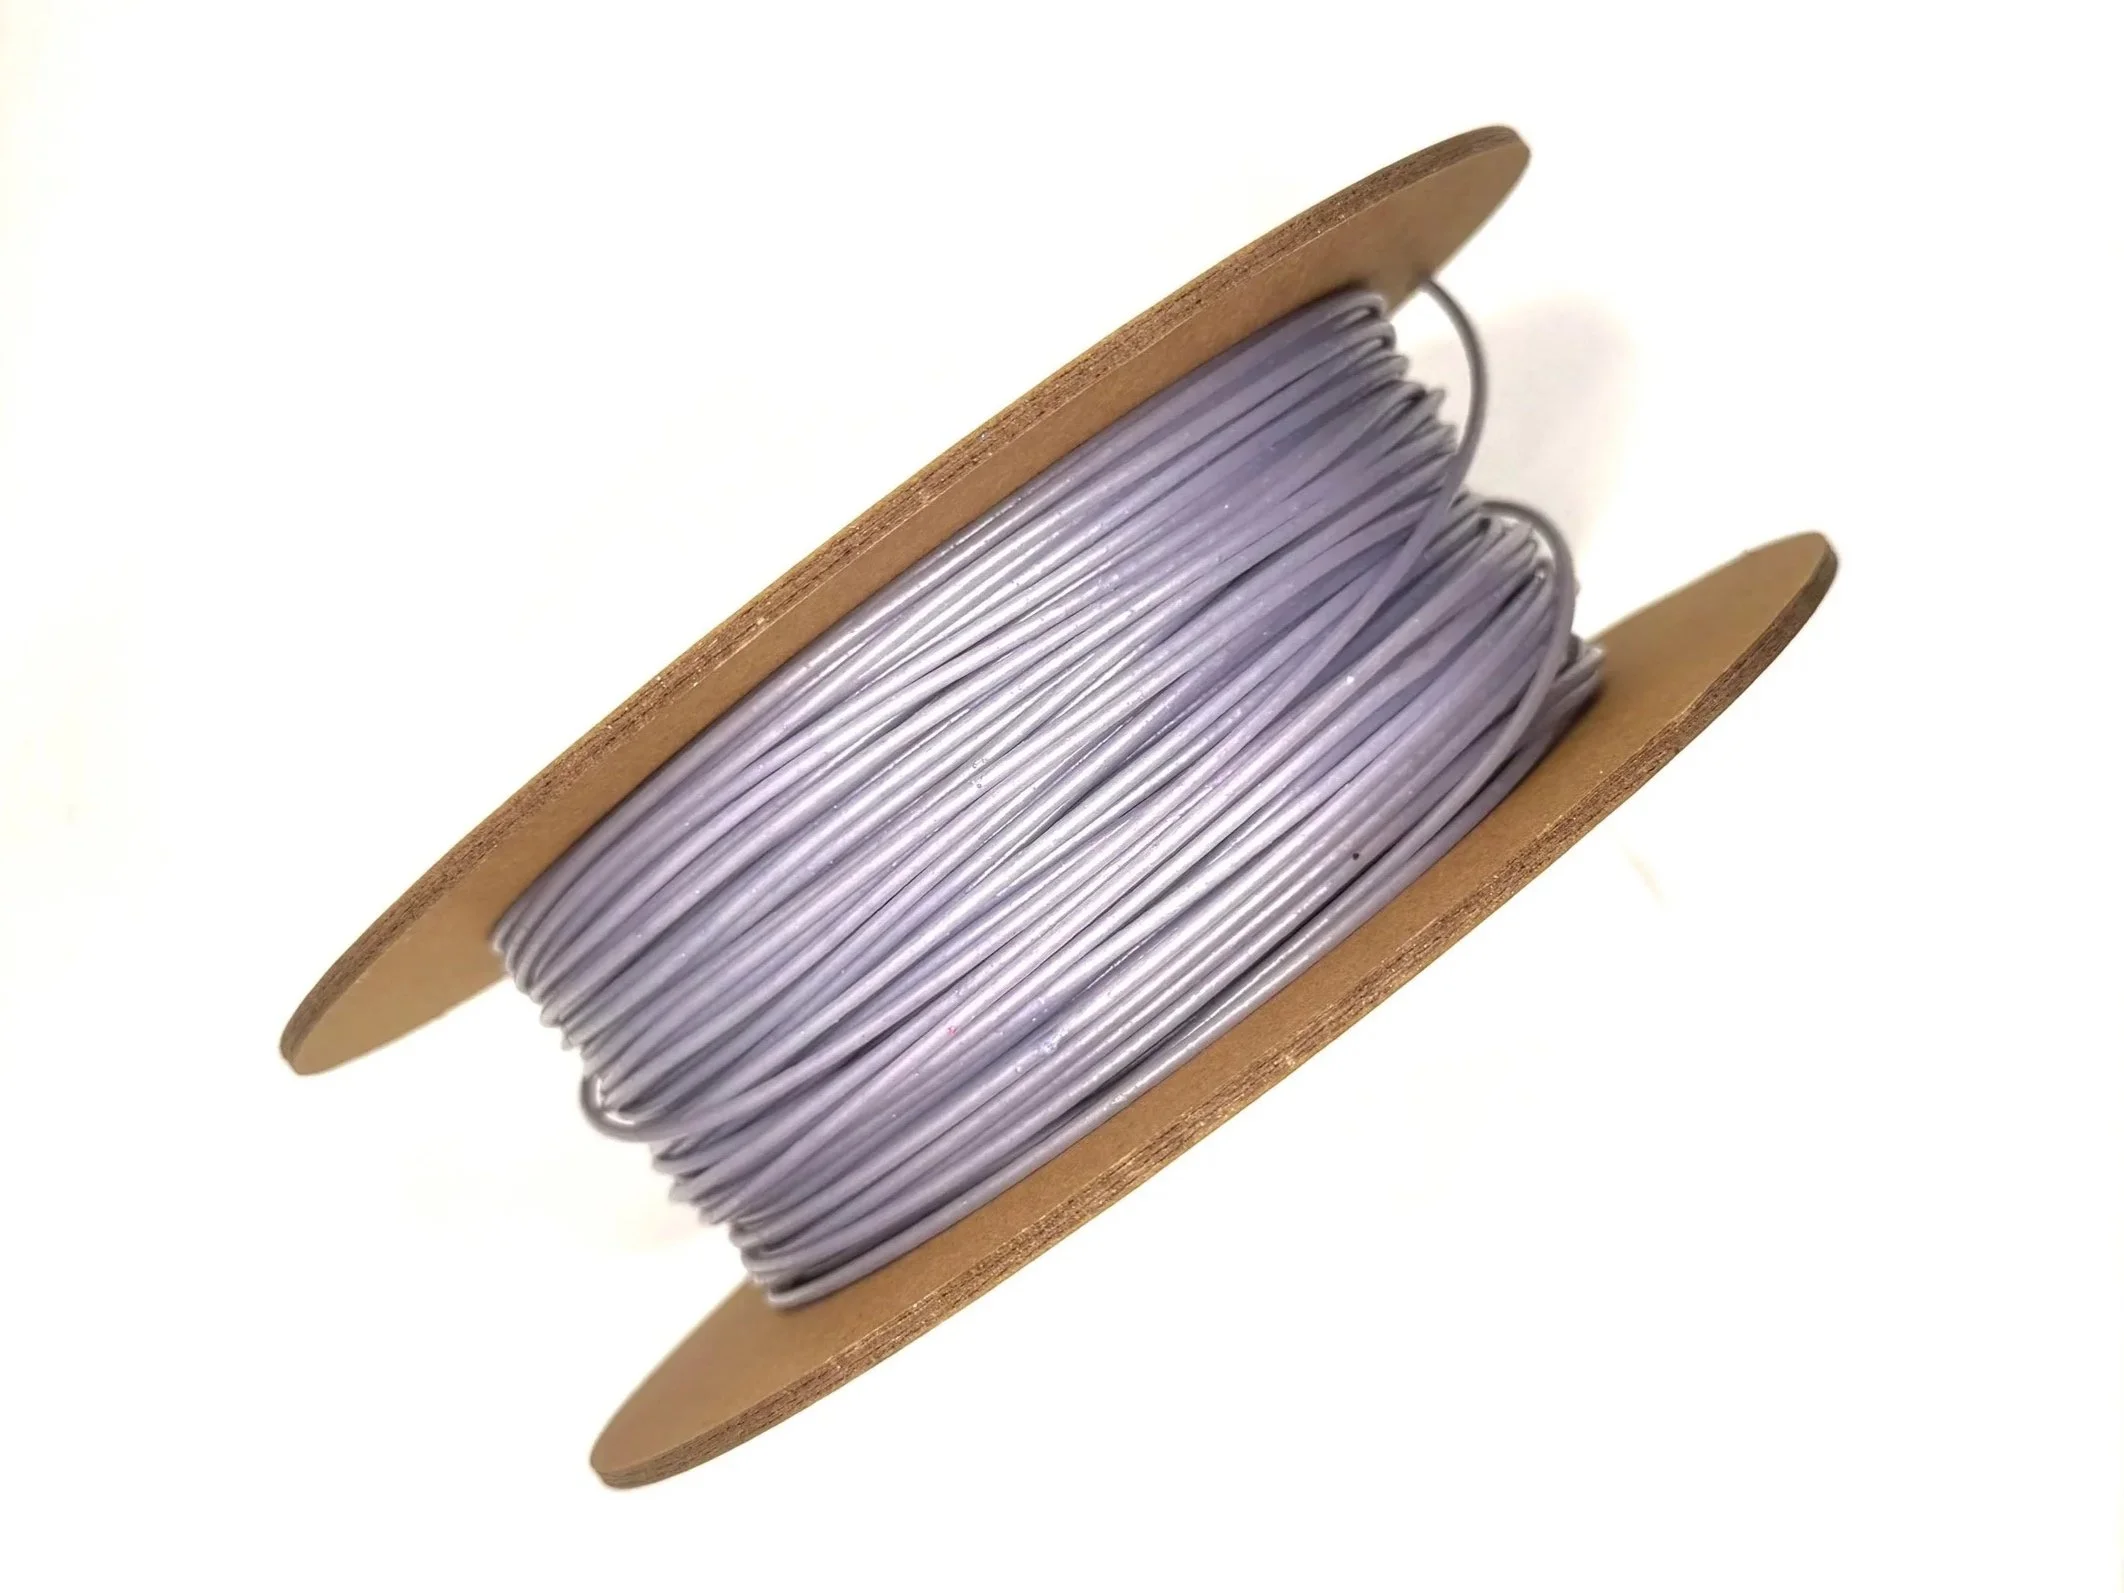
Microwave
-
What if your 3D print could change shape—expand, twist, collapse—without motors, wires, or gears? Just pure microwave energy?
TimeMass Microwave is the first-ever filament that transforms under electromagnetic radiation. No mechanics. Just heat, vapor, and smart geometry doing all the work.
Most thermoplastics ignore microwaves. Ours eats them for breakfast.
It’s made with polar molecular groups that absorb microwave frequencies (yeah, like your food does). Once activated, it heats up from the inside, triggering built-in shape changes—from slow bends to sudden inflations.
How it works:
Microwave activation – UHF radiation excites the polar molecules. Boom: internal heat.
Microfluidic expansion – embedded water vaporizes, causing controlled pressure changes.
Programmable geometry – smart design means you can decide how it transforms.
What can you actually do with this?
Morphing sculptures – kinetic art that moves with invisible waves.
Self-expanding structures – think packaging, architecture, deployable tech.
Soft robotics & smart actuators – no motors needed, just energy.
Interactive displays – things that open, bend, or animate on command.
Space tech – lightweight, compact prints that “deploy” mid-orbit.
Need Ideas? Here You Go:
Transforming sculptures and kinetic art piecesthat change under microwave exposure.
Self-expanding objects, such as soft robotic actuators or deployable structures.
Educational experiments in thermodynamics and microwave interaction physics.
Custom food-safe molds that expand slightly when heated to create precise shaping.
Biomimetic designs, inspired by nature’s shape-shifting structures.
-
Click here to access our new and improved TimeMass GPT Assistant. Just tell it your printer model and the TimeMass filament you're using—it will instantly recommend the exact parameters you need to start printing successfully.
Using a Bambu Lab printer?
Click here to download our updated Bambu Lab profile. All printing parameters are fully optimized and tested—just load the file and start printing.1. Introduction
These parameters are designed to help avoid printing issues; however, temperatures and speed timings can be adjusted based on your specific goals. For example, if you prefer a less rigid result, we recommend using a lower temperature. This section outlines a complete slicing and printing profile for TimeMass, tailored for printers with a 0.8 mm nozzle. If the print is not being successful, please lower the nozzle temperature by 10°C and start over until an optimal print is achieved. Please check the manual for printing parameters.2. Temperature Settings
2.aNozzle Temperature: 230°C — Optimal for flowability while avoiding decomposition (which begins around 250°C).
2.bBed Temperature: 75°C — Ensures strong first-layer adhesion and prevents moisture bubbling.
2.cNozzle Temperature Range: 230–245°C — Timeplast melts around 165°C but prints best at 240°C for precise viscosity control.3. Cooling Settings
3.aNo Cooling for First Layers: 3 layers — Prevents shrinkage due to rapid cooling of moisture-rich filament.
3.bFan Minimum Speed: 0% for the first 100 seconds — Allows heat retention during early layers.
3.cFan Maximum Speed: 15% starting at 8 seconds — Avoids overcooling that can lead to warping.
3.dKeep Fan Always On: OFF — Allows vapor to escape and avoids internal fogging.
3.eSlow Down for Cooling: ON — Improves surface finish with controlled cooling.
3.fForce Cooling for Overhangs: OFF — Overcooling can deform bridges in Timeplast.
3.gFan for Overhangs: 15% — Only for essential cooling in complex areas.
3.hPre-Start Fan Time: 2 seconds — Minimizes pressure differential during the first layer.4. Volumetric Flow
4.aMax Volumetric Speed: 12 mm³/s — Based on a melt flow index of ~15 g/10min, allows high-speed printing.
4.bRamming Speed: 3 mm³/s — Prevents bubbles or popping from pressure spikes.5. Retraction and Flow
5.aRetraction Distance: 0.4 mm — Minimal retraction required for soft filaments to avoid stringing.
5.bRetraction Speed: 15 mm/s — Slow enough to avoid pulling molten plastic.
5.cPressure Advance: 0.05 — Compensates for nozzle lag at high flow rates.
5.dFlow Ratio: 92% — Slight under-extrusion avoids swelling and surface artifacts.6. Precision Settings
6.aGap Closing Radius: 0.1 mm — Tolerant of gaps in thicker walls.
6.bArc Fitting: ON — Reduces G-code size and smooths curve transitions.
6.cElephant Foot Compensation: 0.1 mm — Offsets squishing in the first layer caused by large bead sizes.7. Walls and Shells
7.aWall Loops: 2 — Minimum for strength when using a 0.8 mm nozzle.
7.bDetect Thin Walls: ON — Ensures tight geometries aren’t skipped.
7.cTop/Bottom Shell Layers: 3 — Provides good coverage; increase if watertightness is needed.
7.dTop/Bottom Thickness: 1.2 mm — Equals 1.5x the nozzle size for solid strength.
7.eTop/Bottom Pattern: Monotonic — Distributes tension evenly and improves surface finish.8. Geometry and Movement
8.aWall Order: Inner before Outer — Creates cleaner outer surfaces.
8.bInfill First: OFF — Maintains precise outer dimensions.
8.cSmooth Speed Transition: ON — Prevents ringing caused by abrupt speed changes.
8.dSmooth Coefficient: 80 — Ideal damping for soft materials.
8.eAvoid Crossing Wall: ON — Minimizes stringing across part walls.
8.fMax Detour for Crossing: 10 mm or 5% — Balances time with print cleanliness.9. Layer and Width Settings
9.aLayer Height: 0.3 mm — Optimal for strength and resolution using a 0.8 mm nozzle.
9.bInitial Layer Height: 0.35 mm — Slightly higher to improve adhesion.
9.cLine Widths (all): 0.8 mm — Matches nozzle diameter for consistent extrusion.10. Seam Settings
10.aSeam Position: Aligned or Back — Use aligned for mechanical consistency, back for visual appeal.
10.bSmart Scarf Seam: ON — Automatically adjusts seam location to reduce visual impact.
10.cSeam Angle: 155° — Standard seam angle for clean transitions.
10.dSeam Steps: 10 — Smooths seam path and improves visual finish.11. Infill Settings
11.aWall/Infill Overlap: 10% — Prevents infill from deforming soft exterior walls.
11.bInfill Combination: ON — Consolidates paths for efficiency.
11.cDetect Floating Shells: ON — Ensures unsupported vertical structures are printed reliably.
11.dSparse Infill Density: 20–25% — Balanced rigidity vs. material use.
11.eSparse Pattern: Grid — Stable and efficient for flexible geometries.12. Speed Settings
12.aTravel: 160 mm/s — Fast but safe against backlash.
12.bInitial Layer: 15 mm/s — Prevents nozzle from skimming and ensures bed adhesion.
12.cOuter Wall: 60 mm/s — Controlled speed for surface quality.
12.dInner Wall: 90 mm/s — Slightly faster without compromising control.
12.eSmall Perimeter: 35 mm/s — Reduced speed for detailed geometry.
12.fTop Surface: 40 mm/s — Improves finish on topmost layers.
12.gInfill: 100–120 mm/s — Takes advantage of high flowability.13. Acceleration Settings
13.aNormal Print: 2000 mm/s² — Prevents ringing in soft filaments.
13.bTravel: 4000 mm/s² — Enables fast movement without harsh transitions.
13.cInitial Layer: 300 mm/s² — Gentle movement prevents lifting from the bed.
13.dOuter Wall: 1500 mm/s² — Improves outer surface clarity.
13.eInner Wall: 2000 mm/s² — Balanced for structural components.
13.fTop Surface: 1500 mm/s² — Ensures smooth detailing.14. Adhesion and Brims
14.aSkirt Loops: 2 — Helps prime nozzle and start cleanly.
14.bBrim Width: 6 mm — Helps hold soft materials down.
14.cBrim Gap: 0.15 mm — Allows for easy removal without tearing.15. Prime Tower and Flush Settings
15.aPrime Tower: ON — Purges moisture and early flow inconsistencies.
15.bTower Width: 40 mm — Prevents collapse due to heat.
15.cBrim Width (Tower): 4 mm — Adds stability to the purge base.
15.dFlush Into Support: ON — Discards unwanted early flow safely.16. G-Code Start Script
M900 K0.05 ; Pressure Advance M106 S0 ; Fan off G92 E0 G1 E15 F300 ; purge line G92 E0
17. Additional Notes
17.aDry filament at 155 F for 2 hours before use.
17.bStore with desiccant.
17.cKeep extruder door open to allow vapor to escape.
17.dAvoid long dwell times at high temperatures.If you need any other assistance, feel free to reach out to us anytime at timeplast@timeplast.com — we’ll be happy to help.
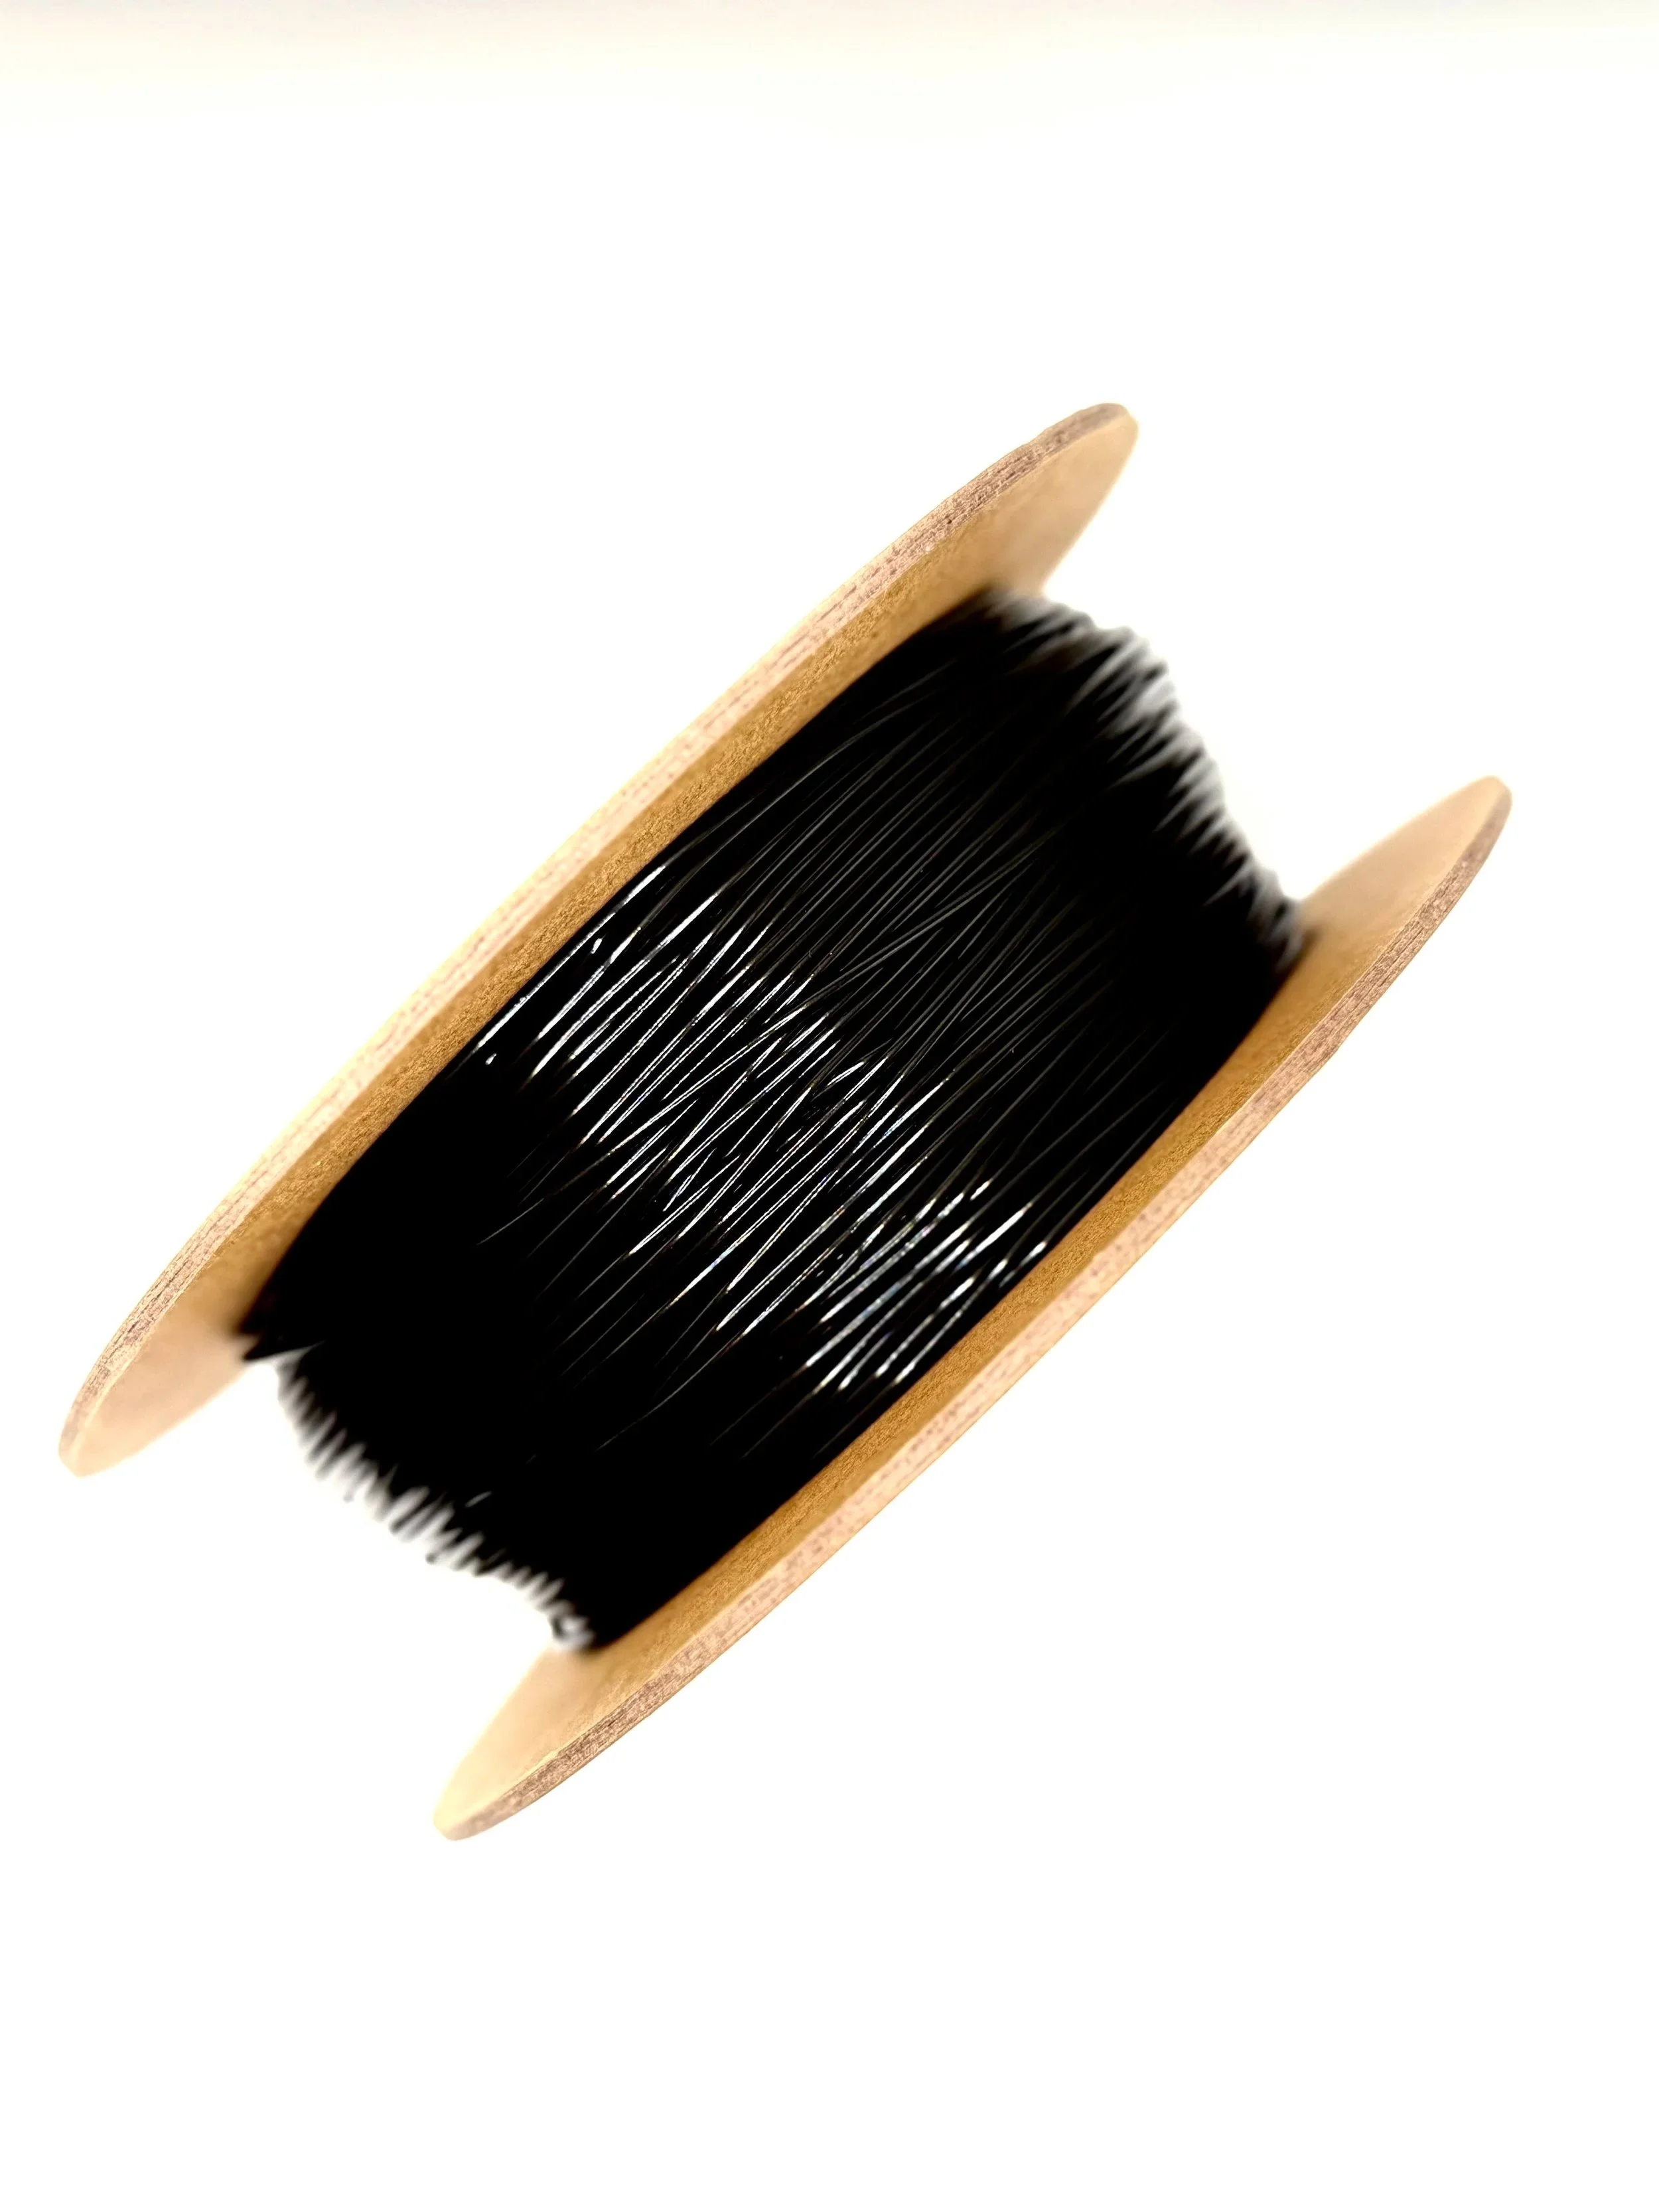
Carbon Nanotube
-
What if your 3D print could change shape—expand, twist, collapse—without motors, wires, or gears? Just pure microwave energy?
TimeMass Microwave is the first-ever filament that transforms under electromagnetic radiation. No mechanics. Just heat, vapor, and smart geometry doing all the work.
Most thermoplastics ignore microwaves. Ours eats them for breakfast.
It’s made with polar molecular groups that absorb microwave frequencies (yeah, like your food does). Once activated, it heats up from the inside, triggering built-in shape changes—from slow bends to sudden inflations.
How it works:
Microwave activation – UHF radiation excites the polar molecules. Boom: internal heat.
Microfluidic expansion – embedded water vaporizes, causing controlled pressure changes.
Programmable geometry – smart design means you can decide how it transforms.
What can you actually do with this?
Morphing sculptures – kinetic art that moves with invisible waves.
Self-expanding structures – think packaging, architecture, deployable tech.
Soft robotics & smart actuators – no motors needed, just energy.
Interactive displays – things that open, bend, or animate on command.
Space tech – lightweight, compact prints that “deploy” mid-orbit.
Need Ideas? Here You Go:
Transforming sculptures and kinetic art piecesthat change under microwave exposure.
Self-expanding objects, such as soft robotic actuators or deployable structures.
Educational experiments in thermodynamics and microwave interaction physics.
Custom food-safe molds that expand slightly when heated to create precise shaping.
Biomimetic designs, inspired by nature’s shape-shifting structures.
-
Click here to access our new and improved TimeMass GPT Assistant. Just tell it your printer model and the TimeMass filament you're using—it will instantly recommend the exact parameters you need to start printing successfully.
Using a Bambu Lab printer?
Click here to download our updated Bambu Lab profile. All printing parameters are fully optimized and tested—just load the file and start printing.1. Introduction
These parameters are designed to help avoid printing issues; however, temperatures and speed timings can be adjusted based on your specific goals. For example, if you prefer a less rigid result, we recommend using a lower temperature. This section outlines a complete slicing and printing profile for TimeMass, tailored for printers with a 0.8 mm nozzle. If the print is not being successful, please lower the nozzle temperature by 10°C and start over until an optimal print is achieved. Please check the manual for printing parameters.2. Temperature Settings
2.aNozzle Temperature: 230°C — Optimal for flowability while avoiding decomposition (which begins around 250°C).
2.bBed Temperature: 75°C — Ensures strong first-layer adhesion and prevents moisture bubbling.
2.cNozzle Temperature Range: 230–245°C — Timeplast melts around 165°C but prints best at 240°C for precise viscosity control.3. Cooling Settings
3.aNo Cooling for First Layers: 3 layers — Prevents shrinkage due to rapid cooling of moisture-rich filament.
3.bFan Minimum Speed: 0% for the first 100 seconds — Allows heat retention during early layers.
3.cFan Maximum Speed: 15% starting at 8 seconds — Avoids overcooling that can lead to warping.
3.dKeep Fan Always On: OFF — Allows vapor to escape and avoids internal fogging.
3.eSlow Down for Cooling: ON — Improves surface finish with controlled cooling.
3.fForce Cooling for Overhangs: OFF — Overcooling can deform bridges in Timeplast.
3.gFan for Overhangs: 15% — Only for essential cooling in complex areas.
3.hPre-Start Fan Time: 2 seconds — Minimizes pressure differential during the first layer.4. Volumetric Flow
4.aMax Volumetric Speed: 12 mm³/s — Based on a melt flow index of ~15 g/10min, allows high-speed printing.
4.bRamming Speed: 3 mm³/s — Prevents bubbles or popping from pressure spikes.5. Retraction and Flow
5.aRetraction Distance: 0.4 mm — Minimal retraction required for soft filaments to avoid stringing.
5.bRetraction Speed: 15 mm/s — Slow enough to avoid pulling molten plastic.
5.cPressure Advance: 0.05 — Compensates for nozzle lag at high flow rates.
5.dFlow Ratio: 92% — Slight under-extrusion avoids swelling and surface artifacts.6. Precision Settings
6.aGap Closing Radius: 0.1 mm — Tolerant of gaps in thicker walls.
6.bArc Fitting: ON — Reduces G-code size and smooths curve transitions.
6.cElephant Foot Compensation: 0.1 mm — Offsets squishing in the first layer caused by large bead sizes.7. Walls and Shells
7.aWall Loops: 2 — Minimum for strength when using a 0.8 mm nozzle.
7.bDetect Thin Walls: ON — Ensures tight geometries aren’t skipped.
7.cTop/Bottom Shell Layers: 3 — Provides good coverage; increase if watertightness is needed.
7.dTop/Bottom Thickness: 1.2 mm — Equals 1.5x the nozzle size for solid strength.
7.eTop/Bottom Pattern: Monotonic — Distributes tension evenly and improves surface finish.8. Geometry and Movement
8.aWall Order: Inner before Outer — Creates cleaner outer surfaces.
8.bInfill First: OFF — Maintains precise outer dimensions.
8.cSmooth Speed Transition: ON — Prevents ringing caused by abrupt speed changes.
8.dSmooth Coefficient: 80 — Ideal damping for soft materials.
8.eAvoid Crossing Wall: ON — Minimizes stringing across part walls.
8.fMax Detour for Crossing: 10 mm or 5% — Balances time with print cleanliness.9. Layer and Width Settings
9.aLayer Height: 0.3 mm — Optimal for strength and resolution using a 0.8 mm nozzle.
9.bInitial Layer Height: 0.35 mm — Slightly higher to improve adhesion.
9.cLine Widths (all): 0.8 mm — Matches nozzle diameter for consistent extrusion.10. Seam Settings
10.aSeam Position: Aligned or Back — Use aligned for mechanical consistency, back for visual appeal.
10.bSmart Scarf Seam: ON — Automatically adjusts seam location to reduce visual impact.
10.cSeam Angle: 155° — Standard seam angle for clean transitions.
10.dSeam Steps: 10 — Smooths seam path and improves visual finish.11. Infill Settings
11.aWall/Infill Overlap: 10% — Prevents infill from deforming soft exterior walls.
11.bInfill Combination: ON — Consolidates paths for efficiency.
11.cDetect Floating Shells: ON — Ensures unsupported vertical structures are printed reliably.
11.dSparse Infill Density: 20–25% — Balanced rigidity vs. material use.
11.eSparse Pattern: Grid — Stable and efficient for flexible geometries.12. Speed Settings
12.aTravel: 160 mm/s — Fast but safe against backlash.
12.bInitial Layer: 15 mm/s — Prevents nozzle from skimming and ensures bed adhesion.
12.cOuter Wall: 60 mm/s — Controlled speed for surface quality.
12.dInner Wall: 90 mm/s — Slightly faster without compromising control.
12.eSmall Perimeter: 35 mm/s — Reduced speed for detailed geometry.
12.fTop Surface: 40 mm/s — Improves finish on topmost layers.
12.gInfill: 100–120 mm/s — Takes advantage of high flowability.13. Acceleration Settings
13.aNormal Print: 2000 mm/s² — Prevents ringing in soft filaments.
13.bTravel: 4000 mm/s² — Enables fast movement without harsh transitions.
13.cInitial Layer: 300 mm/s² — Gentle movement prevents lifting from the bed.
13.dOuter Wall: 1500 mm/s² — Improves outer surface clarity.
13.eInner Wall: 2000 mm/s² — Balanced for structural components.
13.fTop Surface: 1500 mm/s² — Ensures smooth detailing.14. Adhesion and Brims
14.aSkirt Loops: 2 — Helps prime nozzle and start cleanly.
14.bBrim Width: 6 mm — Helps hold soft materials down.
14.cBrim Gap: 0.15 mm — Allows for easy removal without tearing.15. Prime Tower and Flush Settings
15.aPrime Tower: ON — Purges moisture and early flow inconsistencies.
15.bTower Width: 40 mm — Prevents collapse due to heat.
15.cBrim Width (Tower): 4 mm — Adds stability to the purge base.
15.dFlush Into Support: ON — Discards unwanted early flow safely.16. G-Code Start Script
M900 K0.05 ; Pressure Advance M106 S0 ; Fan off G92 E0 G1 E15 F300 ; purge line G92 E0
17. Additional Notes
17.aDry filament at 155 F for 2 hours before use.
17.bStore with desiccant.
17.cKeep extruder door open to allow vapor to escape.
17.dAvoid long dwell times at high temperatures.If you need any other assistance, feel free to reach out to us anytime at timeplast@timeplast.com — we’ll be happy to help.
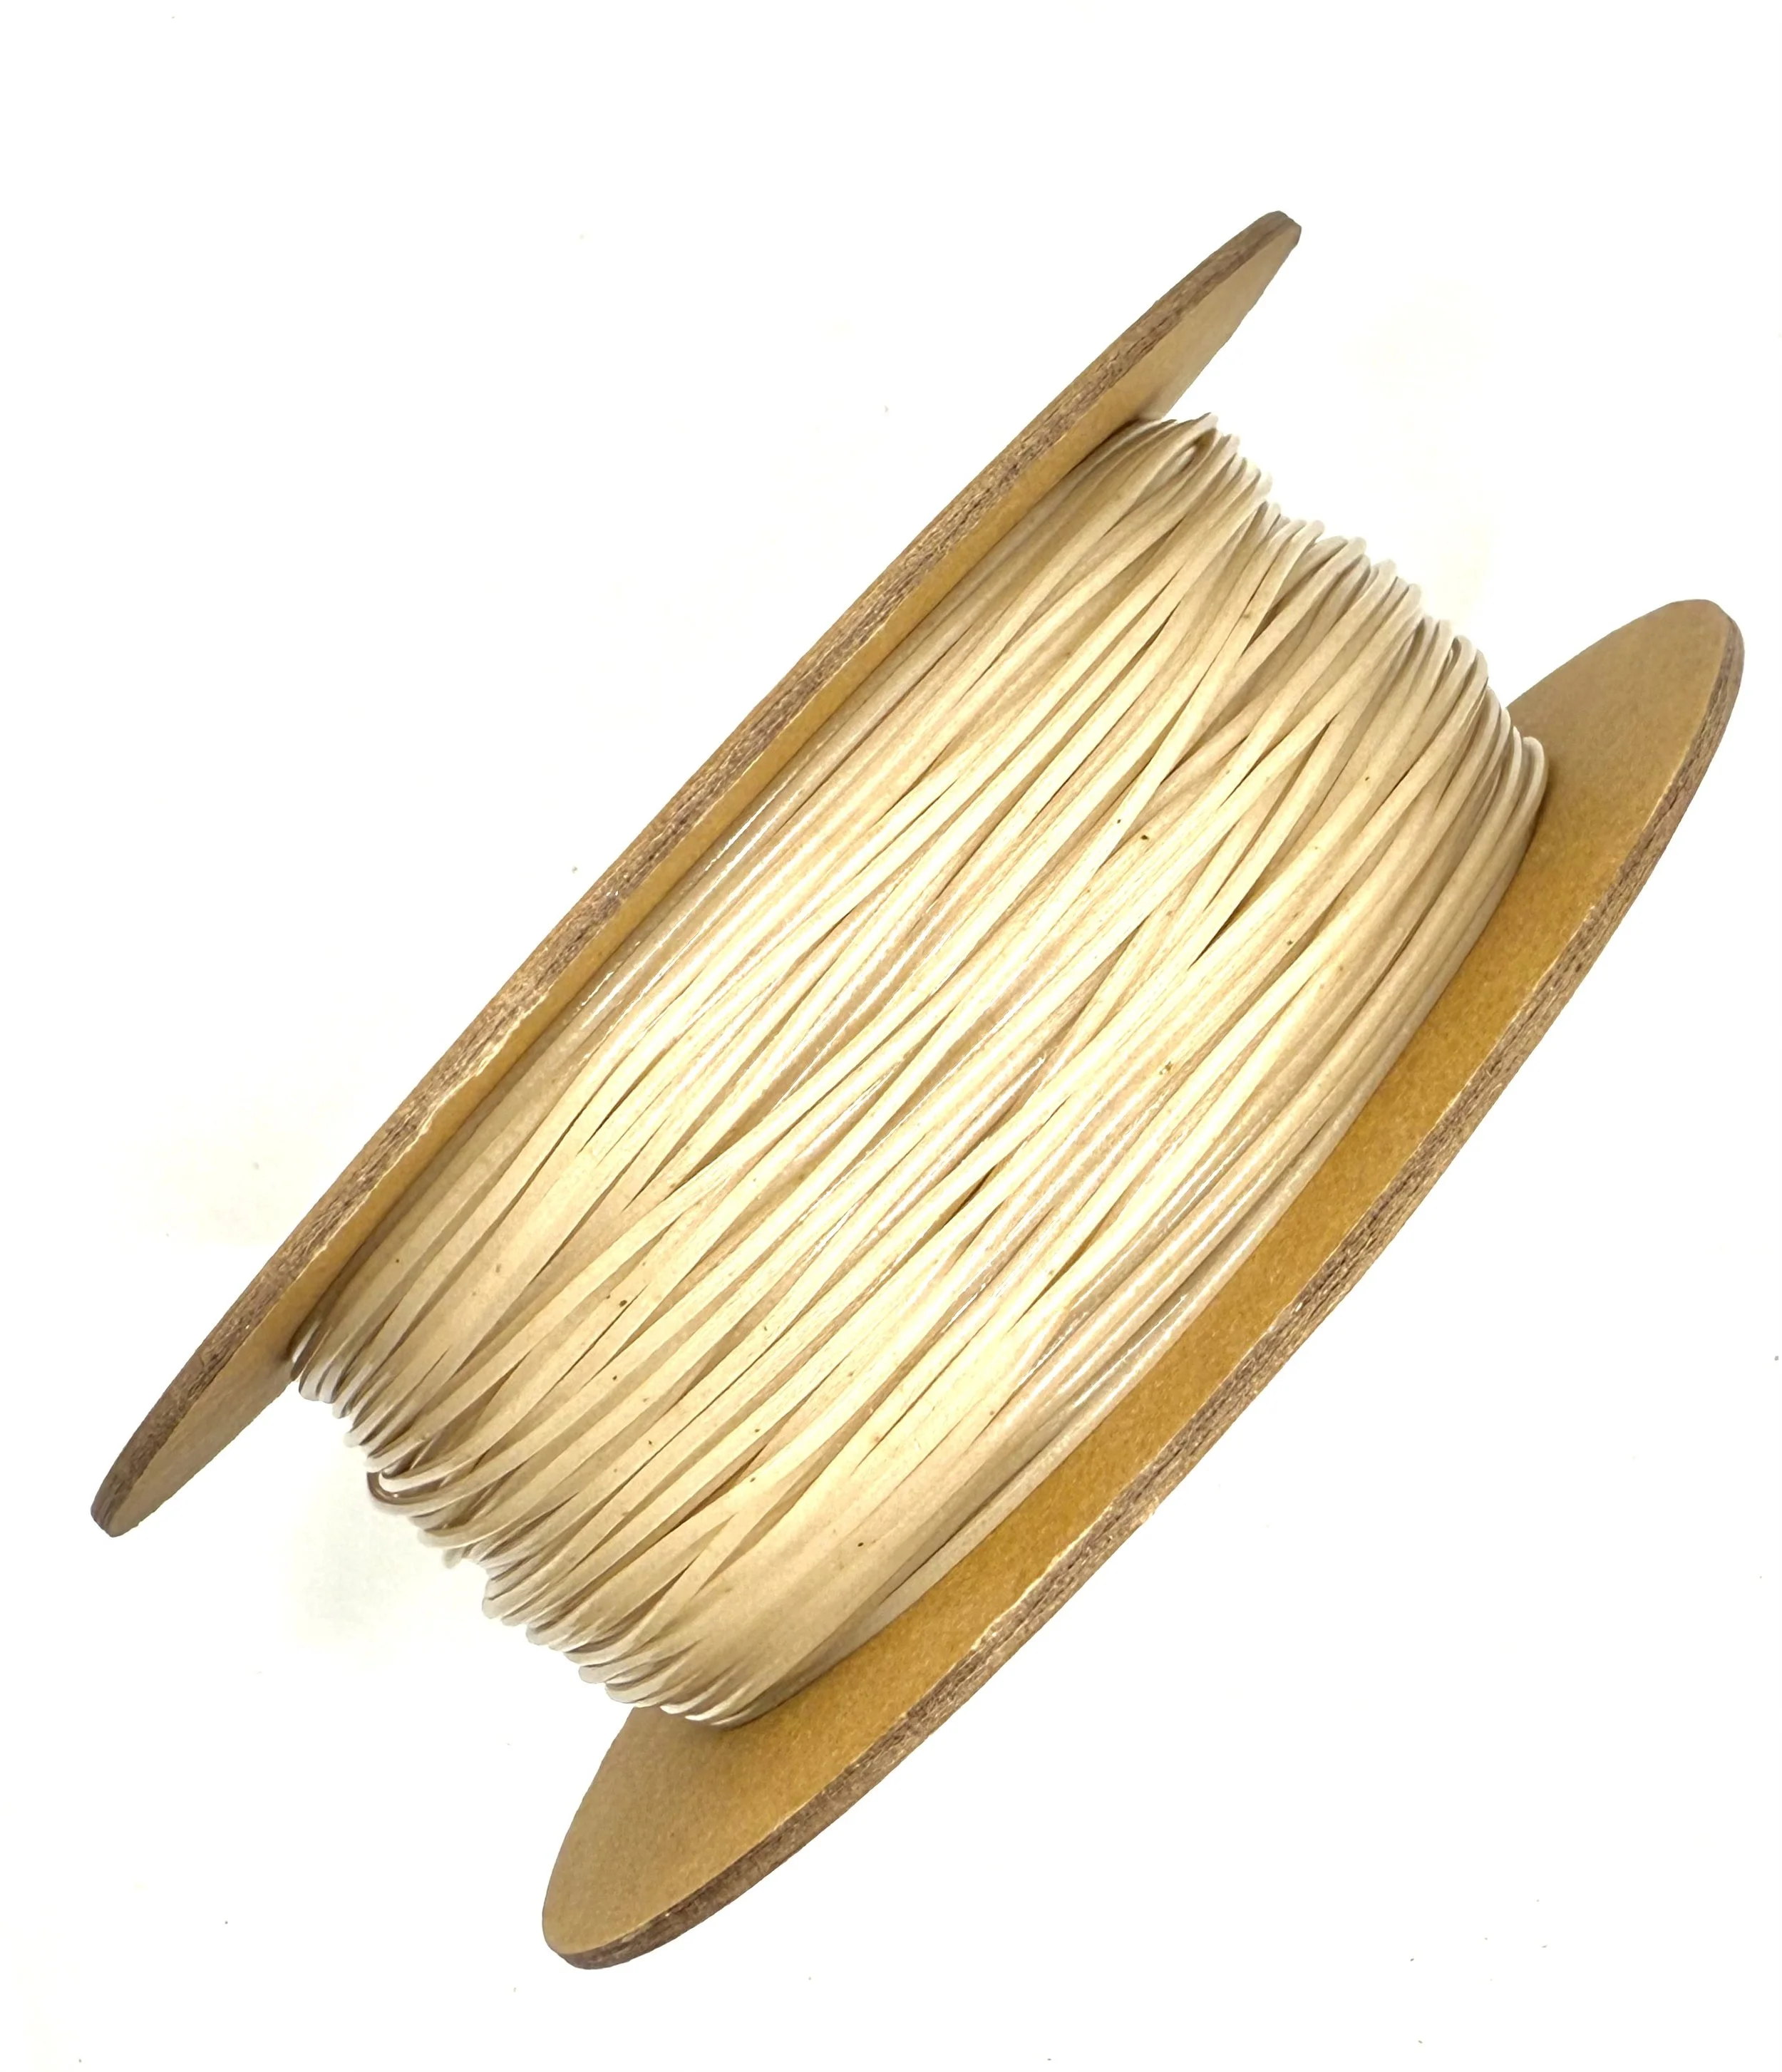
Urn
-
The passing of a loved one is a moment of profound loss, but also an opportunity to honor their life in a way that is as unique as they were.
TimeMass - Urn is a thoughtfully crafted 4D-filament, designed to provide a respectful, beautiful, and meaningful way to create a custom urn for someone dear.
Imagine a farewell that merges remembrance with renewal—an urn that floats gently upon the water, carrying the ashes of a loved one under the night sky. As it dissolves, it leaves behind something greater: Lotus seeds, symbolizing rebirth and enlightenment across many cultures, and Kelp spores, fostering new marine life in the waters that embrace them.
Crafted from planet-neutral, water-soluble materials, TimeMass - Urn is infused with:
Lotus Seeds (Nelumbo nucifera) – representing purity, spiritual awakening, and the cycle of life.
Kelp Spores (Macrocystis pyrifera) – nourishing marine environments, sustaining underwater ecosystems.
Crushed Coral (Calcium Carbonate) – aiding reef regeneration and symbolizing eternal connection to the ocean.If combined with TimeMass Fire, Light, or Glow, you can create a one-of-a-kind urn that glows softly in the twilight, offering a final radiant tribute before gracefully dissolving into the water.
As TimeMass - Urn gently breaks down, it disperses its embedded elements to support aquatic ecosystems—a final act of giving, turning loss into renewal, and remembrance into life.
For those seeking a farewell as beautiful as the life it honors, TimeMass - Urn offers a serene, unforgettable goodbye—one that echoes in the waters and hearts forever.
Need Ideas? Here You Go:
Floating urns for ceremonies, allowing ashes to be released into natural waters.
Commemorative sculptures that gradually dissolve over time, leaving no waste.
Aquatic life-support structures, such as artificial reef foundations or eco-art projects.
Eco-conscious time capsules that release elements into the water when needed.
-
Click here to access our new and improved TimeMass GPT Assistant. Just tell it your printer model and the TimeMass filament you're using—it will instantly recommend the exact parameters you need to start printing successfully.
Using a Bambu Lab printer?
Click here to download our updated Bambu Lab profile. All printing parameters are fully optimized and tested—just load the file and start printing.1. Introduction
These parameters are designed to help avoid printing issues; however, temperatures and speed timings can be adjusted based on your specific goals. For example, if you prefer a less rigid result, we recommend using a lower temperature. This section outlines a complete slicing and printing profile for TimeMass, tailored for printers with a 0.8 mm nozzle. If the print is not being successful, please lower the nozzle temperature by 10°C and start over until an optimal print is achieved. Please check the manual for printing parameters.2. Temperature Settings
2.aNozzle Temperature: 230°C — Optimal for flowability while avoiding decomposition (which begins around 250°C).
2.bBed Temperature: 75°C — Ensures strong first-layer adhesion and prevents moisture bubbling.
2.cNozzle Temperature Range: 230–245°C — Timeplast melts around 165°C but prints best at 240°C for precise viscosity control.3. Cooling Settings
3.aNo Cooling for First Layers: 3 layers — Prevents shrinkage due to rapid cooling of moisture-rich filament.
3.bFan Minimum Speed: 0% for the first 100 seconds — Allows heat retention during early layers.
3.cFan Maximum Speed: 15% starting at 8 seconds — Avoids overcooling that can lead to warping.
3.dKeep Fan Always On: OFF — Allows vapor to escape and avoids internal fogging.
3.eSlow Down for Cooling: ON — Improves surface finish with controlled cooling.
3.fForce Cooling for Overhangs: OFF — Overcooling can deform bridges in Timeplast.
3.gFan for Overhangs: 15% — Only for essential cooling in complex areas.
3.hPre-Start Fan Time: 2 seconds — Minimizes pressure differential during the first layer.4. Volumetric Flow
4.aMax Volumetric Speed: 12 mm³/s — Based on a melt flow index of ~15 g/10min, allows high-speed printing.
4.bRamming Speed: 3 mm³/s — Prevents bubbles or popping from pressure spikes.5. Retraction and Flow
5.aRetraction Distance: 0.4 mm — Minimal retraction required for soft filaments to avoid stringing.
5.bRetraction Speed: 15 mm/s — Slow enough to avoid pulling molten plastic.
5.cPressure Advance: 0.05 — Compensates for nozzle lag at high flow rates.
5.dFlow Ratio: 92% — Slight under-extrusion avoids swelling and surface artifacts.6. Precision Settings
6.aGap Closing Radius: 0.1 mm — Tolerant of gaps in thicker walls.
6.bArc Fitting: ON — Reduces G-code size and smooths curve transitions.
6.cElephant Foot Compensation: 0.1 mm — Offsets squishing in the first layer caused by large bead sizes.7. Walls and Shells
7.aWall Loops: 2 — Minimum for strength when using a 0.8 mm nozzle.
7.bDetect Thin Walls: ON — Ensures tight geometries aren’t skipped.
7.cTop/Bottom Shell Layers: 3 — Provides good coverage; increase if watertightness is needed.
7.dTop/Bottom Thickness: 1.2 mm — Equals 1.5x the nozzle size for solid strength.
7.eTop/Bottom Pattern: Monotonic — Distributes tension evenly and improves surface finish.8. Geometry and Movement
8.aWall Order: Inner before Outer — Creates cleaner outer surfaces.
8.bInfill First: OFF — Maintains precise outer dimensions.
8.cSmooth Speed Transition: ON — Prevents ringing caused by abrupt speed changes.
8.dSmooth Coefficient: 80 — Ideal damping for soft materials.
8.eAvoid Crossing Wall: ON — Minimizes stringing across part walls.
8.fMax Detour for Crossing: 10 mm or 5% — Balances time with print cleanliness.9. Layer and Width Settings
9.aLayer Height: 0.3 mm — Optimal for strength and resolution using a 0.8 mm nozzle.
9.bInitial Layer Height: 0.35 mm — Slightly higher to improve adhesion.
9.cLine Widths (all): 0.8 mm — Matches nozzle diameter for consistent extrusion.10. Seam Settings
10.aSeam Position: Aligned or Back — Use aligned for mechanical consistency, back for visual appeal.
10.bSmart Scarf Seam: ON — Automatically adjusts seam location to reduce visual impact.
10.cSeam Angle: 155° — Standard seam angle for clean transitions.
10.dSeam Steps: 10 — Smooths seam path and improves visual finish.11. Infill Settings
11.aWall/Infill Overlap: 10% — Prevents infill from deforming soft exterior walls.
11.bInfill Combination: ON — Consolidates paths for efficiency.
11.cDetect Floating Shells: ON — Ensures unsupported vertical structures are printed reliably.
11.dSparse Infill Density: 20–25% — Balanced rigidity vs. material use.
11.eSparse Pattern: Grid — Stable and efficient for flexible geometries.12. Speed Settings
12.aTravel: 160 mm/s — Fast but safe against backlash.
12.bInitial Layer: 15 mm/s — Prevents nozzle from skimming and ensures bed adhesion.
12.cOuter Wall: 60 mm/s — Controlled speed for surface quality.
12.dInner Wall: 90 mm/s — Slightly faster without compromising control.
12.eSmall Perimeter: 35 mm/s — Reduced speed for detailed geometry.
12.fTop Surface: 40 mm/s — Improves finish on topmost layers.
12.gInfill: 100–120 mm/s — Takes advantage of high flowability.13. Acceleration Settings
13.aNormal Print: 2000 mm/s² — Prevents ringing in soft filaments.
13.bTravel: 4000 mm/s² — Enables fast movement without harsh transitions.
13.cInitial Layer: 300 mm/s² — Gentle movement prevents lifting from the bed.
13.dOuter Wall: 1500 mm/s² — Improves outer surface clarity.
13.eInner Wall: 2000 mm/s² — Balanced for structural components.
13.fTop Surface: 1500 mm/s² — Ensures smooth detailing.14. Adhesion and Brims
14.aSkirt Loops: 2 — Helps prime nozzle and start cleanly.
14.bBrim Width: 6 mm — Helps hold soft materials down.
14.cBrim Gap: 0.15 mm — Allows for easy removal without tearing.15. Prime Tower and Flush Settings
15.aPrime Tower: ON — Purges moisture and early flow inconsistencies.
15.bTower Width: 40 mm — Prevents collapse due to heat.
15.cBrim Width (Tower): 4 mm — Adds stability to the purge base.
15.dFlush Into Support: ON — Discards unwanted early flow safely.16. G-Code Start Script
M900 K0.05 ; Pressure Advance M106 S0 ; Fan off G92 E0 G1 E15 F300 ; purge line G92 E0
17. Additional Notes
17.aDry filament at 155 F for 2 hours before use.
17.bStore with desiccant.
17.cKeep extruder door open to allow vapor to escape.
17.dAvoid long dwell times at high temperatures.If you need any other assistance, feel free to reach out to us anytime at timeplast@timeplast.com — we’ll be happy to help.
Photovoltaic

-
This cutting-edge 3D printing filament is the result of a collaboration between Timeplast and String Cubed Inc. to create a material that not only can be 3D-printed but also converts light into electricity. Dubbed TimeMass Photovoltaic, it represents a fusion of Timeplast’s expertise in water-soluble polymers and String Cubed’s innovative approach to functional nanomaterials.
Like other TimeMass products, the filament’s base matrix is largely water and a proprietary polymerized alcohol formula (approximately 70% water content), meaning printed objects will dissolve when exposed to water.
What sets this filament apart is the infusion of advanced additives that give it photovoltaic (solar cell-like) properties while maintaining full water solubility of the plastic matrix.
Below we detail the formulation’s key components and the important safety procedures customers should follow when using TimeMass Photovoltaic filament, especially considering its water-dissolvable nature and the potentially toxic additives released upon dissolution.
Next-Generation Photovoltaic Formulation
The TimeMass Photovoltaic filament’s functionality comes from a three-part system embedded in the dissolvable Timeplast polymer matrix. This formulation uses zinc oxide nanoparticles, Nitrogen doped carbon nanotubes, and ultra-fine graphite powder for crucial conductivity.
Each component plays a unique role in enabling a photovoltaic response:
Zinc Oxide Nanoparticles (ZnO): In place of TiO₂, the filament now incorporates high-purity ZnO nanoparticles (semiconductor grade). ZnO is an n-type semiconductor with a wide band gap (~3.37 eV), similar to TiO₂, which means it strongly absorbs ultraviolet light and can generate charge carriers under illumination. ZnO is widely used in electronics and solar cells as a UV-sensitive semiconductor. By dispersing nano-scale ZnO throughout the filament, the material can harness UV light from sunlight or other sources to excite electrons. These excited electrons are the basis of the photovoltaic effect in the filament – ZnO essentially acts as the light-absorbing, electricity-generating medium. The ZnO particles in TimeMass Photovoltaic are uniformly distributed in the polymer, maximizing light exposure and electron generation across the printed object.
Specialized Carbon Nanotubes: A specific formulation of carbon nanotubes (CNTs) These are extremely thin conductive fibers (on the order of tens of nanometers in diameter, with lengths of several microns). For this filament we are using multi-walled carbon nanotubes (MWCNTs) with high purity. Their role is to form conductive pathways and enhance charge separation. Carbon nanotubes have exceptional electrical conductivity and a very high aspect ratio, meaning they can connect the microscopic domains of ZnO within the filament like wiring. In fact, studies show that adding CNTs to ZnO composites greatly increases the electrical conductivity and improves charge transport. In our filament, the specific CNT formulation creates a nano-network that collects the electrons excited by ZnO and shuttles them through the material to produce an electric current. Additionally, the nanotubes broaden the light response of the filament – CNTs are black-colored and absorb a broad spectrum of light (visible and IR), complementing ZnO’s UV absorption. This synergy means a printed object can generate a photocurrent under sunlight more efficiently, as the CNTs help harvest and transport charges that ZnO produces under UV illumination.
Graphite Powder: The third component is ultra-fine graphite powder (3000-mesh, with particle size on the order of ~5–40 microns) Graphite is a conductive form of carbon, and in this formulation it serves multiple purposes. First, it provides a conductive matrix that connects the entire structure electrically – essentially forming a web of microscopic carbon that electrons can flow through easily. The 3000-mesh graphite, being extremely fine, disperses thoroughly and ensures that even if the nanotubes are somewhat sparse, the graphite particles fill any gaps to maintain conductivity. Second, graphite adds bulk electrical conductivity and structural stability to the filament. It helps in collecting charge from the nanotubes and ZnO and funneling it through the printed object to whatever electrodes or contacts are used to tap the power. In summary, graphite works as the “electrode” material distributed within the filament, giving the composite enough conductivity for a measurable photovoltaic response. (Graphite is also chemically stable and not photoactive, so it remains inert while providing electrical pathways.)
Water-Soluble Polymer Matrix: All the above additives are embedded in Timeplast’s proprietary TimeMass polymer matrix, which is a polymerized alcohol-based material that is water-soluble. This matrix holds the ZnO, CNTs, and graphite together in a flexible filament form that can be fed into standard FDM/FFF 3D printers. Once printed and dried, the object is solid and the additives are locked in place. However, when the printed object is later exposed to water, the polymer will dissolve, releasing the embedded ZnO nanoparticles, nanotubes, and graphite powder into the water. The water-soluble binder is designed to dissolve completely without leaving any persistent plastic residue – TimeMass materials dissolve at the molecular level, leaving no microplastic fragments behind. This is a key environmental feature: unlike conventional plastics, the base material won’t linger as pollution. (Only the inorganic additives would remain as a sediment, which we address in the safety section.)
How It Works – Photovoltaic Effect: When you shine a light (especially sunlight or UV-rich light) on a print made with TimeMass Photovoltaic filament, the ZnO nanoparticles absorb UV photons and get excited, generating electron-hole pairs (much like the semiconductor layer of a solar cell). The carbon nanotubes and graphite then immediately do their job by conducting these electrons through the material. If electrodes or wires are connected to the printed object (for example, at different points of a print), a small photocurrent can be measured – essentially the print becomes a tiny solar panel. While the power output is modest (as one would expect given the small particle size and experimental nature of the material), it is enough to demonstrate a photovoltaic response. This breakthrough opens up imaginative possibilities: you could 3D-print devices or surfaces that generate electricity under light, all with a filament that later can dissolve away when its purpose is done. The collaboration between Timeplast and String Cubed Inc. has optimized the ratios of ZnO, CNTs, and graphite to maximize this effect.
Moreover, the filament benefits from ZnO’s comparable band-gap and photoactivity while leveraging possibly different charge dynamics or availability. (ZnO often has a higher electron mobility and similar exciton energy to TiO₂, and it can be produced in nano form easily)
Overall, the tri-component system – ZnO for light absorption, CNT/graphite for conduction – works in concert to yield a functional photovoltaic material in a standard FDM filament format.
-
Click here to access our new and improved TimeMass GPT Assistant. Just tell it your printer model and the TimeMass filament you're using—it will instantly recommend the exact parameters you need to start printing successfully.
Using a Bambu Lab printer?
Click here to download our updated Bambu Lab profile. All printing parameters are fully optimized and tested—just load the file and start printing.1. Introduction
These parameters are designed to help avoid printing issues; however, temperatures and speed timings can be adjusted based on your specific goals. For example, if you prefer a less rigid result, we recommend using a lower temperature. This section outlines a complete slicing and printing profile for TimeMass Photovoltaic, tailored for printers with a 0.8 mm nozzle. If the print is not being successful, please lower the nozzle temperature by 10°C and start over until an optimal print is achieved. Please check the manual for printing parameters.2. Temperature Settings
2.aNozzle Temperature: 230°C — Optimal for flowability while avoiding decomposition (which begins around 250°C).
2.bBed Temperature: 75°C — Ensures strong first-layer adhesion and prevents moisture bubbling.
2.cNozzle Temperature Range: 230–245°C — Timeplast melts around 165°C but prints best at 240°C for precise viscosity control.3. Cooling Settings
3.aNo Cooling for First Layers: 3 layers — Prevents shrinkage due to rapid cooling of moisture-rich filament.
3.bFan Minimum Speed: 0% for the first 100 seconds — Allows heat retention during early layers.
3.cFan Maximum Speed: 15% starting at 8 seconds — Avoids overcooling that can lead to warping.
3.dKeep Fan Always On: OFF — Allows vapor to escape and avoids internal fogging.
3.eSlow Down for Cooling: ON — Improves surface finish with controlled cooling.
3.fForce Cooling for Overhangs: OFF — Overcooling can deform bridges in Timeplast.
3.gFan for Overhangs: 15% — Only for essential cooling in complex areas.
3.hPre-Start Fan Time: 2 seconds — Minimizes pressure differential during the first layer.4. Volumetric Flow
4.aMax Volumetric Speed: 12 mm³/s — Based on a melt flow index of ~15 g/10min, allows high-speed printing.
4.bRamming Speed: 3 mm³/s — Prevents bubbles or popping from pressure spikes.5. Retraction and Flow
5.aRetraction Distance: 0.4 mm — Minimal retraction required for soft filaments to avoid stringing.
5.bRetraction Speed: 15 mm/s — Slow enough to avoid pulling molten plastic.
5.cPressure Advance: 0.05 — Compensates for nozzle lag at high flow rates.
5.dFlow Ratio: 92% — Slight under-extrusion avoids swelling and surface artifacts.6. Precision Settings
6.aGap Closing Radius: 0.1 mm — Tolerant of gaps in thicker walls.
6.bArc Fitting: ON — Reduces G-code size and smooths curve transitions.
6.cElephant Foot Compensation: 0.1 mm — Offsets squishing in the first layer caused by large bead sizes.7. Walls and Shells
7.aWall Loops: 2 — Minimum for strength when using a 0.8 mm nozzle.
7.bDetect Thin Walls: ON — Ensures tight geometries aren’t skipped.
7.cTop/Bottom Shell Layers: 3 — Provides good coverage; increase if watertightness is needed.
7.dTop/Bottom Thickness: 1.2 mm — Equals 1.5x the nozzle size for solid strength.
7.eTop/Bottom Pattern: Monotonic — Distributes tension evenly and improves surface finish.8. Geometry and Movement
8.aWall Order: Inner before Outer — Creates cleaner outer surfaces.
8.bInfill First: OFF — Maintains precise outer dimensions.
8.cSmooth Speed Transition: ON — Prevents ringing caused by abrupt speed changes.
8.dSmooth Coefficient: 80 — Ideal damping for soft materials.
8.eAvoid Crossing Wall: ON — Minimizes stringing across part walls.
8.fMax Detour for Crossing: 10 mm or 5% — Balances time with print cleanliness.9. Layer and Width Settings
9.aLayer Height: 0.3 mm — Optimal for strength and resolution using a 0.8 mm nozzle.
9.bInitial Layer Height: 0.35 mm — Slightly higher to improve adhesion.
9.cLine Widths (all): 0.8 mm — Matches nozzle diameter for consistent extrusion.10. Seam Settings
10.aSeam Position: Aligned or Back — Use aligned for mechanical consistency, back for visual appeal.
10.bSmart Scarf Seam: ON — Automatically adjusts seam location to reduce visual impact.
10.cSeam Angle: 155° — Standard seam angle for clean transitions.
10.dSeam Steps: 10 — Smooths seam path and improves visual finish.11. Infill Settings
11.aWall/Infill Overlap: 10% — Prevents infill from deforming soft exterior walls.
11.bInfill Combination: ON — Consolidates paths for efficiency.
11.cDetect Floating Shells: ON — Ensures unsupported vertical structures are printed reliably.
11.dSparse Infill Density: 20–25% — Balanced rigidity vs. material use.
11.eSparse Pattern: Grid — Stable and efficient for flexible geometries.12. Speed Settings
12.aTravel: 160 mm/s — Fast but safe against backlash.
12.bInitial Layer: 15 mm/s — Prevents nozzle from skimming and ensures bed adhesion.
12.cOuter Wall: 60 mm/s — Controlled speed for surface quality.
12.dInner Wall: 90 mm/s — Slightly faster without compromising control.
12.eSmall Perimeter: 35 mm/s — Reduced speed for detailed geometry.
12.fTop Surface: 40 mm/s — Improves finish on topmost layers.
12.gInfill: 100–120 mm/s — Takes advantage of high flowability.13. Acceleration Settings
13.aNormal Print: 2000 mm/s² — Prevents ringing in soft filaments.
13.bTravel: 4000 mm/s² — Enables fast movement without harsh transitions.
13.cInitial Layer: 300 mm/s² — Gentle movement prevents lifting from the bed.
13.dOuter Wall: 1500 mm/s² — Improves outer surface clarity.
13.eInner Wall: 2000 mm/s² — Balanced for structural components.
13.fTop Surface: 1500 mm/s² — Ensures smooth detailing.14. Adhesion and Brims
14.aSkirt Loops: 2 — Helps prime nozzle and start cleanly.
14.bBrim Width: 6 mm — Helps hold soft materials down.
14.cBrim Gap: 0.15 mm — Allows for easy removal without tearing.15. Prime Tower and Flush Settings
15.aPrime Tower: ON — Purges moisture and early flow inconsistencies.
15.bTower Width: 40 mm — Prevents collapse due to heat.
15.cBrim Width (Tower): 4 mm — Adds stability to the purge base.
15.dFlush Into Support: ON — Discards unwanted early flow safely.16. G-Code Start Script
M900 K0.05 ; Pressure Advance M106 S0 ; Fan off G92 E0 G1 E15 F300 ; purge line G92 E0
17. Additional Notes
17.aDry filament at 155 F for 2 hours before use.
17.bStore with desiccant.
17.cKeep extruder door open to allow vapor to escape.
17.dAvoid long dwell times at high temperatures.If you need any other assistance, feel free to reach out to us anytime at timeplast@timeplast.com — we’ll be happy to help.
Raw scented Soap lineup
Clove Soap
-
Clove Soap Gen 5 infuses your daily cleanse with the soothing spice of clove—imagine printing a bar that envelops your hands in the cozy aroma of clove while it foams. This 3D-printable soap filament takes our revolutionary foaming soap technology and adds a nostalgic twist: real clove oil for a gentle, aromatic cleanse with natural antiseptic benefits. Each bar you print is a little work of art and care, lasting far longer than ordinary soap and releasing rich, clove-laden lather with every use. It’s more than a soap; it’s a handcrafted self-care ritual born from your creativity, blending the comforts of an old-world apothecary with modern making.
How it works: 70% structured water buffers nozzle heat; clove aroma survives and blooms gradually with use.
Why Soap Gen 5? Bold spice that helps mask strong odors.
Printing recommendations: For reliable prints, please always use a 0.8mm nozzle. A texture plate and a printing adhesive. So that first layer will adhere. For all of the other parameters, please use our specialized GPT here.
Add a classic spice note to sink-side prints.
-
Click here to access our new and improved TimeMass GPT Assistant. Just tell it your printer model and the TimeMass filament you're using—it will instantly recommend the exact parameters you need to start printing successfully.
Using a Bambu Lab printer?
Click here to download our updated Bambu Lab profile. All printing parameters are fully optimized and tested—just load the file and start printing.1. Introduction
These parameters are designed to help avoid printing issues; however, temperatures and speed timings can be adjusted based on your specific goals. For example, if you prefer a less rigid result, we recommend using a lower temperature. This section outlines a complete slicing and printing profile for TimeMass Soap, tailored for printers with a 0.8 mm nozzle. If the print is not being successful, please lower the nozzle temperature by 10°C and start over until an optimal print is achieved. Please check the manual for printing parameters.2. Temperature Settings
2.aNozzle Temperature: 230°C — Optimal for flowability while avoiding decomposition (which begins around 250°C).
2.bBed Temperature: 75°C — Ensures strong first-layer adhesion and prevents moisture bubbling.
2.cNozzle Temperature Range: 230–245°C — Timeplast melts around 165°C but prints best at 235°C for precise viscosity control.3. Cooling Settings
3.aNo Cooling for First Layers: 3 layers — Prevents shrinkage due to rapid cooling of moisture-rich filament.
3.bFan Minimum Speed: 0% for the first 100 seconds — Allows heat retention during early layers.
3.cFan Maximum Speed: 15% starting at 8 seconds — Avoids overcooling that can lead to warping.
3.dKeep Fan Always On: OFF — Allows vapor to escape and avoids internal fogging.
3.eSlow Down for Cooling: ON — Improves surface finish with controlled cooling.
3.fForce Cooling for Overhangs: OFF — Overcooling can deform bridges in Timeplast.
3.gFan for Overhangs: 15% — Only for essential cooling in complex areas.
3.hPre-Start Fan Time: 2 seconds — Minimizes pressure differential during the first layer.4. Volumetric Flow
4.aMax Volumetric Speed: 12 mm³/s — Based on a melt flow index of ~15 g/10min, allows high-speed printing.
4.bRamming Speed: 3 mm³/s — Prevents bubbles or popping from pressure spikes.5. Retraction and Flow
5.aRetraction Distance: 0.4 mm — Minimal retraction required for soft filaments to avoid stringing.
5.bRetraction Speed: 15 mm/s — Slow enough to avoid pulling molten plastic.
5.cPressure Advance: 0.05 — Compensates for nozzle lag at high flow rates.
5.dFlow Ratio: 92% — Slight under-extrusion avoids swelling and surface artifacts.6. Precision Settings
6.aGap Closing Radius: 0.1 mm — Tolerant of gaps in thicker walls.
6.bArc Fitting: ON — Reduces G-code size and smooths curve transitions.
6.cElephant Foot Compensation: 0.1 mm — Offsets squishing in the first layer caused by large bead sizes.7. Walls and Shells
7.aWall Loops: 2 — Minimum for strength when using a 0.8 mm nozzle.
7.bDetect Thin Walls: ON — Ensures tight geometries aren’t skipped.
7.cTop/Bottom Shell Layers: 3 — Provides good coverage; increase if watertightness is needed.
7.dTop/Bottom Thickness: 1.2 mm — Equals 1.5x the nozzle size for solid strength.
7.eTop/Bottom Pattern: Monotonic — Distributes tension evenly and improves surface finish.8. Geometry and Movement
8.aWall Order: Inner before Outer — Creates cleaner outer surfaces.
8.bInfill First: OFF — Maintains precise outer dimensions.
8.cSmooth Speed Transition: ON — Prevents ringing caused by abrupt speed changes.
8.dSmooth Coefficient: 80 — Ideal damping for soft materials.
8.eAvoid Crossing Wall: ON — Minimizes stringing across part walls.
8.fMax Detour for Crossing: 10 mm or 5% — Balances time with print cleanliness.9. Layer and Width Settings
9.aLayer Height: 0.3 mm — Optimal for strength and resolution using a 0.8 mm nozzle.
9.bInitial Layer Height: 0.35 mm — Slightly higher to improve adhesion.
9.cLine Widths (all): 0.8 mm — Matches nozzle diameter for consistent extrusion.10. Seam Settings
10.aSeam Position: Aligned or Back — Use aligned for mechanical consistency, back for visual appeal.
10.bSmart Scarf Seam: ON — Automatically adjusts seam location to reduce visual impact.
10.cSeam Angle: 155° — Standard seam angle for clean transitions.
10.dSeam Steps: 10 — Smooths seam path and improves visual finish.11. Infill Settings
11.aWall/Infill Overlap: 10% — Prevents infill from deforming soft exterior walls.
11.bInfill Combination: ON — Consolidates paths for efficiency.
11.cDetect Floating Shells: ON — Ensures unsupported vertical structures are printed reliably.
11.dSparse Infill Density: 20–25% — Balanced rigidity vs. material use.
11.eSparse Pattern: Grid — Stable and efficient for flexible geometries.12. Speed Settings
12.aTravel: 160 mm/s — Fast but safe against backlash.
12.bInitial Layer: 15 mm/s — Prevents nozzle from skimming and ensures bed adhesion.
12.cOuter Wall: 60 mm/s — Controlled speed for surface quality.
12.dInner Wall: 90 mm/s — Slightly faster without compromising control.
12.eSmall Perimeter: 35 mm/s — Reduced speed for detailed geometry.
12.fTop Surface: 40 mm/s — Improves finish on topmost layers.
12.gInfill: 100–120 mm/s — Takes advantage of high flowability.13. Acceleration Settings
13.aNormal Print: 2000 mm/s² — Prevents ringing in soft filaments.
13.bTravel: 4000 mm/s² — Enables fast movement without harsh transitions.
13.cInitial Layer: 300 mm/s² — Gentle movement prevents lifting from the bed.
13.dOuter Wall: 1500 mm/s² — Improves outer surface clarity.
13.eInner Wall: 2000 mm/s² — Balanced for structural components.
13.fTop Surface: 1500 mm/s² — Ensures smooth detailing.14. Adhesion and Brims
14.aSkirt Loops: 2 — Helps prime nozzle and start cleanly.
14.bBrim Width: 6 mm — Helps hold soft materials down.
14.cBrim Gap: 0.15 mm — Allows for easy removal without tearing.15. Prime Tower and Flush Settings
15.aPrime Tower: ON — Purges moisture and early flow inconsistencies.
15.bTower Width: 40 mm — Prevents collapse due to heat.
15.cBrim Width (Tower): 4 mm — Adds stability to the purge base.
15.dFlush Into Support: ON — Discards unwanted early flow safely.16. G-Code Start Script
M900 K0.05 ; Pressure Advance M106 S0 ; Fan off G92 E0 G1 E15 F300 ; purge line G92 E0
17. Additional Notes
17.aDry filament at 155 F for 2 hours before use.
17.bStore with desiccant.
17.cKeep extruder door open to allow vapor to escape.
17.dAvoid long dwell times at high temperatures.If you need any other assistance, feel free to reach out to us anytime at timeplast@timeplast.com — we’ll be happy to help.
Free U.S. standard shipping on orders of 5+ spools!
Black Pepper Soap
-
Black Pepper Soap Gen 5 brings an unexpected dash of boldness to your self-care routine—yes, you can 3D-print a soap with the invigorating zing of black pepper. Using our advanced foaming soap filament infused with real black pepper essence, each custom bar produces a rich lather that tingles the senses with subtle spice, turning a simple wash into a refreshing wake-up call for skin and spirit. Crafted with our Gen 5 formula, these soaps aren’t just novel; they’re durable and effective, lasting up to 10× longer than your average bar while naturally leveraging pepper’s gentle antiseptic qualities. This is creativity at its most playful and practical: you’re printing a statement soap that cleanses, energizes, and delights with every use.
How it works: 70% structured water pulls energy from the melt, preserving pepper’s spark; water-soluble for progressive release.
Why Soap Gen 5? Sporty, wake-up feel for active routines.
Printing recommendations: For reliable prints, please always use a 0.8mm nozzle. A texture plate and a printing adhesive. So that first layer will adhere. For all of the other parameters, please use our specialized GPT here.
Print an energizing token.
-
Click here to access our new and improved TimeMass GPT Assistant. Just tell it your printer model and the TimeMass filament you're using—it will instantly recommend the exact parameters you need to start printing successfully.
Using a Bambu Lab printer?
Click here to download our updated Bambu Lab profile. All printing parameters are fully optimized and tested—just load the file and start printing.1. Introduction
These parameters are designed to help avoid printing issues; however, temperatures and speed timings can be adjusted based on your specific goals. For example, if you prefer a less rigid result, we recommend using a lower temperature. This section outlines a complete slicing and printing profile for TimeMass Soap, tailored for printers with a 0.8 mm nozzle. If the print is not being successful, please lower the nozzle temperature by 10°C and start over until an optimal print is achieved. Please check the manual for printing parameters.2. Temperature Settings
2.aNozzle Temperature: 230°C — Optimal for flowability while avoiding decomposition (which begins around 250°C).
2.bBed Temperature: 75°C — Ensures strong first-layer adhesion and prevents moisture bubbling.
2.cNozzle Temperature Range: 230–245°C — Timeplast melts around 165°C but prints best at 235°C for precise viscosity control.3. Cooling Settings
3.aNo Cooling for First Layers: 3 layers — Prevents shrinkage due to rapid cooling of moisture-rich filament.
3.bFan Minimum Speed: 0% for the first 100 seconds — Allows heat retention during early layers.
3.cFan Maximum Speed: 15% starting at 8 seconds — Avoids overcooling that can lead to warping.
3.dKeep Fan Always On: OFF — Allows vapor to escape and avoids internal fogging.
3.eSlow Down for Cooling: ON — Improves surface finish with controlled cooling.
3.fForce Cooling for Overhangs: OFF — Overcooling can deform bridges in Timeplast.
3.gFan for Overhangs: 15% — Only for essential cooling in complex areas.
3.hPre-Start Fan Time: 2 seconds — Minimizes pressure differential during the first layer.4. Volumetric Flow
4.aMax Volumetric Speed: 12 mm³/s — Based on a melt flow index of ~15 g/10min, allows high-speed printing.
4.bRamming Speed: 3 mm³/s — Prevents bubbles or popping from pressure spikes.5. Retraction and Flow
5.aRetraction Distance: 0.4 mm — Minimal retraction required for soft filaments to avoid stringing.
5.bRetraction Speed: 15 mm/s — Slow enough to avoid pulling molten plastic.
5.cPressure Advance: 0.05 — Compensates for nozzle lag at high flow rates.
5.dFlow Ratio: 92% — Slight under-extrusion avoids swelling and surface artifacts.6. Precision Settings
6.aGap Closing Radius: 0.1 mm — Tolerant of gaps in thicker walls.
6.bArc Fitting: ON — Reduces G-code size and smooths curve transitions.
6.cElephant Foot Compensation: 0.1 mm — Offsets squishing in the first layer caused by large bead sizes.7. Walls and Shells
7.aWall Loops: 2 — Minimum for strength when using a 0.8 mm nozzle.
7.bDetect Thin Walls: ON — Ensures tight geometries aren’t skipped.
7.cTop/Bottom Shell Layers: 3 — Provides good coverage; increase if watertightness is needed.
7.dTop/Bottom Thickness: 1.2 mm — Equals 1.5x the nozzle size for solid strength.
7.eTop/Bottom Pattern: Monotonic — Distributes tension evenly and improves surface finish.8. Geometry and Movement
8.aWall Order: Inner before Outer — Creates cleaner outer surfaces.
8.bInfill First: OFF — Maintains precise outer dimensions.
8.cSmooth Speed Transition: ON — Prevents ringing caused by abrupt speed changes.
8.dSmooth Coefficient: 80 — Ideal damping for soft materials.
8.eAvoid Crossing Wall: ON — Minimizes stringing across part walls.
8.fMax Detour for Crossing: 10 mm or 5% — Balances time with print cleanliness.9. Layer and Width Settings
9.aLayer Height: 0.3 mm — Optimal for strength and resolution using a 0.8 mm nozzle.
9.bInitial Layer Height: 0.35 mm — Slightly higher to improve adhesion.
9.cLine Widths (all): 0.8 mm — Matches nozzle diameter for consistent extrusion.10. Seam Settings
10.aSeam Position: Aligned or Back — Use aligned for mechanical consistency, back for visual appeal.
10.bSmart Scarf Seam: ON — Automatically adjusts seam location to reduce visual impact.
10.cSeam Angle: 155° — Standard seam angle for clean transitions.
10.dSeam Steps: 10 — Smooths seam path and improves visual finish.11. Infill Settings
11.aWall/Infill Overlap: 10% — Prevents infill from deforming soft exterior walls.
11.bInfill Combination: ON — Consolidates paths for efficiency.
11.cDetect Floating Shells: ON — Ensures unsupported vertical structures are printed reliably.
11.dSparse Infill Density: 20–25% — Balanced rigidity vs. material use.
11.eSparse Pattern: Grid — Stable and efficient for flexible geometries.12. Speed Settings
12.aTravel: 160 mm/s — Fast but safe against backlash.
12.bInitial Layer: 15 mm/s — Prevents nozzle from skimming and ensures bed adhesion.
12.cOuter Wall: 60 mm/s — Controlled speed for surface quality.
12.dInner Wall: 90 mm/s — Slightly faster without compromising control.
12.eSmall Perimeter: 35 mm/s — Reduced speed for detailed geometry.
12.fTop Surface: 40 mm/s — Improves finish on topmost layers.
12.gInfill: 100–120 mm/s — Takes advantage of high flowability.13. Acceleration Settings
13.aNormal Print: 2000 mm/s² — Prevents ringing in soft filaments.
13.bTravel: 4000 mm/s² — Enables fast movement without harsh transitions.
13.cInitial Layer: 300 mm/s² — Gentle movement prevents lifting from the bed.
13.dOuter Wall: 1500 mm/s² — Improves outer surface clarity.
13.eInner Wall: 2000 mm/s² — Balanced for structural components.
13.fTop Surface: 1500 mm/s² — Ensures smooth detailing.14. Adhesion and Brims
14.aSkirt Loops: 2 — Helps prime nozzle and start cleanly.
14.bBrim Width: 6 mm — Helps hold soft materials down.
14.cBrim Gap: 0.15 mm — Allows for easy removal without tearing.15. Prime Tower and Flush Settings
15.aPrime Tower: ON — Purges moisture and early flow inconsistencies.
15.bTower Width: 40 mm — Prevents collapse due to heat.
15.cBrim Width (Tower): 4 mm — Adds stability to the purge base.
15.dFlush Into Support: ON — Discards unwanted early flow safely.16. G-Code Start Script
M900 K0.05 ; Pressure Advance M106 S0 ; Fan off G92 E0 G1 E15 F300 ; purge line G92 E0
17. Additional Notes
17.aDry filament at 155 F for 2 hours before use.
17.bStore with desiccant.
17.cKeep extruder door open to allow vapor to escape.
17.dAvoid long dwell times at high temperatures.If you need any other assistance, feel free to reach out to us anytime at timeplast@timeplast.com — we’ll be happy to help.
Free U.S. standard shipping on orders of 5+ spools!
Star Anise Soap
-
Turn your cleansing ritual into an exotic escape with Star Anise Soap Gen 5. This innovative 3D-printable soap filament is enriched with real star anise, so every bar you print lathers up with a whimsical licorice-kissed aroma—transforming a simple hand wash into a sensory journey through far-off spice markets. Built on our latest foaming soap formula, the bars are luxuriously long-lasting and naturally minded, gently releasing star anise’s subtle antimicrobial essence each time you scrub. It’s an enchanting fusion of craft and self-care: print a starry soap that delights the senses, lasts and lathers beautifully, and brings a touch of magic to your everyday routine.
How it works: 70% structured water off-gasses, easing heat and preserving aroma; water-soluble for odor-neutralizing freshness on rinse.
Why Soap Gen 5? Great in culinary spaces to counter lingering smells.
Printing recommendations: For reliable prints, please always use a 0.8mm nozzle. A texture plate and a printing adhesive. So that first layer will adhere. For all of the other parameters, please use our specialized GPT here.
Print a tidy, anise-fresh helper.
-
Click here to access our specialized TimeMass GPT Assistant.Just tell it your printer model and the TimeMass filament you're using—it will instantly recommend the exact parameters you need to start printing successfully.
Using a Bambu Lab printer?
Click here to download our updated Bambu Lab profile. All printing parameters are fully optimized and tested—just load the file and start printing.1. Introduction
These parameters are designed to help avoid printing issues; however, temperatures and speed timings can be adjusted based on your specific goals. For example, if you prefer a less rigid result, we recommend using a lower temperature. This section outlines a complete slicing and printing profile for TimeMass Iridescent Gold, tailored for printers with a 0.8 mm nozzle. If the print is not being successful, please lower the nozzle temperature by 10°C and start over until an optimal print is achieved.While these examples were printed with a 0.8 mm nozzle, TimeMass can be used with any nozzle size. Please check the manual for printing parameters with all the other nozzle sizes.2. Temperature Settings
2.aNozzle Temperature: 240°C — Optimal for flowability while avoiding decomposition (which begins around 250°C).
2.bBed Temperature: 95°C — Ensures strong first-layer adhesion and prevents moisture bubbling.
2.cNozzle Temperature Range: 230–245°C — Timeplast melts around 165°C but prints best at 240°C for precise viscosity control.3. Cooling Settings
3.aNo Cooling for First Layers: 3 layers — Prevents shrinkage due to rapid cooling of moisture-rich filament.
3.bFan Minimum Speed: 0% for the first 100 seconds — Allows heat retention during early layers.
3.cFan Maximum Speed: 15% starting at 8 seconds — Avoids overcooling that can lead to warping.
3.dKeep Fan Always On: OFF — Allows vapor to escape and avoids internal fogging.
3.eSlow Down for Cooling: ON — Improves surface finish with controlled cooling.
3.fForce Cooling for Overhangs: OFF — Overcooling can deform bridges in Timeplast.
3.gFan for Overhangs: 15% — Only for essential cooling in complex areas.
3.hPre-Start Fan Time: 2 seconds — Minimizes pressure differential during the first layer.4. Volumetric Flow
4.aMax Volumetric Speed: 12 mm³/s — Based on a melt flow index of ~15 g/10min, allows high-speed printing.
4.bRamming Speed: 3 mm³/s — Prevents bubbles or popping from pressure spikes.5. Retraction and Flow
5.aRetraction Distance: 0.4 mm — Minimal retraction required for soft filaments to avoid stringing.
5.bRetraction Speed: 15 mm/s — Slow enough to avoid pulling molten plastic.
5.cPressure Advance: 0.05 — Compensates for nozzle lag at high flow rates.
5.dFlow Ratio: 92% — Slight under-extrusion avoids swelling and surface artifacts.6. Precision Settings
6.aGap Closing Radius: 0.1 mm — Tolerant of gaps in thicker walls.
6.bArc Fitting: ON — Reduces G-code size and smooths curve transitions.
6.cElephant Foot Compensation: 0.1 mm — Offsets squishing in the first layer caused by large bead sizes.7. Walls and Shells
7.aWall Loops: 2 — Minimum for strength when using a 0.8 mm nozzle.
7.bDetect Thin Walls: ON — Ensures tight geometries aren’t skipped.
7.cTop/Bottom Shell Layers: 3 — Provides good coverage; increase if watertightness is needed.
7.dTop/Bottom Thickness: 1.2 mm — Equals 1.5x the nozzle size for solid strength.
7.eTop/Bottom Pattern: Monotonic — Distributes tension evenly and improves surface finish.8. Geometry and Movement
8.aWall Order: Inner before Outer — Creates cleaner outer surfaces.
8.bInfill First: OFF — Maintains precise outer dimensions.
8.cSmooth Speed Transition: ON — Prevents ringing caused by abrupt speed changes.
8.dSmooth Coefficient: 80 — Ideal damping for soft materials.
8.eAvoid Crossing Wall: ON — Minimizes stringing across part walls.
8.fMax Detour for Crossing: 10 mm or 5% — Balances time with print cleanliness.9. Layer and Width Settings
9.aLayer Height: 0.3 mm — Optimal for strength and resolution using a 0.8 mm nozzle.
9.bInitial Layer Height: 0.35 mm — Slightly higher to improve adhesion.
9.cLine Widths (all): 0.8 mm — Matches nozzle diameter for consistent extrusion.10. Seam Settings
10.aSeam Position: Aligned or Back — Use aligned for mechanical consistency, back for visual appeal.
10.bSmart Scarf Seam: ON — Automatically adjusts seam location to reduce visual impact.
10.cSeam Angle: 155° — Standard seam angle for clean transitions.
10.dSeam Steps: 10 — Smooths seam path and improves visual finish.11. Infill Settings
11.aWall/Infill Overlap: 10% — Prevents infill from deforming soft exterior walls.
11.bInfill Combination: ON — Consolidates paths for efficiency.
11.cDetect Floating Shells: ON — Ensures unsupported vertical structures are printed reliably.
11.dSparse Infill Density: 20–25% — Balanced rigidity vs. material use.
11.eSparse Pattern: Grid — Stable and efficient for flexible geometries.12. Speed Settings
12.aTravel: 160 mm/s — Fast but safe against backlash.
12.bInitial Layer: 15 mm/s — Prevents nozzle from skimming and ensures bed adhesion.
12.cOuter Wall: 60 mm/s — Controlled speed for surface quality.
12.dInner Wall: 90 mm/s — Slightly faster without compromising control.
12.eSmall Perimeter: 35 mm/s — Reduced speed for detailed geometry.
12.fTop Surface: 40 mm/s — Improves finish on topmost layers.
12.gInfill: 100–120 mm/s — Takes advantage of high flowability.13. Acceleration Settings
13.aNormal Print: 2000 mm/s² — Prevents ringing in soft filaments.
13.bTravel: 4000 mm/s² — Enables fast movement without harsh transitions.
13.cInitial Layer: 300 mm/s² — Gentle movement prevents lifting from the bed.
13.dOuter Wall: 1500 mm/s² — Improves outer surface clarity.
13.eInner Wall: 2000 mm/s² — Balanced for structural components.
13.fTop Surface: 1500 mm/s² — Ensures smooth detailing.14. Adhesion and Brims
14.aSkirt Loops: 2 — Helps prime nozzle and start cleanly.
14.bBrim Width: 6 mm — Helps hold soft materials down.
14.cBrim Gap: 0.15 mm — Allows for easy removal without tearing.15. Prime Tower and Flush Settings
15.aPrime Tower: ON — Purges moisture and early flow inconsistencies.
15.bTower Width: 40 mm — Prevents collapse due to heat.
15.cBrim Width (Tower): 4 mm — Adds stability to the purge base.
15.dFlush Into Support: ON — Discards unwanted early flow safely.16. G-Code Start Script
M900 K0.05 ; Pressure Advance M106 S0 ; Fan off G92 E0 G1 E15 F300 ; purge line G92 E0
17. Additional Notes
17.aDry filament at 100°C for 2 hours before use.
17.bStore with desiccant.
17.cKeep extruder door open to allow vapor to escape.
17.dAvoid long dwell times at high temperatures.If you need print settings for other nozzle sizes, feel free to reach out to us at timeplast@timeplast.com — we’ll be happy to help.
You can also get instant support through our dedicated ChatGPT assistant here:https://chatgpt.com/g/g-6823924241cc8191bbabcf0bc6523e3f-timemass-4d-printing🚀
Free U.S. standard shipping on orders of 5+ spools!
Lavender Soap
-
Transform your wash into a calming ritual with Lavender Soap Gen 5, the 3D-printable soap that brings tranquil lavender fields to your fingertips. Infused with pure lavender oil, this innovative filament prints soap bars that bloom with velvety lather and a soothing floral scent—turning every bath or handwash into a mini spa escape. Our Gen 5 formulation ensures each lavender soap you create is as practical as it is pampering: abundantly foamy, enduring far longer than standard soaps, and imparting lavender’s natural calming and antimicrobial touches with every use. It’s a gentle indulgence you design yourself, marrying the art of making with the restorative power of a beloved botanical to elevate daily self-care.
How it works: 70% structured water absorbs energy, protecting delicate lavender; water-soluble for measured diffusion.
Why Soap Gen 5? Ideal for nighttime or relaxed spaces.
Printing recommendations: For reliable prints, please always use a 0.8mm nozzle. A texture plate and a printing adhesive. So that first layer will adhere. For all of the other parameters, please use our specialized GPT here.
Print calm.
-
Click here to access our new and improved TimeMass GPT Assistant. Just tell it your printer model and the TimeMass filament you're using—it will instantly recommend the exact parameters you need to start printing successfully.
Using a Bambu Lab printer?
Click here to download our updated Bambu Lab profile. All printing parameters are fully optimized and tested—just load the file and start printing.1. Introduction
These parameters are designed to help avoid printing issues; however, temperatures and speed timings can be adjusted based on your specific goals. For example, if you prefer a less rigid result, we recommend using a lower temperature. This section outlines a complete slicing and printing profile for TimeMass Soap, tailored for printers with a 0.8 mm nozzle. If the print is not being successful, please lower the nozzle temperature by 10°C and start over until an optimal print is achieved. Please check the manual for printing parameters.2. Temperature Settings
2.aNozzle Temperature: 230°C — Optimal for flowability while avoiding decomposition (which begins around 250°C).
2.bBed Temperature: 75°C — Ensures strong first-layer adhesion and prevents moisture bubbling.
2.cNozzle Temperature Range: 230–245°C — Timeplast melts around 165°C but prints best at 235°C for precise viscosity control.3. Cooling Settings
3.aNo Cooling for First Layers: 3 layers — Prevents shrinkage due to rapid cooling of moisture-rich filament.
3.bFan Minimum Speed: 0% for the first 100 seconds — Allows heat retention during early layers.
3.cFan Maximum Speed: 15% starting at 8 seconds — Avoids overcooling that can lead to warping.
3.dKeep Fan Always On: OFF — Allows vapor to escape and avoids internal fogging.
3.eSlow Down for Cooling: ON — Improves surface finish with controlled cooling.
3.fForce Cooling for Overhangs: OFF — Overcooling can deform bridges in Timeplast.
3.gFan for Overhangs: 15% — Only for essential cooling in complex areas.
3.hPre-Start Fan Time: 2 seconds — Minimizes pressure differential during the first layer.4. Volumetric Flow
4.aMax Volumetric Speed: 12 mm³/s — Based on a melt flow index of ~15 g/10min, allows high-speed printing.
4.bRamming Speed: 3 mm³/s — Prevents bubbles or popping from pressure spikes.5. Retraction and Flow
5.aRetraction Distance: 0.4 mm — Minimal retraction required for soft filaments to avoid stringing.
5.bRetraction Speed: 15 mm/s — Slow enough to avoid pulling molten plastic.
5.cPressure Advance: 0.05 — Compensates for nozzle lag at high flow rates.
5.dFlow Ratio: 92% — Slight under-extrusion avoids swelling and surface artifacts.6. Precision Settings
6.aGap Closing Radius: 0.1 mm — Tolerant of gaps in thicker walls.
6.bArc Fitting: ON — Reduces G-code size and smooths curve transitions.
6.cElephant Foot Compensation: 0.1 mm — Offsets squishing in the first layer caused by large bead sizes.7. Walls and Shells
7.aWall Loops: 2 — Minimum for strength when using a 0.8 mm nozzle.
7.bDetect Thin Walls: ON — Ensures tight geometries aren’t skipped.
7.cTop/Bottom Shell Layers: 3 — Provides good coverage; increase if watertightness is needed.
7.dTop/Bottom Thickness: 1.2 mm — Equals 1.5x the nozzle size for solid strength.
7.eTop/Bottom Pattern: Monotonic — Distributes tension evenly and improves surface finish.8. Geometry and Movement
8.aWall Order: Inner before Outer — Creates cleaner outer surfaces.
8.bInfill First: OFF — Maintains precise outer dimensions.
8.cSmooth Speed Transition: ON — Prevents ringing caused by abrupt speed changes.
8.dSmooth Coefficient: 80 — Ideal damping for soft materials.
8.eAvoid Crossing Wall: ON — Minimizes stringing across part walls.
8.fMax Detour for Crossing: 10 mm or 5% — Balances time with print cleanliness.9. Layer and Width Settings
9.aLayer Height: 0.3 mm — Optimal for strength and resolution using a 0.8 mm nozzle.
9.bInitial Layer Height: 0.35 mm — Slightly higher to improve adhesion.
9.cLine Widths (all): 0.8 mm — Matches nozzle diameter for consistent extrusion.10. Seam Settings
10.aSeam Position: Aligned or Back — Use aligned for mechanical consistency, back for visual appeal.
10.bSmart Scarf Seam: ON — Automatically adjusts seam location to reduce visual impact.
10.cSeam Angle: 155° — Standard seam angle for clean transitions.
10.dSeam Steps: 10 — Smooths seam path and improves visual finish.11. Infill Settings
11.aWall/Infill Overlap: 10% — Prevents infill from deforming soft exterior walls.
11.bInfill Combination: ON — Consolidates paths for efficiency.
11.cDetect Floating Shells: ON — Ensures unsupported vertical structures are printed reliably.
11.dSparse Infill Density: 20–25% — Balanced rigidity vs. material use.
11.eSparse Pattern: Grid — Stable and efficient for flexible geometries.12. Speed Settings
12.aTravel: 160 mm/s — Fast but safe against backlash.
12.bInitial Layer: 15 mm/s — Prevents nozzle from skimming and ensures bed adhesion.
12.cOuter Wall: 60 mm/s — Controlled speed for surface quality.
12.dInner Wall: 90 mm/s — Slightly faster without compromising control.
12.eSmall Perimeter: 35 mm/s — Reduced speed for detailed geometry.
12.fTop Surface: 40 mm/s — Improves finish on topmost layers.
12.gInfill: 100–120 mm/s — Takes advantage of high flowability.13. Acceleration Settings
13.aNormal Print: 2000 mm/s² — Prevents ringing in soft filaments.
13.bTravel: 4000 mm/s² — Enables fast movement without harsh transitions.
13.cInitial Layer: 300 mm/s² — Gentle movement prevents lifting from the bed.
13.dOuter Wall: 1500 mm/s² — Improves outer surface clarity.
13.eInner Wall: 2000 mm/s² — Balanced for structural components.
13.fTop Surface: 1500 mm/s² — Ensures smooth detailing.14. Adhesion and Brims
14.aSkirt Loops: 2 — Helps prime nozzle and start cleanly.
14.bBrim Width: 6 mm — Helps hold soft materials down.
14.cBrim Gap: 0.15 mm — Allows for easy removal without tearing.15. Prime Tower and Flush Settings
15.aPrime Tower: ON — Purges moisture and early flow inconsistencies.
15.bTower Width: 40 mm — Prevents collapse due to heat.
15.cBrim Width (Tower): 4 mm — Adds stability to the purge base.
15.dFlush Into Support: ON — Discards unwanted early flow safely.16. G-Code Start Script
M900 K0.05 ; Pressure Advance M106 S0 ; Fan off G92 E0 G1 E15 F300 ; purge line G92 E0
17. Additional Notes
17.aDry filament at 155 F for 2 hours before use.
17.bStore with desiccant.
17.cKeep extruder door open to allow vapor to escape.
17.dAvoid long dwell times at high temperatures.If you need any other assistance, feel free to reach out to us anytime at timeplast@timeplast.com — we’ll be happy to help.
Free U.S. standard shipping on orders of 5+ spools!
Cocoa Soap
-
Cocoa Soap Gen 5 makes every wash feel like a treat, blending the joys of chocolate indulgence with DIY innovation. This advanced 3D-printable soap filament is infused with real cocoa essence, meaning each bar you create will lather into a creamy foam carrying the soothing, mood-lifting scent of chocolate. Backed by our Gen 5 technology for rich foam and extended use, your printed cocoa soap isn’t just a novelty—it lasts significantly longer than ordinary soaps and even imparts cocoa’s gentle antioxidant touch to your skin. Delight in a bathing experience that’s equal parts playful and pampering: you’ve essentially 3D-printed a little slice of chocolate heaven that cleanses and charms with every use.
How it works: 70% structured water lowers the heat hit; cocoa lingers and blooms on wash.
Why Soap Gen 5? Gourmand mood; can slightly tint foam in prototypes.
Printing recommendations: For reliable prints, please always use a 0.8mm nozzle. A texture plate and a printing adhesive. So that first layer will adhere. For all of the other parameters, please use our specialized GPT here.
Print a sweet touch.
-
Click here to access our new and improved TimeMass GPT Assistant. Just tell it your printer model and the TimeMass filament you're using—it will instantly recommend the exact parameters you need to start printing successfully.
Using a Bambu Lab printer?
Click here to download our updated Bambu Lab profile. All printing parameters are fully optimized and tested—just load the file and start printing.1. Introduction
These parameters are designed to help avoid printing issues; however, temperatures and speed timings can be adjusted based on your specific goals. For example, if you prefer a less rigid result, we recommend using a lower temperature. This section outlines a complete slicing and printing profile for TimeMass, tailored for printers with a 0.8 mm nozzle. If the print is not being successful, please lower the nozzle temperature by 10°C and start over until an optimal print is achieved. Please check the manual for printing parameters.2. Temperature Settings
2.aNozzle Temperature: 230°C — Optimal for flowability while avoiding decomposition (which begins around 250°C).
2.bBed Temperature: 75°C — Ensures strong first-layer adhesion and prevents moisture bubbling.
2.cNozzle Temperature Range: 230–245°C — Timeplast melts around 165°C but prints best at 235°C for precise viscosity control.3. Cooling Settings
3.aNo Cooling for First Layers: 3 layers — Prevents shrinkage due to rapid cooling of moisture-rich filament.
3.bFan Minimum Speed: 0% for the first 100 seconds — Allows heat retention during early layers.
3.cFan Maximum Speed: 15% starting at 8 seconds — Avoids overcooling that can lead to warping.
3.dKeep Fan Always On: OFF — Allows vapor to escape and avoids internal fogging.
3.eSlow Down for Cooling: ON — Improves surface finish with controlled cooling.
3.fForce Cooling for Overhangs: OFF — Overcooling can deform bridges in Timeplast.
3.gFan for Overhangs: 15% — Only for essential cooling in complex areas.
3.hPre-Start Fan Time: 2 seconds — Minimizes pressure differential during the first layer.4. Volumetric Flow
4.aMax Volumetric Speed: 12 mm³/s — Based on a melt flow index of ~15 g/10min, allows high-speed printing.
4.bRamming Speed: 3 mm³/s — Prevents bubbles or popping from pressure spikes.5. Retraction and Flow
5.aRetraction Distance: 0.4 mm — Minimal retraction required for soft filaments to avoid stringing.
5.bRetraction Speed: 15 mm/s — Slow enough to avoid pulling molten plastic.
5.cPressure Advance: 0.05 — Compensates for nozzle lag at high flow rates.
5.dFlow Ratio: 92% — Slight under-extrusion avoids swelling and surface artifacts.6. Precision Settings
6.aGap Closing Radius: 0.1 mm — Tolerant of gaps in thicker walls.
6.bArc Fitting: ON — Reduces G-code size and smooths curve transitions.
6.cElephant Foot Compensation: 0.1 mm — Offsets squishing in the first layer caused by large bead sizes.7. Walls and Shells
7.aWall Loops: 2 — Minimum for strength when using a 0.8 mm nozzle.
7.bDetect Thin Walls: ON — Ensures tight geometries aren’t skipped.
7.cTop/Bottom Shell Layers: 3 — Provides good coverage; increase if watertightness is needed.
7.dTop/Bottom Thickness: 1.2 mm — Equals 1.5x the nozzle size for solid strength.
7.eTop/Bottom Pattern: Monotonic — Distributes tension evenly and improves surface finish.8. Geometry and Movement
8.aWall Order: Inner before Outer — Creates cleaner outer surfaces.
8.bInfill First: OFF — Maintains precise outer dimensions.
8.cSmooth Speed Transition: ON — Prevents ringing caused by abrupt speed changes.
8.dSmooth Coefficient: 80 — Ideal damping for soft materials.
8.eAvoid Crossing Wall: ON — Minimizes stringing across part walls.
8.fMax Detour for Crossing: 10 mm or 5% — Balances time with print cleanliness.9. Layer and Width Settings
9.aLayer Height: 0.3 mm — Optimal for strength and resolution using a 0.8 mm nozzle.
9.bInitial Layer Height: 0.35 mm — Slightly higher to improve adhesion.
9.cLine Widths (all): 0.8 mm — Matches nozzle diameter for consistent extrusion.10. Seam Settings
10.aSeam Position: Aligned or Back — Use aligned for mechanical consistency, back for visual appeal.
10.bSmart Scarf Seam: ON — Automatically adjusts seam location to reduce visual impact.
10.cSeam Angle: 155° — Standard seam angle for clean transitions.
10.dSeam Steps: 10 — Smooths seam path and improves visual finish.11. Infill Settings
11.aWall/Infill Overlap: 10% — Prevents infill from deforming soft exterior walls.
11.bInfill Combination: ON — Consolidates paths for efficiency.
11.cDetect Floating Shells: ON — Ensures unsupported vertical structures are printed reliably.
11.dSparse Infill Density: 20–25% — Balanced rigidity vs. material use.
11.eSparse Pattern: Grid — Stable and efficient for flexible geometries.12. Speed Settings
12.aTravel: 160 mm/s — Fast but safe against backlash.
12.bInitial Layer: 15 mm/s — Prevents nozzle from skimming and ensures bed adhesion.
12.cOuter Wall: 60 mm/s — Controlled speed for surface quality.
12.dInner Wall: 90 mm/s — Slightly faster without compromising control.
12.eSmall Perimeter: 35 mm/s — Reduced speed for detailed geometry.
12.fTop Surface: 40 mm/s — Improves finish on topmost layers.
12.gInfill: 100–120 mm/s — Takes advantage of high flowability.13. Acceleration Settings
13.aNormal Print: 2000 mm/s² — Prevents ringing in soft filaments.
13.bTravel: 4000 mm/s² — Enables fast movement without harsh transitions.
13.cInitial Layer: 300 mm/s² — Gentle movement prevents lifting from the bed.
13.dOuter Wall: 1500 mm/s² — Improves outer surface clarity.
13.eInner Wall: 2000 mm/s² — Balanced for structural components.
13.fTop Surface: 1500 mm/s² — Ensures smooth detailing.14. Adhesion and Brims
14.aSkirt Loops: 2 — Helps prime nozzle and start cleanly.
14.bBrim Width: 6 mm — Helps hold soft materials down.
14.cBrim Gap: 0.15 mm — Allows for easy removal without tearing.15. Prime Tower and Flush Settings
15.aPrime Tower: ON — Purges moisture and early flow inconsistencies.
15.bTower Width: 40 mm — Prevents collapse due to heat.
15.cBrim Width (Tower): 4 mm — Adds stability to the purge base.
15.dFlush Into Support: ON — Discards unwanted early flow safely.16. G-Code Start Script
M900 K0.05 ; Pressure Advance M106 S0 ; Fan off G92 E0 G1 E15 F300 ; purge line G92 E0
17. Additional Notes
17.aDry filament at 155 F for 2 hours before use.
17.bStore with desiccant.
17.cKeep extruder door open to allow vapor to escape.
17.dAvoid long dwell times at high temperatures.If you need any other assistance, feel free to reach out to us anytime at timeplast@timeplast.com — we’ll be happy to help.
Free U.S. standard shipping on orders of 5+ spools!
Cardamom Soap
-
Cardamom Soap Gen 5 turns your 3D printer into an artisan apothecary, creating soaps imbued with the bright, uplifting aroma of cardamom. Each bar printed with this foaming soap filament greets you with fragrant suds reminiscent of spiced tea and citrusy herbs, as real cardamom oil infuses every bubble. Our Gen 5 soap technology ensures these bars are both indulgent and practical—they foam richly, last significantly longer than ordinary soaps, and carry cardamom’s natural cleansing properties to elevate your daily wash. The result is a uniquely personal bath experience: a fusion of soothing spice and innovative craft, handmade by you for a touch of everyday luxury.
How it works: 70% structured water tempers heat, keeping top notes alive; water-soluble for steady, fresh release.
Why Soap Gen 5? “Just-cleaned” vibe for everyday use.
Printing recommendations: For reliable prints, please always use a 0.8mm nozzle. A texture plate and a printing adhesive. So that first layer will adhere. For all of the other parameters, please use our specialized GPT here.
Print fresh.
-
Click here to access our specialized TimeMass GPT Assistant.Just tell it your printer model and the TimeMass filament you're using—it will instantly recommend the exact parameters you need to start printing successfully.
Using a Bambu Lab printer?
Click here to download our updated Bambu Lab profile. All printing parameters are fully optimized and tested—just load the file and start printing.1. Introduction
These parameters are designed to help avoid printing issues; however, temperatures and speed timings can be adjusted based on your specific goals. For example, if you prefer a less rigid result, we recommend using a lower temperature. This section outlines a complete slicing and printing profile for TimeMass Iridescent Green, tailored for printers with a 0.8 mm nozzle. If the print is not being successful, please lower the nozzle temperature by 10°C and start over until an optimal print is achieved.While these examples were printed with a 0.8 mm nozzle, TimeMass can be used with any nozzle size. Please check the manual for printing parameters with all the other nozzle sizes.2. Temperature Settings
2.aNozzle Temperature: 240°C — Optimal for flowability while avoiding decomposition (which begins around 250°C).
2.bBed Temperature: 95°C — Ensures strong first-layer adhesion and prevents moisture bubbling.
2.cNozzle Temperature Range: 230–245°C — Timeplast melts around 165°C but prints best at 240°C for precise viscosity control.3. Cooling Settings
3.aNo Cooling for First Layers: 3 layers — Prevents shrinkage due to rapid cooling of moisture-rich filament.
3.bFan Minimum Speed: 0% for the first 100 seconds — Allows heat retention during early layers.
3.cFan Maximum Speed: 15% starting at 8 seconds — Avoids overcooling that can lead to warping.
3.dKeep Fan Always On: OFF — Allows vapor to escape and avoids internal fogging.
3.eSlow Down for Cooling: ON — Improves surface finish with controlled cooling.
3.fForce Cooling for Overhangs: OFF — Overcooling can deform bridges in Timeplast.
3.gFan for Overhangs: 15% — Only for essential cooling in complex areas.
3.hPre-Start Fan Time: 2 seconds — Minimizes pressure differential during the first layer.4. Volumetric Flow
4.aMax Volumetric Speed: 12 mm³/s — Based on a melt flow index of ~15 g/10min, allows high-speed printing.
4.bRamming Speed: 3 mm³/s — Prevents bubbles or popping from pressure spikes.5. Retraction and Flow
5.aRetraction Distance: 0.4 mm — Minimal retraction required for soft filaments to avoid stringing.
5.bRetraction Speed: 15 mm/s — Slow enough to avoid pulling molten plastic.
5.cPressure Advance: 0.05 — Compensates for nozzle lag at high flow rates.
5.dFlow Ratio: 92% — Slight under-extrusion avoids swelling and surface artifacts.6. Precision Settings
6.aGap Closing Radius: 0.1 mm — Tolerant of gaps in thicker walls.
6.bArc Fitting: ON — Reduces G-code size and smooths curve transitions.
6.cElephant Foot Compensation: 0.1 mm — Offsets squishing in the first layer caused by large bead sizes.7. Walls and Shells
7.aWall Loops: 2 — Minimum for strength when using a 0.8 mm nozzle.
7.bDetect Thin Walls: ON — Ensures tight geometries aren’t skipped.
7.cTop/Bottom Shell Layers: 3 — Provides good coverage; increase if watertightness is needed.
7.dTop/Bottom Thickness: 1.2 mm — Equals 1.5x the nozzle size for solid strength.
7.eTop/Bottom Pattern: Monotonic — Distributes tension evenly and improves surface finish.8. Geometry and Movement
8.aWall Order: Inner before Outer — Creates cleaner outer surfaces.
8.bInfill First: OFF — Maintains precise outer dimensions.
8.cSmooth Speed Transition: ON — Prevents ringing caused by abrupt speed changes.
8.dSmooth Coefficient: 80 — Ideal damping for soft materials.
8.eAvoid Crossing Wall: ON — Minimizes stringing across part walls.
8.fMax Detour for Crossing: 10 mm or 5% — Balances time with print cleanliness.9. Layer and Width Settings
9.aLayer Height: 0.3 mm — Optimal for strength and resolution using a 0.8 mm nozzle.
9.bInitial Layer Height: 0.35 mm — Slightly higher to improve adhesion.
9.cLine Widths (all): 0.8 mm — Matches nozzle diameter for consistent extrusion.10. Seam Settings
10.aSeam Position: Aligned or Back — Use aligned for mechanical consistency, back for visual appeal.
10.bSmart Scarf Seam: ON — Automatically adjusts seam location to reduce visual impact.
10.cSeam Angle: 155° — Standard seam angle for clean transitions.
10.dSeam Steps: 10 — Smooths seam path and improves visual finish.11. Infill Settings
11.aWall/Infill Overlap: 10% — Prevents infill from deforming soft exterior walls.
11.bInfill Combination: ON — Consolidates paths for efficiency.
11.cDetect Floating Shells: ON — Ensures unsupported vertical structures are printed reliably.
11.dSparse Infill Density: 20–25% — Balanced rigidity vs. material use.
11.eSparse Pattern: Grid — Stable and efficient for flexible geometries.12. Speed Settings
12.aTravel: 160 mm/s — Fast but safe against backlash.
12.bInitial Layer: 15 mm/s — Prevents nozzle from skimming and ensures bed adhesion.
12.cOuter Wall: 60 mm/s — Controlled speed for surface quality.
12.dInner Wall: 90 mm/s — Slightly faster without compromising control.
12.eSmall Perimeter: 35 mm/s — Reduced speed for detailed geometry.
12.fTop Surface: 40 mm/s — Improves finish on topmost layers.
12.gInfill: 100–120 mm/s — Takes advantage of high flowability.13. Acceleration Settings
13.aNormal Print: 2000 mm/s² — Prevents ringing in soft filaments.
13.bTravel: 4000 mm/s² — Enables fast movement without harsh transitions.
13.cInitial Layer: 300 mm/s² — Gentle movement prevents lifting from the bed.
13.dOuter Wall: 1500 mm/s² — Improves outer surface clarity.
13.eInner Wall: 2000 mm/s² — Balanced for structural components.
13.fTop Surface: 1500 mm/s² — Ensures smooth detailing.14. Adhesion and Brims
14.aSkirt Loops: 2 — Helps prime nozzle and start cleanly.
14.bBrim Width: 6 mm — Helps hold soft materials down.
14.cBrim Gap: 0.15 mm — Allows for easy removal without tearing.15. Prime Tower and Flush Settings
15.aPrime Tower: ON — Purges moisture and early flow inconsistencies.
15.bTower Width: 40 mm — Prevents collapse due to heat.
15.cBrim Width (Tower): 4 mm — Adds stability to the purge base.
15.dFlush Into Support: ON — Discards unwanted early flow safely.16. G-Code Start Script
M900 K0.05 ; Pressure Advance M106 S0 ; Fan off G92 E0 G1 E15 F300 ; purge line G92 E0
17. Additional Notes
17.aDry filament at 100°C for 2 hours before use.
17.bStore with desiccant.
17.cKeep extruder door open to allow vapor to escape.
17.dAvoid long dwell times at high temperatures.If you need print settings for other nozzle sizes, feel free to reach out to us at timeplast@timeplast.com — we’ll be happy to help.
Free U.S. standard shipping on orders of 5+ spools!
Nutmeg Soap
-
Nutmeg Soap Gen 5 brings a dash of sweet spice into your 3D printing repertoire, turning everyday washing into a heartwarming treat. With real nutmeg essence infused into our foaming soap filament, each printed bar produces a creamy lather that carries the cozy scent of holiday baking and a hint of nutmeg’s natural soothing properties. Our Gen 5 formula ensures these unique soaps are as durable as they are delightful—lasting up to 10× longer than store-bought bars while filling your bath with the gentle warmth of spice. It’s a blend of creativity and comfort: you’re crafting not just a soap, but a fragrant experience that warms the soul and elevates your daily routine.
How it works: 70% structured water absorbs energy in-process, protecting nutmeg; water-soluble for steady scent with rinses.
Why Soap Gen 5? Cozy profile; fine particles can feel softly polished in prototypes.
Printing recommendations: For reliable prints, please always use a 0.8mm nozzle. A texture plate and a printing adhesive. So that first layer will adhere. For all of the other parameters, please use our specialized GPT here.
Print a warm, welcoming token.
-
Click here to access our new and improved TimeMass GPT Assistant. Just tell it your printer model and the TimeMass filament you're using—it will instantly recommend the exact parameters you need to start printing successfully.
Using a Bambu Lab printer?
Click here to download our updated Bambu Lab profile. All printing parameters are fully optimized and tested—just load the file and start printing.1. Introduction
These parameters are designed to help avoid printing issues; however, temperatures and speed timings can be adjusted based on your specific goals. For example, if you prefer a less rigid result, we recommend using a lower temperature. This section outlines a complete slicing and printing profile for TimeMass Soap, tailored for printers with a 0.8 mm nozzle. If the print is not being successful, please lower the nozzle temperature by 10°C and start over until an optimal print is achieved. Please check the manual for printing parameters.2. Temperature Settings
2.aNozzle Temperature: 230°C — Optimal for flowability while avoiding decomposition (which begins around 250°C).
2.bBed Temperature: 75°C — Ensures strong first-layer adhesion and prevents moisture bubbling.
2.cNozzle Temperature Range: 230–245°C — Timeplast melts around 165°C but prints best at 235°C for precise viscosity control.3. Cooling Settings
3.aNo Cooling for First Layers: 3 layers — Prevents shrinkage due to rapid cooling of moisture-rich filament.
3.bFan Minimum Speed: 0% for the first 100 seconds — Allows heat retention during early layers.
3.cFan Maximum Speed: 15% starting at 8 seconds — Avoids overcooling that can lead to warping.
3.dKeep Fan Always On: OFF — Allows vapor to escape and avoids internal fogging.
3.eSlow Down for Cooling: ON — Improves surface finish with controlled cooling.
3.fForce Cooling for Overhangs: OFF — Overcooling can deform bridges in Timeplast.
3.gFan for Overhangs: 15% — Only for essential cooling in complex areas.
3.hPre-Start Fan Time: 2 seconds — Minimizes pressure differential during the first layer.4. Volumetric Flow
4.aMax Volumetric Speed: 12 mm³/s — Based on a melt flow index of ~15 g/10min, allows high-speed printing.
4.bRamming Speed: 3 mm³/s — Prevents bubbles or popping from pressure spikes.5. Retraction and Flow
5.aRetraction Distance: 0.4 mm — Minimal retraction required for soft filaments to avoid stringing.
5.bRetraction Speed: 15 mm/s — Slow enough to avoid pulling molten plastic.
5.cPressure Advance: 0.05 — Compensates for nozzle lag at high flow rates.
5.dFlow Ratio: 92% — Slight under-extrusion avoids swelling and surface artifacts.6. Precision Settings
6.aGap Closing Radius: 0.1 mm — Tolerant of gaps in thicker walls.
6.bArc Fitting: ON — Reduces G-code size and smooths curve transitions.
6.cElephant Foot Compensation: 0.1 mm — Offsets squishing in the first layer caused by large bead sizes.7. Walls and Shells
7.aWall Loops: 2 — Minimum for strength when using a 0.8 mm nozzle.
7.bDetect Thin Walls: ON — Ensures tight geometries aren’t skipped.
7.cTop/Bottom Shell Layers: 3 — Provides good coverage; increase if watertightness is needed.
7.dTop/Bottom Thickness: 1.2 mm — Equals 1.5x the nozzle size for solid strength.
7.eTop/Bottom Pattern: Monotonic — Distributes tension evenly and improves surface finish.8. Geometry and Movement
8.aWall Order: Inner before Outer — Creates cleaner outer surfaces.
8.bInfill First: OFF — Maintains precise outer dimensions.
8.cSmooth Speed Transition: ON — Prevents ringing caused by abrupt speed changes.
8.dSmooth Coefficient: 80 — Ideal damping for soft materials.
8.eAvoid Crossing Wall: ON — Minimizes stringing across part walls.
8.fMax Detour for Crossing: 10 mm or 5% — Balances time with print cleanliness.9. Layer and Width Settings
9.aLayer Height: 0.3 mm — Optimal for strength and resolution using a 0.8 mm nozzle.
9.bInitial Layer Height: 0.35 mm — Slightly higher to improve adhesion.
9.cLine Widths (all): 0.8 mm — Matches nozzle diameter for consistent extrusion.10. Seam Settings
10.aSeam Position: Aligned or Back — Use aligned for mechanical consistency, back for visual appeal.
10.bSmart Scarf Seam: ON — Automatically adjusts seam location to reduce visual impact.
10.cSeam Angle: 155° — Standard seam angle for clean transitions.
10.dSeam Steps: 10 — Smooths seam path and improves visual finish.11. Infill Settings
11.aWall/Infill Overlap: 10% — Prevents infill from deforming soft exterior walls.
11.bInfill Combination: ON — Consolidates paths for efficiency.
11.cDetect Floating Shells: ON — Ensures unsupported vertical structures are printed reliably.
11.dSparse Infill Density: 20–25% — Balanced rigidity vs. material use.
11.eSparse Pattern: Grid — Stable and efficient for flexible geometries.12. Speed Settings
12.aTravel: 160 mm/s — Fast but safe against backlash.
12.bInitial Layer: 15 mm/s — Prevents nozzle from skimming and ensures bed adhesion.
12.cOuter Wall: 60 mm/s — Controlled speed for surface quality.
12.dInner Wall: 90 mm/s — Slightly faster without compromising control.
12.eSmall Perimeter: 35 mm/s — Reduced speed for detailed geometry.
12.fTop Surface: 40 mm/s — Improves finish on topmost layers.
12.gInfill: 100–120 mm/s — Takes advantage of high flowability.13. Acceleration Settings
13.aNormal Print: 2000 mm/s² — Prevents ringing in soft filaments.
13.bTravel: 4000 mm/s² — Enables fast movement without harsh transitions.
13.cInitial Layer: 300 mm/s² — Gentle movement prevents lifting from the bed.
13.dOuter Wall: 1500 mm/s² — Improves outer surface clarity.
13.eInner Wall: 2000 mm/s² — Balanced for structural components.
13.fTop Surface: 1500 mm/s² — Ensures smooth detailing.14. Adhesion and Brims
14.aSkirt Loops: 2 — Helps prime nozzle and start cleanly.
14.bBrim Width: 6 mm — Helps hold soft materials down.
14.cBrim Gap: 0.15 mm — Allows for easy removal without tearing.15. Prime Tower and Flush Settings
15.aPrime Tower: ON — Purges moisture and early flow inconsistencies.
15.bTower Width: 40 mm — Prevents collapse due to heat.
15.cBrim Width (Tower): 4 mm — Adds stability to the purge base.
15.dFlush Into Support: ON — Discards unwanted early flow safely.16. G-Code Start Script
M900 K0.05 ; Pressure Advance M106 S0 ; Fan off G92 E0 G1 E15 F300 ; purge line G92 E0
17. Additional Notes
17.aDry filament at 155 F for 2 hours before use.
17.bStore with desiccant.
17.cKeep extruder door open to allow vapor to escape.
17.dAvoid long dwell times at high temperatures.If you need any other assistance, feel free to reach out to us anytime at timeplast@timeplast.com — we’ll be happy to help.
Free U.S. standard shipping on orders of 5+ spools!
Coffee Soap
-
Brewing a perfect morning just got hands-on with Coffee Soap Gen 5. Imagine printing your own caffeinated soap bars that froth up with the comforting aroma of fresh coffee—each wash becomes an energizing yet soothing start to the day. Infused with real coffee essence, this foaming soap filament combines our Gen 5 technology for luxuriant lather and longevity with coffee’s natural deodorizing benefits. The result is a printed soap that doesn’t just cleanse; it perks up your senses and lasts through countless mornings, marrying the ritual of a great brew with the creativity of 3D printing.
How it works: 70% structured water protects roast notes through printing; water-soluble for steady scent with use (and a mild scrubby feel in prototypes).
Why Soap Gen 5? Helps mask kitchen odors; café-warm vibe.
Printing recommendations: For reliable prints, please always use a 0.8mm nozzle. A texture plate and a printing adhesive. So that first layer will adhere. For all of the other parameters, please use our specialized GPT here.
Print a café-fresh token.
-
Click here to access our new and improved TimeMass GPT Assistant. Just tell it your printer model and the TimeMass filament you're using—it will instantly recommend the exact parameters you need to start printing successfully.
Using a Bambu Lab printer?
Click here to download our updated Bambu Lab profile. All printing parameters are fully optimized and tested—just load the file and start printing.1. Introduction
These parameters are designed to help avoid printing issues; however, temperatures and speed timings can be adjusted based on your specific goals. For example, if you prefer a less rigid result, we recommend using a lower temperature. This section outlines a complete slicing and printing profile for TimeMass Soap, tailored for printers with a 0.8 mm nozzle. If the print is not being successful, please lower the nozzle temperature by 10°C and start over until an optimal print is achieved. Please check the manual for printing parameters.2. Temperature Settings
2.aNozzle Temperature: 230°C — Optimal for flowability while avoiding decomposition (which begins around 250°C).
2.bBed Temperature: 75°C — Ensures strong first-layer adhesion and prevents moisture bubbling.
2.cNozzle Temperature Range: 230–245°C — Timeplast melts around 165°C but prints best at 235°C for precise viscosity control.3. Cooling Settings
3.aNo Cooling for First Layers: 3 layers — Prevents shrinkage due to rapid cooling of moisture-rich filament.
3.bFan Minimum Speed: 0% for the first 100 seconds — Allows heat retention during early layers.
3.cFan Maximum Speed: 15% starting at 8 seconds — Avoids overcooling that can lead to warping.
3.dKeep Fan Always On: OFF — Allows vapor to escape and avoids internal fogging.
3.eSlow Down for Cooling: ON — Improves surface finish with controlled cooling.
3.fForce Cooling for Overhangs: OFF — Overcooling can deform bridges in Timeplast.
3.gFan for Overhangs: 15% — Only for essential cooling in complex areas.
3.hPre-Start Fan Time: 2 seconds — Minimizes pressure differential during the first layer.4. Volumetric Flow
4.aMax Volumetric Speed: 12 mm³/s — Based on a melt flow index of ~15 g/10min, allows high-speed printing.
4.bRamming Speed: 3 mm³/s — Prevents bubbles or popping from pressure spikes.5. Retraction and Flow
5.aRetraction Distance: 0.4 mm — Minimal retraction required for soft filaments to avoid stringing.
5.bRetraction Speed: 15 mm/s — Slow enough to avoid pulling molten plastic.
5.cPressure Advance: 0.05 — Compensates for nozzle lag at high flow rates.
5.dFlow Ratio: 92% — Slight under-extrusion avoids swelling and surface artifacts.6. Precision Settings
6.aGap Closing Radius: 0.1 mm — Tolerant of gaps in thicker walls.
6.bArc Fitting: ON — Reduces G-code size and smooths curve transitions.
6.cElephant Foot Compensation: 0.1 mm — Offsets squishing in the first layer caused by large bead sizes.7. Walls and Shells
7.aWall Loops: 2 — Minimum for strength when using a 0.8 mm nozzle.
7.bDetect Thin Walls: ON — Ensures tight geometries aren’t skipped.
7.cTop/Bottom Shell Layers: 3 — Provides good coverage; increase if watertightness is needed.
7.dTop/Bottom Thickness: 1.2 mm — Equals 1.5x the nozzle size for solid strength.
7.eTop/Bottom Pattern: Monotonic — Distributes tension evenly and improves surface finish.8. Geometry and Movement
8.aWall Order: Inner before Outer — Creates cleaner outer surfaces.
8.bInfill First: OFF — Maintains precise outer dimensions.
8.cSmooth Speed Transition: ON — Prevents ringing caused by abrupt speed changes.
8.dSmooth Coefficient: 80 — Ideal damping for soft materials.
8.eAvoid Crossing Wall: ON — Minimizes stringing across part walls.
8.fMax Detour for Crossing: 10 mm or 5% — Balances time with print cleanliness.9. Layer and Width Settings
9.aLayer Height: 0.3 mm — Optimal for strength and resolution using a 0.8 mm nozzle.
9.bInitial Layer Height: 0.35 mm — Slightly higher to improve adhesion.
9.cLine Widths (all): 0.8 mm — Matches nozzle diameter for consistent extrusion.10. Seam Settings
10.aSeam Position: Aligned or Back — Use aligned for mechanical consistency, back for visual appeal.
10.bSmart Scarf Seam: ON — Automatically adjusts seam location to reduce visual impact.
10.cSeam Angle: 155° — Standard seam angle for clean transitions.
10.dSeam Steps: 10 — Smooths seam path and improves visual finish.11. Infill Settings
11.aWall/Infill Overlap: 10% — Prevents infill from deforming soft exterior walls.
11.bInfill Combination: ON — Consolidates paths for efficiency.
11.cDetect Floating Shells: ON — Ensures unsupported vertical structures are printed reliably.
11.dSparse Infill Density: 20–25% — Balanced rigidity vs. material use.
11.eSparse Pattern: Grid — Stable and efficient for flexible geometries.12. Speed Settings
12.aTravel: 160 mm/s — Fast but safe against backlash.
12.bInitial Layer: 15 mm/s — Prevents nozzle from skimming and ensures bed adhesion.
12.cOuter Wall: 60 mm/s — Controlled speed for surface quality.
12.dInner Wall: 90 mm/s — Slightly faster without compromising control.
12.eSmall Perimeter: 35 mm/s — Reduced speed for detailed geometry.
12.fTop Surface: 40 mm/s — Improves finish on topmost layers.
12.gInfill: 100–120 mm/s — Takes advantage of high flowability.13. Acceleration Settings
13.aNormal Print: 2000 mm/s² — Prevents ringing in soft filaments.
13.bTravel: 4000 mm/s² — Enables fast movement without harsh transitions.
13.cInitial Layer: 300 mm/s² — Gentle movement prevents lifting from the bed.
13.dOuter Wall: 1500 mm/s² — Improves outer surface clarity.
13.eInner Wall: 2000 mm/s² — Balanced for structural components.
13.fTop Surface: 1500 mm/s² — Ensures smooth detailing.14. Adhesion and Brims
14.aSkirt Loops: 2 — Helps prime nozzle and start cleanly.
14.bBrim Width: 6 mm — Helps hold soft materials down.
14.cBrim Gap: 0.15 mm — Allows for easy removal without tearing.15. Prime Tower and Flush Settings
15.aPrime Tower: ON — Purges moisture and early flow inconsistencies.
15.bTower Width: 40 mm — Prevents collapse due to heat.
15.cBrim Width (Tower): 4 mm — Adds stability to the purge base.
15.dFlush Into Support: ON — Discards unwanted early flow safely.16. G-Code Start Script
M900 K0.05 ; Pressure Advance M106 S0 ; Fan off G92 E0 G1 E15 F300 ; purge line G92 E0
17. Additional Notes
17.aDry filament at 155 F for 2 hours before use.
17.bStore with desiccant.
17.cKeep extruder door open to allow vapor to escape.
17.dAvoid long dwell times at high temperatures.If you need any other assistance, feel free to reach out to us anytime at timeplast@timeplast.com — we’ll be happy to help.
Free U.S. standard shipping on orders of 5+ spools!
Vanilla Soap
-
Vanilla Soap Gen 5 invites you to indulge in a bathtime luxury that you crafted yourself. Our 3D-printable foaming soap filament is enriched with true vanilla essence, so every bar you print crests with silky, fragrant bubbles that wrap you in the familiar comfort of sweet vanilla. Engineered with our Gen 5 formula for exceptional lather and longevity, these vanilla-infused soaps last up to 10× longer than store-bought bars—making each creamy wash a lasting pleasure. It’s an experience of pure comfort and creativity intertwined: the warm, soothing scent of vanilla elevates your daily routine, while the innovation behind it speaks to the maker’s soul in you.
How it works: 70% structured water buffers heat so vanilla stays; water-soluble for soft, repeated release.
Why Soap Gen 5? A loved, cozy sweetness for daily care.
Printing recommendations: For reliable prints, please always use a 0.8mm nozzle. A texture plate and a printing adhesive. So that first layer will adhere. For all of the other parameters, please use our specialized GPT here.
Print a comforting accent.
-
Click here to access our new and improved TimeMass GPT Assistant. Just tell it your printer model and the TimeMass filament you're using—it will instantly recommend the exact parameters you need to start printing successfully.
Using a Bambu Lab printer?
Click here to download our updated Bambu Lab profile. All printing parameters are fully optimized and tested—just load the file and start printing.1. Introduction
These parameters are designed to help avoid printing issues; however, temperatures and speed timings can be adjusted based on your specific goals. For example, if you prefer a less rigid result, we recommend using a lower temperature. This section outlines a complete slicing and printing profile for TimeMass, tailored for printers with a 0.8 mm nozzle. If the print is not being successful, please lower the nozzle temperature by 10°C and start over until an optimal print is achieved. Please check the manual for printing parameters.2. Temperature Settings
2.aNozzle Temperature: 230°C — Optimal for flowability while avoiding decomposition (which begins around 250°C).
2.bBed Temperature: 75°C — Ensures strong first-layer adhesion and prevents moisture bubbling.
2.cNozzle Temperature Range: 230–245°C — Timeplast melts around 165°C but prints best at 235°C for precise viscosity control.3. Cooling Settings
3.aNo Cooling for First Layers: 3 layers — Prevents shrinkage due to rapid cooling of moisture-rich filament.
3.bFan Minimum Speed: 0% for the first 100 seconds — Allows heat retention during early layers.
3.cFan Maximum Speed: 15% starting at 8 seconds — Avoids overcooling that can lead to warping.
3.dKeep Fan Always On: OFF — Allows vapor to escape and avoids internal fogging.
3.eSlow Down for Cooling: ON — Improves surface finish with controlled cooling.
3.fForce Cooling for Overhangs: OFF — Overcooling can deform bridges in Timeplast.
3.gFan for Overhangs: 15% — Only for essential cooling in complex areas.
3.hPre-Start Fan Time: 2 seconds — Minimizes pressure differential during the first layer.4. Volumetric Flow
4.aMax Volumetric Speed: 12 mm³/s — Based on a melt flow index of ~15 g/10min, allows high-speed printing.
4.bRamming Speed: 3 mm³/s — Prevents bubbles or popping from pressure spikes.5. Retraction and Flow
5.aRetraction Distance: 0.4 mm — Minimal retraction required for soft filaments to avoid stringing.
5.bRetraction Speed: 15 mm/s — Slow enough to avoid pulling molten plastic.
5.cPressure Advance: 0.05 — Compensates for nozzle lag at high flow rates.
5.dFlow Ratio: 92% — Slight under-extrusion avoids swelling and surface artifacts.6. Precision Settings
6.aGap Closing Radius: 0.1 mm — Tolerant of gaps in thicker walls.
6.bArc Fitting: ON — Reduces G-code size and smooths curve transitions.
6.cElephant Foot Compensation: 0.1 mm — Offsets squishing in the first layer caused by large bead sizes.7. Walls and Shells
7.aWall Loops: 2 — Minimum for strength when using a 0.8 mm nozzle.
7.bDetect Thin Walls: ON — Ensures tight geometries aren’t skipped.
7.cTop/Bottom Shell Layers: 3 — Provides good coverage; increase if watertightness is needed.
7.dTop/Bottom Thickness: 1.2 mm — Equals 1.5x the nozzle size for solid strength.
7.eTop/Bottom Pattern: Monotonic — Distributes tension evenly and improves surface finish.8. Geometry and Movement
8.aWall Order: Inner before Outer — Creates cleaner outer surfaces.
8.bInfill First: OFF — Maintains precise outer dimensions.
8.cSmooth Speed Transition: ON — Prevents ringing caused by abrupt speed changes.
8.dSmooth Coefficient: 80 — Ideal damping for soft materials.
8.eAvoid Crossing Wall: ON — Minimizes stringing across part walls.
8.fMax Detour for Crossing: 10 mm or 5% — Balances time with print cleanliness.9. Layer and Width Settings
9.aLayer Height: 0.3 mm — Optimal for strength and resolution using a 0.8 mm nozzle.
9.bInitial Layer Height: 0.35 mm — Slightly higher to improve adhesion.
9.cLine Widths (all): 0.8 mm — Matches nozzle diameter for consistent extrusion.10. Seam Settings
10.aSeam Position: Aligned or Back — Use aligned for mechanical consistency, back for visual appeal.
10.bSmart Scarf Seam: ON — Automatically adjusts seam location to reduce visual impact.
10.cSeam Angle: 155° — Standard seam angle for clean transitions.
10.dSeam Steps: 10 — Smooths seam path and improves visual finish.11. Infill Settings
11.aWall/Infill Overlap: 10% — Prevents infill from deforming soft exterior walls.
11.bInfill Combination: ON — Consolidates paths for efficiency.
11.cDetect Floating Shells: ON — Ensures unsupported vertical structures are printed reliably.
11.dSparse Infill Density: 20–25% — Balanced rigidity vs. material use.
11.eSparse Pattern: Grid — Stable and efficient for flexible geometries.12. Speed Settings
12.aTravel: 160 mm/s — Fast but safe against backlash.
12.bInitial Layer: 15 mm/s — Prevents nozzle from skimming and ensures bed adhesion.
12.cOuter Wall: 60 mm/s — Controlled speed for surface quality.
12.dInner Wall: 90 mm/s — Slightly faster without compromising control.
12.eSmall Perimeter: 35 mm/s — Reduced speed for detailed geometry.
12.fTop Surface: 40 mm/s — Improves finish on topmost layers.
12.gInfill: 100–120 mm/s — Takes advantage of high flowability.13. Acceleration Settings
13.aNormal Print: 2000 mm/s² — Prevents ringing in soft filaments.
13.bTravel: 4000 mm/s² — Enables fast movement without harsh transitions.
13.cInitial Layer: 300 mm/s² — Gentle movement prevents lifting from the bed.
13.dOuter Wall: 1500 mm/s² — Improves outer surface clarity.
13.eInner Wall: 2000 mm/s² — Balanced for structural components.
13.fTop Surface: 1500 mm/s² — Ensures smooth detailing.14. Adhesion and Brims
14.aSkirt Loops: 2 — Helps prime nozzle and start cleanly.
14.bBrim Width: 6 mm — Helps hold soft materials down.
14.cBrim Gap: 0.15 mm — Allows for easy removal without tearing.15. Prime Tower and Flush Settings
15.aPrime Tower: ON — Purges moisture and early flow inconsistencies.
15.bTower Width: 40 mm — Prevents collapse due to heat.
15.cBrim Width (Tower): 4 mm — Adds stability to the purge base.
15.dFlush Into Support: ON — Discards unwanted early flow safely.16. G-Code Start Script
M900 K0.05 ; Pressure Advance M106 S0 ; Fan off G92 E0 G1 E15 F300 ; purge line G92 E0
17. Additional Notes
17.aDry filament at 155 F for 2 hours before use.
17.bStore with desiccant.
17.cKeep extruder door open to allow vapor to escape.
17.dAvoid long dwell times at high temperatures.If you need any other assistance, feel free to reach out to us anytime at timeplast@timeplast.com — we’ll be happy to help.
Free U.S. standard shipping on orders of 5+ spools!
Lemongrass Soap
-
Lemongrass Soap Gen 5 invigorates your cleansing routine with a bright, herbal zest crafted by your own 3D printer. Packed with real lemongrass essence, this foaming soap filament produces lively bars that burst with refreshing citrus-green lather—like washing with a ray of sunshine on a summer morning. Our Gen 5 soap tech ensures each bar is both sumptuous and sensible: it foams generously, outlasts ordinary soaps by a wide margin, and carries lemongrass’s natural antiseptic energy into every use. You’re not just printing soap; you’re creating a vibrant, feel-good experience that rejuvenates your senses and showcases the harmony of nature and innovation in the palm of your hand.
How it works: 70% structured water vents and preserves citrus brightness; water-soluble for clean, repeatable release.
Why Soap Gen 5? Everyday freshness that cuts through odors.
Printing recommendations: For reliable prints, please always use a 0.8mm nozzle. A texture plate and a printing adhesive. So that first layer will adhere. For all of the other parameters, please use our specialized GPT here.
Print fresh.
-
Click here to access our new and improved TimeMass GPT Assistant. Just tell it your printer model and the TimeMass filament you're using—it will instantly recommend the exact parameters you need to start printing successfully.
Using a Bambu Lab printer?
Click here to download our updated Bambu Lab profile. All printing parameters are fully optimized and tested—just load the file and start printing.1. Introduction
These parameters are designed to help avoid printing issues; however, temperatures and speed timings can be adjusted based on your specific goals. For example, if you prefer a less rigid result, we recommend using a lower temperature. This section outlines a complete slicing and printing profile for TimeMass Soap, tailored for printers with a 0.8 mm nozzle. If the print is not being successful, please lower the nozzle temperature by 10°C and start over until an optimal print is achieved. Please check the manual for printing parameters.2. Temperature Settings
2.aNozzle Temperature: 230°C — Optimal for flowability while avoiding decomposition (which begins around 250°C).
2.bBed Temperature: 75°C — Ensures strong first-layer adhesion and prevents moisture bubbling.
2.cNozzle Temperature Range: 230–245°C — Timeplast melts around 165°C but prints best at 235°C for precise viscosity control.3. Cooling Settings
3.aNo Cooling for First Layers: 3 layers — Prevents shrinkage due to rapid cooling of moisture-rich filament.
3.bFan Minimum Speed: 0% for the first 100 seconds — Allows heat retention during early layers.
3.cFan Maximum Speed: 15% starting at 8 seconds — Avoids overcooling that can lead to warping.
3.dKeep Fan Always On: OFF — Allows vapor to escape and avoids internal fogging.
3.eSlow Down for Cooling: ON — Improves surface finish with controlled cooling.
3.fForce Cooling for Overhangs: OFF — Overcooling can deform bridges in Timeplast.
3.gFan for Overhangs: 15% — Only for essential cooling in complex areas.
3.hPre-Start Fan Time: 2 seconds — Minimizes pressure differential during the first layer.4. Volumetric Flow
4.aMax Volumetric Speed: 12 mm³/s — Based on a melt flow index of ~15 g/10min, allows high-speed printing.
4.bRamming Speed: 3 mm³/s — Prevents bubbles or popping from pressure spikes.5. Retraction and Flow
5.aRetraction Distance: 0.4 mm — Minimal retraction required for soft filaments to avoid stringing.
5.bRetraction Speed: 15 mm/s — Slow enough to avoid pulling molten plastic.
5.cPressure Advance: 0.05 — Compensates for nozzle lag at high flow rates.
5.dFlow Ratio: 92% — Slight under-extrusion avoids swelling and surface artifacts.6. Precision Settings
6.aGap Closing Radius: 0.1 mm — Tolerant of gaps in thicker walls.
6.bArc Fitting: ON — Reduces G-code size and smooths curve transitions.
6.cElephant Foot Compensation: 0.1 mm — Offsets squishing in the first layer caused by large bead sizes.7. Walls and Shells
7.aWall Loops: 2 — Minimum for strength when using a 0.8 mm nozzle.
7.bDetect Thin Walls: ON — Ensures tight geometries aren’t skipped.
7.cTop/Bottom Shell Layers: 3 — Provides good coverage; increase if watertightness is needed.
7.dTop/Bottom Thickness: 1.2 mm — Equals 1.5x the nozzle size for solid strength.
7.eTop/Bottom Pattern: Monotonic — Distributes tension evenly and improves surface finish.8. Geometry and Movement
8.aWall Order: Inner before Outer — Creates cleaner outer surfaces.
8.bInfill First: OFF — Maintains precise outer dimensions.
8.cSmooth Speed Transition: ON — Prevents ringing caused by abrupt speed changes.
8.dSmooth Coefficient: 80 — Ideal damping for soft materials.
8.eAvoid Crossing Wall: ON — Minimizes stringing across part walls.
8.fMax Detour for Crossing: 10 mm or 5% — Balances time with print cleanliness.9. Layer and Width Settings
9.aLayer Height: 0.3 mm — Optimal for strength and resolution using a 0.8 mm nozzle.
9.bInitial Layer Height: 0.35 mm — Slightly higher to improve adhesion.
9.cLine Widths (all): 0.8 mm — Matches nozzle diameter for consistent extrusion.10. Seam Settings
10.aSeam Position: Aligned or Back — Use aligned for mechanical consistency, back for visual appeal.
10.bSmart Scarf Seam: ON — Automatically adjusts seam location to reduce visual impact.
10.cSeam Angle: 155° — Standard seam angle for clean transitions.
10.dSeam Steps: 10 — Smooths seam path and improves visual finish.11. Infill Settings
11.aWall/Infill Overlap: 10% — Prevents infill from deforming soft exterior walls.
11.bInfill Combination: ON — Consolidates paths for efficiency.
11.cDetect Floating Shells: ON — Ensures unsupported vertical structures are printed reliably.
11.dSparse Infill Density: 20–25% — Balanced rigidity vs. material use.
11.eSparse Pattern: Grid — Stable and efficient for flexible geometries.12. Speed Settings
12.aTravel: 160 mm/s — Fast but safe against backlash.
12.bInitial Layer: 15 mm/s — Prevents nozzle from skimming and ensures bed adhesion.
12.cOuter Wall: 60 mm/s — Controlled speed for surface quality.
12.dInner Wall: 90 mm/s — Slightly faster without compromising control.
12.eSmall Perimeter: 35 mm/s — Reduced speed for detailed geometry.
12.fTop Surface: 40 mm/s — Improves finish on topmost layers.
12.gInfill: 100–120 mm/s — Takes advantage of high flowability.13. Acceleration Settings
13.aNormal Print: 2000 mm/s² — Prevents ringing in soft filaments.
13.bTravel: 4000 mm/s² — Enables fast movement without harsh transitions.
13.cInitial Layer: 300 mm/s² — Gentle movement prevents lifting from the bed.
13.dOuter Wall: 1500 mm/s² — Improves outer surface clarity.
13.eInner Wall: 2000 mm/s² — Balanced for structural components.
13.fTop Surface: 1500 mm/s² — Ensures smooth detailing.14. Adhesion and Brims
14.aSkirt Loops: 2 — Helps prime nozzle and start cleanly.
14.bBrim Width: 6 mm — Helps hold soft materials down.
14.cBrim Gap: 0.15 mm — Allows for easy removal without tearing.15. Prime Tower and Flush Settings
15.aPrime Tower: ON — Purges moisture and early flow inconsistencies.
15.bTower Width: 40 mm — Prevents collapse due to heat.
15.cBrim Width (Tower): 4 mm — Adds stability to the purge base.
15.dFlush Into Support: ON — Discards unwanted early flow safely.16. G-Code Start Script
M900 K0.05 ; Pressure Advance M106 S0 ; Fan off G92 E0 G1 E15 F300 ; purge line G92 E0
17. Additional Notes
17.aDry filament at 155 F for 2 hours before use.
17.bStore with desiccant.
17.cKeep extruder door open to allow vapor to escape.
17.dAvoid long dwell times at high temperatures.If you need any other assistance, feel free to reach out to us anytime at timeplast@timeplast.com — we’ll be happy to help.
Free U.S. standard shipping on orders of 5+ spools!
Ginger Soap
-
Ginger Soap Gen 5 brings a revitalizing touch of spice to the realm of 3D-printed bath essentials. Infused with genuine ginger extract, this specialty filament lets you craft foaming soap bars that wash your hands with creamy lather and a gentle gingery warmth—comforting and stimulating, like a soothing ginger bath on a chilly day. Thanks to our Gen 5 technology, these ginger-infused soaps last significantly longer than conventional bars, and deliver ginger’s subtle antimicrobial benefits with every use. It’s a fusion of wellness and creativity: you’re printing a humble bar of soap that surprises with spa-like qualities, adding a little zest and care to your everyday routine.
How it works: Ginger normally burns near 200 °C; 70% structured water releases as you print and shields the botanical so the finished part keeps its lively aroma. Water-soluble for gradual scent bloom.
Why Soap Gen 5? An uplifting note that turns routine washing into a quick pick-me-up.
Printing recommendations: For reliable prints, please always use a 0.8mm nozzle. A texture plate and a printing adhesive. So that first layer will adhere. For all of the other parameters, please use our specialized GPT here.
Print an instant mood boost.
-
Click here to access our new and improved TimeMass GPT Assistant. Just tell it your printer model and the TimeMass filament you're using—it will instantly recommend the exact parameters you need to start printing successfully.
Using a Bambu Lab printer?
Click here to download our updated Bambu Lab profile. All printing parameters are fully optimized and tested—just load the file and start printing.1. Introduction
These parameters are designed to help avoid printing issues; however, temperatures and speed timings can be adjusted based on your specific goals. For example, if you prefer a less rigid result, we recommend using a lower temperature. This section outlines a complete slicing and printing profile for TimeMass, tailored for printers with a 0.8 mm nozzle. If the print is not being successful, please lower the nozzle temperature by 10°C and start over until an optimal print is achieved. Please check the manual for printing parameters.2. Temperature Settings
2.aNozzle Temperature: 230°C — Optimal for flowability while avoiding decomposition (which begins around 250°C).
2.bBed Temperature: 75°C — Ensures strong first-layer adhesion and prevents moisture bubbling.
2.cNozzle Temperature Range: 230–245°C — Timeplast melts around 165°C but prints best at 235°C for precise viscosity control.3. Cooling Settings
3.aNo Cooling for First Layers: 3 layers — Prevents shrinkage due to rapid cooling of moisture-rich filament.
3.bFan Minimum Speed: 0% for the first 100 seconds — Allows heat retention during early layers.
3.cFan Maximum Speed: 15% starting at 8 seconds — Avoids overcooling that can lead to warping.
3.dKeep Fan Always On: OFF — Allows vapor to escape and avoids internal fogging.
3.eSlow Down for Cooling: ON — Improves surface finish with controlled cooling.
3.fForce Cooling for Overhangs: OFF — Overcooling can deform bridges in Timeplast.
3.gFan for Overhangs: 15% — Only for essential cooling in complex areas.
3.hPre-Start Fan Time: 2 seconds — Minimizes pressure differential during the first layer.4. Volumetric Flow
4.aMax Volumetric Speed: 12 mm³/s — Based on a melt flow index of ~15 g/10min, allows high-speed printing.
4.bRamming Speed: 3 mm³/s — Prevents bubbles or popping from pressure spikes.5. Retraction and Flow
5.aRetraction Distance: 0.4 mm — Minimal retraction required for soft filaments to avoid stringing.
5.bRetraction Speed: 15 mm/s — Slow enough to avoid pulling molten plastic.
5.cPressure Advance: 0.05 — Compensates for nozzle lag at high flow rates.
5.dFlow Ratio: 92% — Slight under-extrusion avoids swelling and surface artifacts.6. Precision Settings
6.aGap Closing Radius: 0.1 mm — Tolerant of gaps in thicker walls.
6.bArc Fitting: ON — Reduces G-code size and smooths curve transitions.
6.cElephant Foot Compensation: 0.1 mm — Offsets squishing in the first layer caused by large bead sizes.7. Walls and Shells
7.aWall Loops: 2 — Minimum for strength when using a 0.8 mm nozzle.
7.bDetect Thin Walls: ON — Ensures tight geometries aren’t skipped.
7.cTop/Bottom Shell Layers: 3 — Provides good coverage; increase if watertightness is needed.
7.dTop/Bottom Thickness: 1.2 mm — Equals 1.5x the nozzle size for solid strength.
7.eTop/Bottom Pattern: Monotonic — Distributes tension evenly and improves surface finish.8. Geometry and Movement
8.aWall Order: Inner before Outer — Creates cleaner outer surfaces.
8.bInfill First: OFF — Maintains precise outer dimensions.
8.cSmooth Speed Transition: ON — Prevents ringing caused by abrupt speed changes.
8.dSmooth Coefficient: 80 — Ideal damping for soft materials.
8.eAvoid Crossing Wall: ON — Minimizes stringing across part walls.
8.fMax Detour for Crossing: 10 mm or 5% — Balances time with print cleanliness.9. Layer and Width Settings
9.aLayer Height: 0.3 mm — Optimal for strength and resolution using a 0.8 mm nozzle.
9.bInitial Layer Height: 0.35 mm — Slightly higher to improve adhesion.
9.cLine Widths (all): 0.8 mm — Matches nozzle diameter for consistent extrusion.10. Seam Settings
10.aSeam Position: Aligned or Back — Use aligned for mechanical consistency, back for visual appeal.
10.bSmart Scarf Seam: ON — Automatically adjusts seam location to reduce visual impact.
10.cSeam Angle: 155° — Standard seam angle for clean transitions.
10.dSeam Steps: 10 — Smooths seam path and improves visual finish.11. Infill Settings
11.aWall/Infill Overlap: 10% — Prevents infill from deforming soft exterior walls.
11.bInfill Combination: ON — Consolidates paths for efficiency.
11.cDetect Floating Shells: ON — Ensures unsupported vertical structures are printed reliably.
11.dSparse Infill Density: 20–25% — Balanced rigidity vs. material use.
11.eSparse Pattern: Grid — Stable and efficient for flexible geometries.12. Speed Settings
12.aTravel: 160 mm/s — Fast but safe against backlash.
12.bInitial Layer: 15 mm/s — Prevents nozzle from skimming and ensures bed adhesion.
12.cOuter Wall: 60 mm/s — Controlled speed for surface quality.
12.dInner Wall: 90 mm/s — Slightly faster without compromising control.
12.eSmall Perimeter: 35 mm/s — Reduced speed for detailed geometry.
12.fTop Surface: 40 mm/s — Improves finish on topmost layers.
12.gInfill: 100–120 mm/s — Takes advantage of high flowability.13. Acceleration Settings
13.aNormal Print: 2000 mm/s² — Prevents ringing in soft filaments.
13.bTravel: 4000 mm/s² — Enables fast movement without harsh transitions.
13.cInitial Layer: 300 mm/s² — Gentle movement prevents lifting from the bed.
13.dOuter Wall: 1500 mm/s² — Improves outer surface clarity.
13.eInner Wall: 2000 mm/s² — Balanced for structural components.
13.fTop Surface: 1500 mm/s² — Ensures smooth detailing.14. Adhesion and Brims
14.aSkirt Loops: 2 — Helps prime nozzle and start cleanly.
14.bBrim Width: 6 mm — Helps hold soft materials down.
14.cBrim Gap: 0.15 mm — Allows for easy removal without tearing.15. Prime Tower and Flush Settings
15.aPrime Tower: ON — Purges moisture and early flow inconsistencies.
15.bTower Width: 40 mm — Prevents collapse due to heat.
15.cBrim Width (Tower): 4 mm — Adds stability to the purge base.
15.dFlush Into Support: ON — Discards unwanted early flow safely.16. G-Code Start Script
M900 K0.05 ; Pressure Advance M106 S0 ; Fan off G92 E0 G1 E15 F300 ; purge line G92 E0
17. Additional Notes
17.aDry filament at 155 F for 2 hours before use.
17.bStore with desiccant.
17.cKeep extruder door open to allow vapor to escape.
17.dAvoid long dwell times at high temperatures.If you need any other assistance, feel free to reach out to us anytime at timeplast@timeplast.com — we’ll be happy to help.
Free U.S. standard shipping on orders of 5+ spools!
Meet the Solution
-

Certified 100% Water Soluble
ASTM E 1148
-

Certified 100% PFAs-free
ASTM D7979-19
-

70% water, 30% sugar, vinegar, proprietary in-house Polyethenol and Calcium components
-

Patented Pabyss - The Plastic Abyss
A “Molecular Disintegrator” bottomless trashcan.
Metal Surface
The non-metal, metal filament
This demonstration proves that TimeMass Metal Surface isn’t just a filament—it’s an innovative functional material capable of creating lightweight, realistic metallic objects that can even attract magnets! By simply dipping and powder-coating with iron filings, you get a stunning, durable metal effect without complex post-processing.
Fire
A Burning 3D printing filament
Sound on! Listen to the built-in crackling noise
In the video: A TimeMass Fire Benchy boat burning at a slower, more controlled pace. Check the difference in the flame’s color.
Combustible Polymer Matrix: A water-soluble polymer that burns cleanly. This matrix forms the main body of the filament.
Water-Embedded Microstructure: Tiny microcapsules containing water distributed throughout the filament.
Fiber Reinforcement: Thin, slow-burning fibers running through the filament, mimicking the wick structure in traditional candles.
Water Vapor Release: As the filament burns, the embedded water slowly evaporates. This vapor acts as a heat sink, regulating the burn rate and temperature, much like how a candle wick regulates the flame.
Localized Cooling: The release of water vapor creates localized cooling zones, preventing rapid combustion and ensuring a steady, controlled flame height.
Fiber-Wick Effect: The embedded fibers function similarly to a candle wick, channeling the flame and maintaining a consistent burn path. This guides the flame through the filament, layer by layer, in a predictable manner.
We believe TimeMass Fire will burn significantly cleaner than conventional filaments due to its 70% water-based composition. However, we have not yet tested all potential combustion byproducts. For safety, please use this filament only in a well-ventilated area.
In the video a PLA benchy boat burning.
PLA (Polylactic Acid) is not designed for burning and presents several disadvantages compared to Time-Mass - Fire:
Uncontrolled Combustion: PLA burns unpredictably, often resulting in irregular flames, soot production, and unpleasant odors.
Toxic Fumes: Burning PLA can release potentially harmful chemicals, making it unsuitable for controlled applications like candles.
Rapid Burn Rate: PLA lacks any inherent mechanism to regulate the burn rate, leading to fast and uneven combustion.
Light
The illumination filament
Experience the future of light with TimeMass Light, our cutting-edge illumination filament. Designed to efficiently transport and diffuse light, this revolutionary material opens new possibilities for 3D-printed lighting solutions.
Watch our videos to see how TimeMass Light seamlessly channels and disperses light, bringing your creations to life with stunning visual effects.
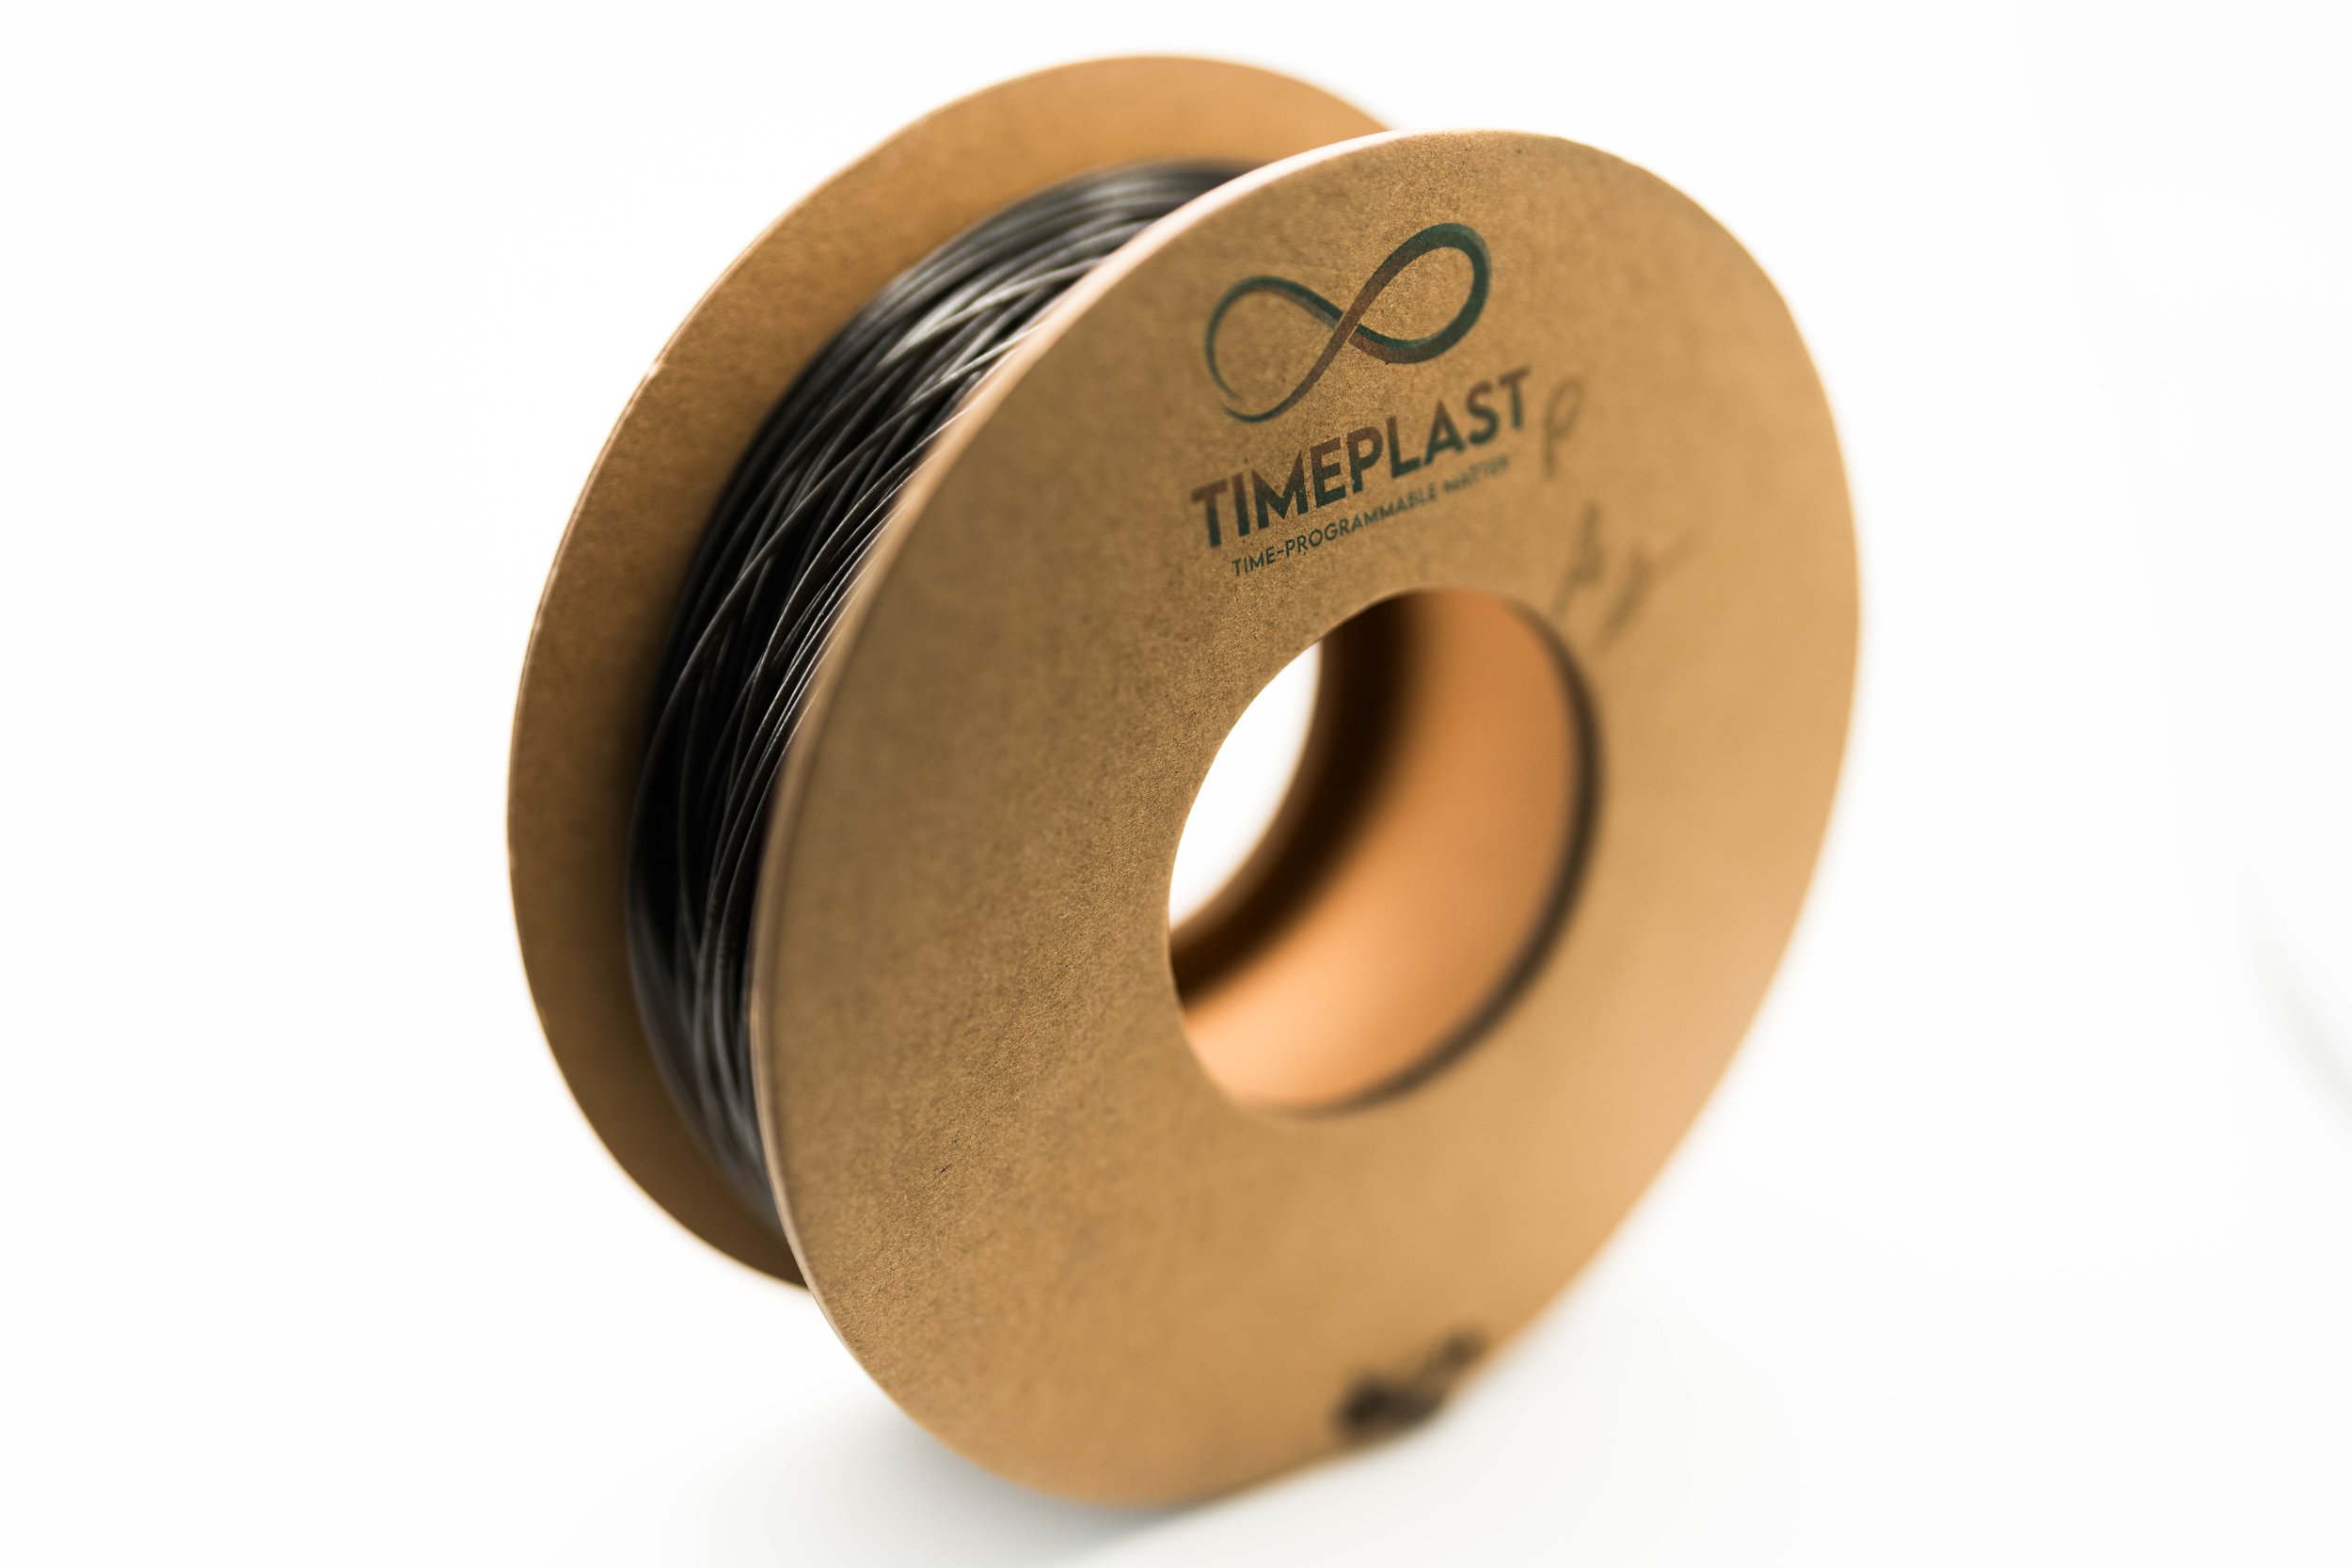

The possibilities are endless
Time-programmed wearables: Like artistic shoes, with incredible designs and at a very low cost of production.
Self-Eroding Marine Structures: Ocean-based supports that provide habitats for marine life and dissolve over time to release beneficial minerals, enriching marine ecosystems naturally.
Automated Farming Components: Timed-dissolving planters that release nutrients and water at key stages of plant growth, optimizing crop health and reducing artificial fertilizers.
Self-destructive Construction Scaffolding: Temporary, self-dissolving scaffolding for construction projects, removing the need for disassembly and minimizing post-construction waste.
Temporary Floating Platforms for Aquatic Events: Modular, dissolvable platforms for water-based events that disappear afterward, leaving the environment undisturbed.
Self-Deconstructing Medical Implants: Medical implants that dissolve once healing is complete, reducing the need for follow-up surgeries and minimizing infection risks.
Slow-Releasing Pesticide Capsules: Agricultural capsules that dissolve over time to release nutrients and pesticides sequentially, optimizing crop protection and reducing chemical waste.
Programmable Packaging Solutions: Water-soluble packaging for single-use items or perishables that disappears after disposal, reducing plastic waste effectively.
Zero-waste Temporary Art Installations: Timed art pieces designed to dissolve over time, creating ephemeral installations that leave no environmental impact, with increased art appreciation due to its ephemeral nature.
Ocean Buoys for Wildlife Monitoring: Timed-dissolving buoys that monitor marine life and disappear after their mission, preventing marine debris.
Personalized Fitness and Wellness Devices: Disposable fitness trackers that dissolve after use, releasing beneficial compounds, offering convenience with no waste.
Smart Infrastructure with Automated Deconstruction: Self-dissolving infrastructure for temporary construction needs, saving on cleanup costs and reducing waste when no longer needed.
Fiber
Sacrificial Polymer Technology for soft 3D printed fabrics
In the image: Our 1.75mm Fiber filament.
What is TimeMass Fiber?
It’s a version of our filaments which is made of a composite Timeplast material, consisting of:
Core or Microfibers as Structural Component: These are durable, flexible strands embedded within the filament. They act as the final "yarn" or fabric structure.
Matrix or Outer Material as the Sacrificial Polymer: Surrounding the structural fibers, the sacrificial polymer serves as a temporary binding material, holding the microfibers in a specific shape during the 3D printing process.
This dual-material design within a single filament eliminates the need for a separate support material, simplifying the printing process and making it possible to achieve very thin fibers
In the image: The same fiber filament shown previously, but after 24 hours of exposure to water, the fibers begin to emerge.
When you print with this filament:
Layer Formation: The filament is deposited in layers, with the sacrificial polymer temporarily binding the fibers to maintain the desired geometry and tension until post-processing.
During printing, the sacrificial polymer:
Supports intricate designs and fine fiber orientation, acting as scaffolding during the build process.
Provides enough structural integrity to enable overhangs or complex shapes without collapsing.

In the image: A close-up view of the fibers themselves.
After printing, the object undergoes a sacrificial polymer removal process:
The sacrificial polymer is engineered to dissolve or disintegrate when exposed to room-temperature water.
As the sacrificial polymer dissolves, it leaves behind only the structural fibers, which are now loosely interwoven or patterned to create a fabric-like material.
The final printed object has to be dried out (for example in a food dehydrator) up until it achieves the desired final texture.
The remaining structure:
Retains flexibility and softness because the fibers were embedded in a precise pattern, mimicking woven or knitted textiles.
Has microvoids and interconnected fiber networks where the sacrificial material was removed, enhancing breathability and softness.
In the image: The before-and-after.
The final product achieves fabric-like properties because:
Fiber Orientation: The structural fibers remain in a pattern that mimics traditional fabric weaving, providing flexibility and drapability.
Tunable Thickness and Texture: By adjusting the sacrificial polymer-to-design ratio and the printing pattern, the properties of the resulting fabric can be tailored for softness, elasticity, or even stretchability.
Porosity: The dissolution of the sacrificial polymer creates spaces between the fibers, allowing the fabric to feel light and breathable.
Applications:
Fashion: Soft, customizable 3D-printed fabrics for garments with intricate patterns and dynamic properties (e.g., shape memory or thermal adaptability).
Medical: Biocompatible fabrics for bandages, surgical meshes, or wearable sensors.
Soft Robotics: Lightweight, flexible materials for artificial skins or soft robotic components.
Eco-Friendly Textiles: Fully recyclable or biodegradable fabrics due to the innovative polymer chemistry of Timeplast.
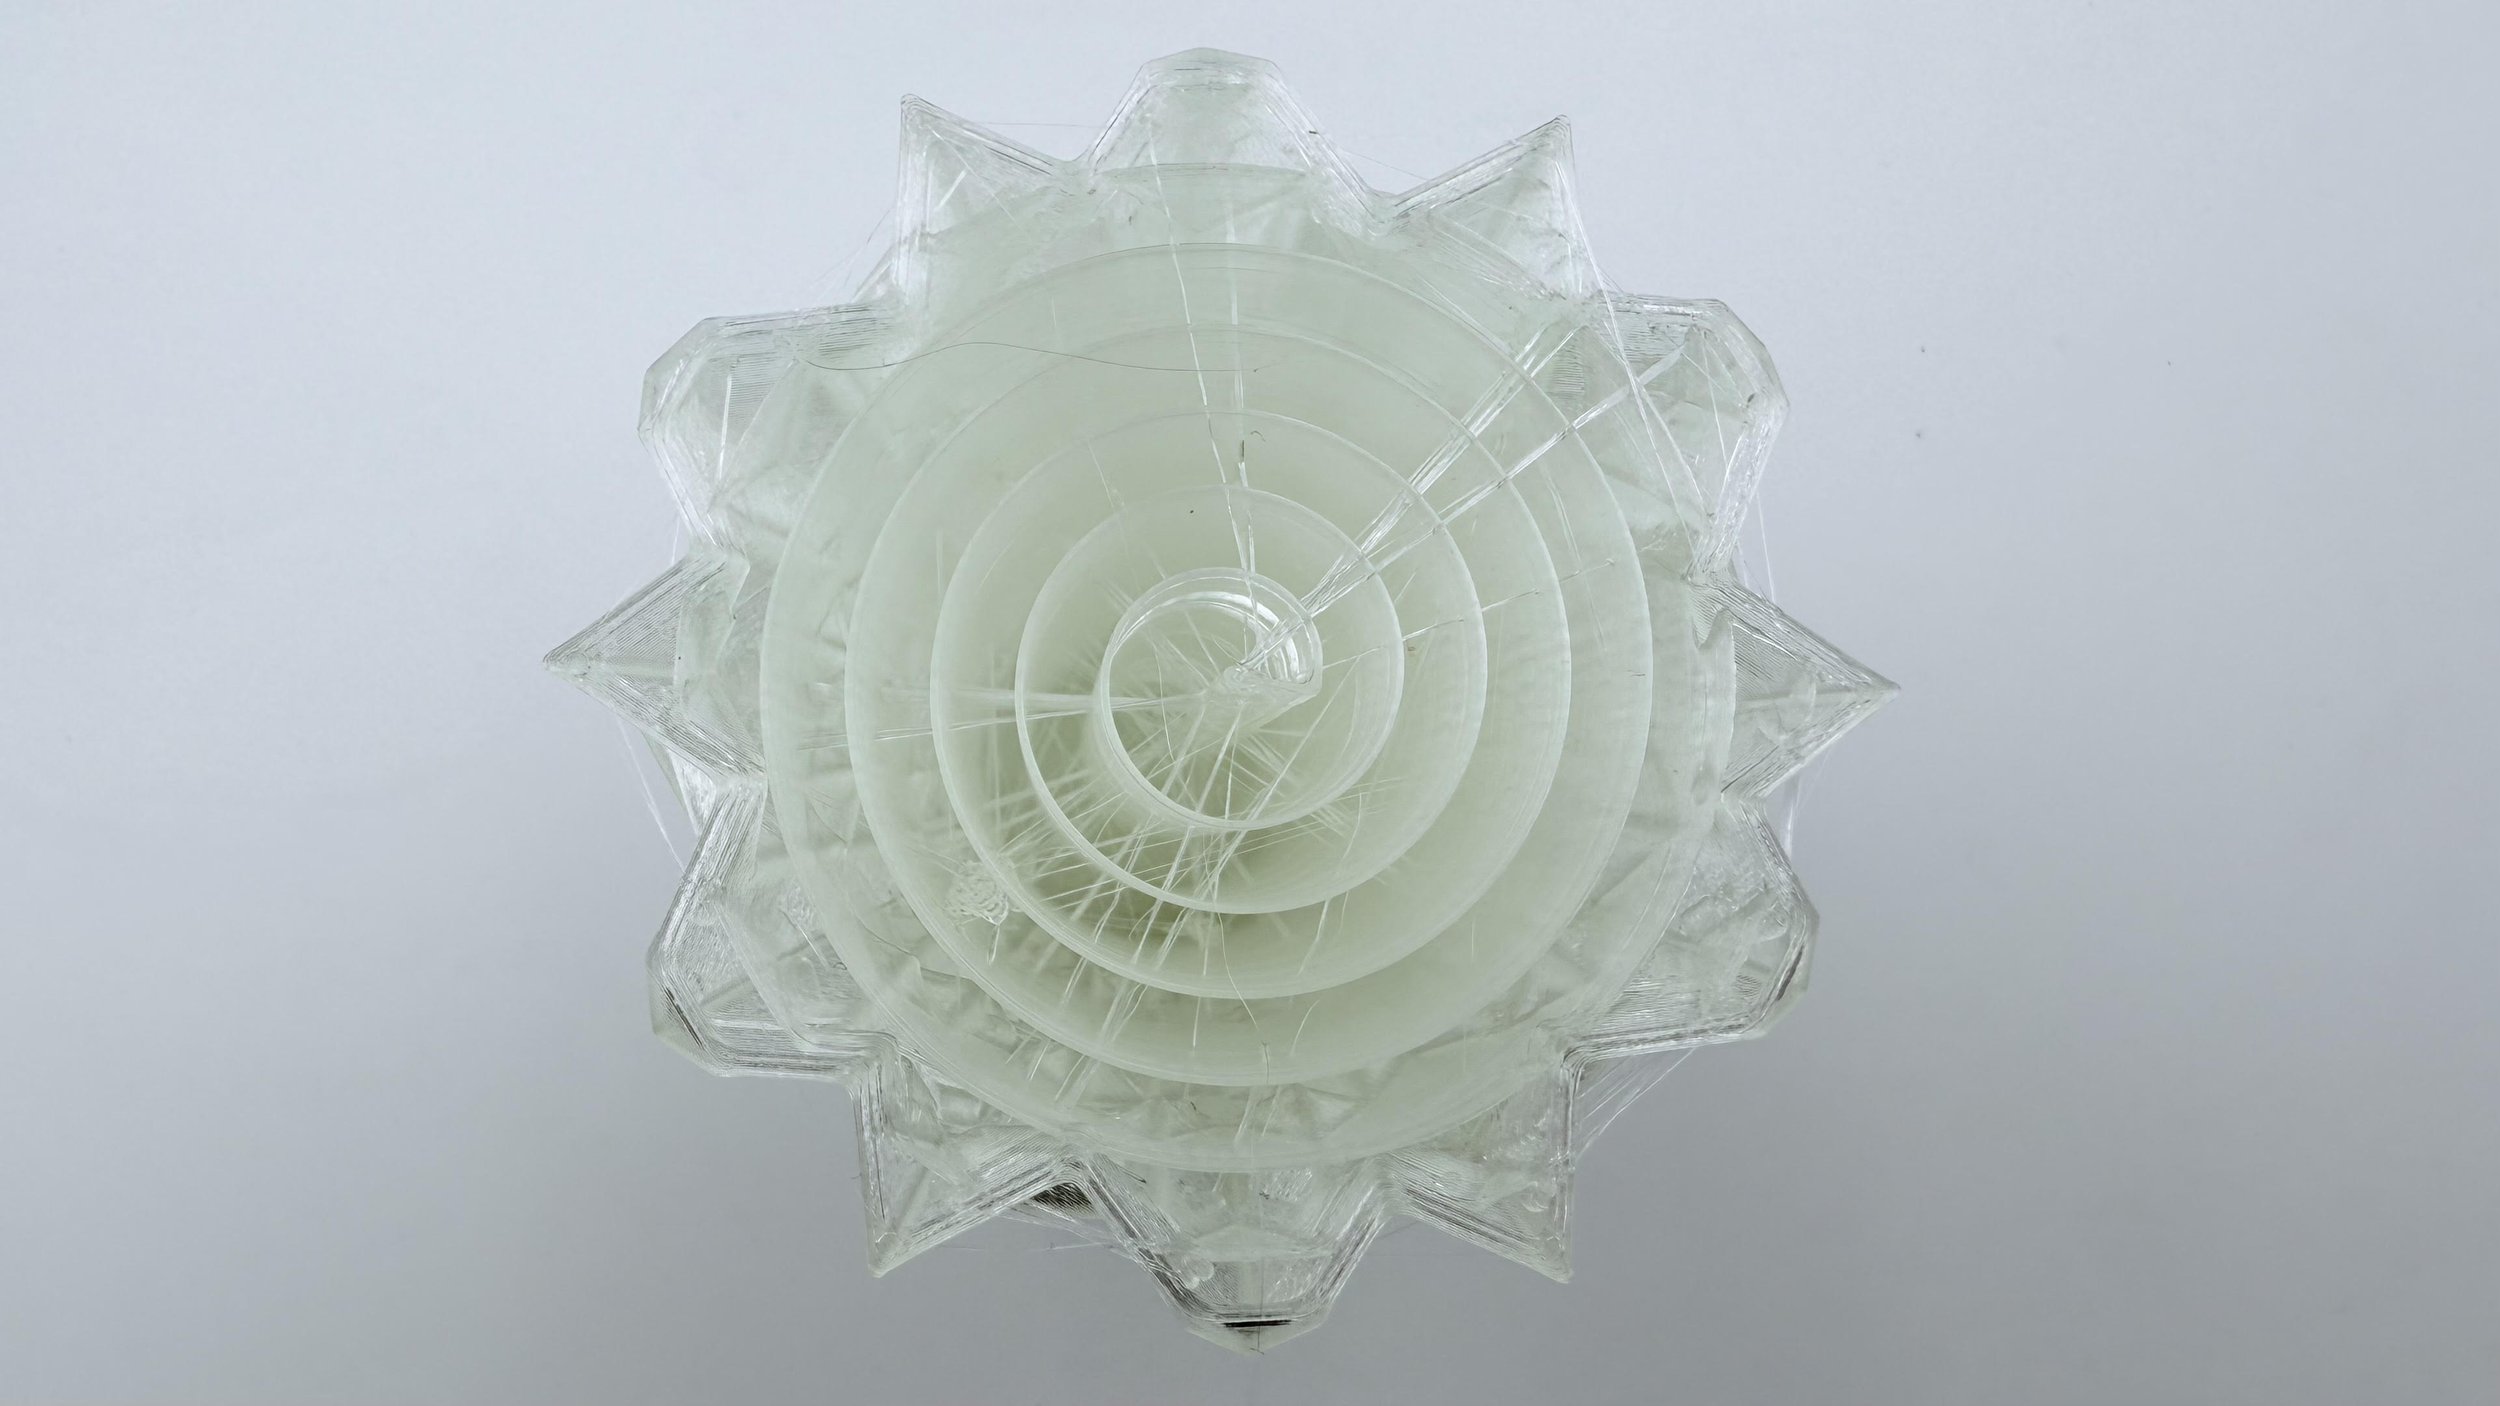
The best
Support filament in the 3D printing world period.
When we say TimeMass is the best support filament, it’s because we genuinely believe it to be true based on our testing and experience.
TimeMass stands out due to its exceptionally high molecular weight—the highest of any support filament we’ve tested at Timeplast. Combined with the non-toxic nature of our proprietary materials, you can print all day without worrying about releasing harmful chemicals into the air.
Additionally, TimeMass is an elastomer, which means it offers a unique combination of flexibility and water solubility. This allows supports to detach in a single stroke, making post-processing easier and cleaner. The high molecular weight also contributes to high-definition prints, setting a new standard for support filaments.
While materials like BVOH, PEG, and HIPS have been used for scientific purposes at much higher price points and are derived from conventional non-polar polymer chains, Time-Mass delivers a superior balance of affordability, safety, and functionality. We believe these factors make it an ideal choice for the average 3D printing enthusiast looking for a reliable and high-performing support filament.
Check the flexibility:
Active.
Extended.
Passive.
Simulate 1000 years in one minute - Or Unleash your artistic side with organic deformations for your otherwise perfect prints with.
TimeMass Microwave
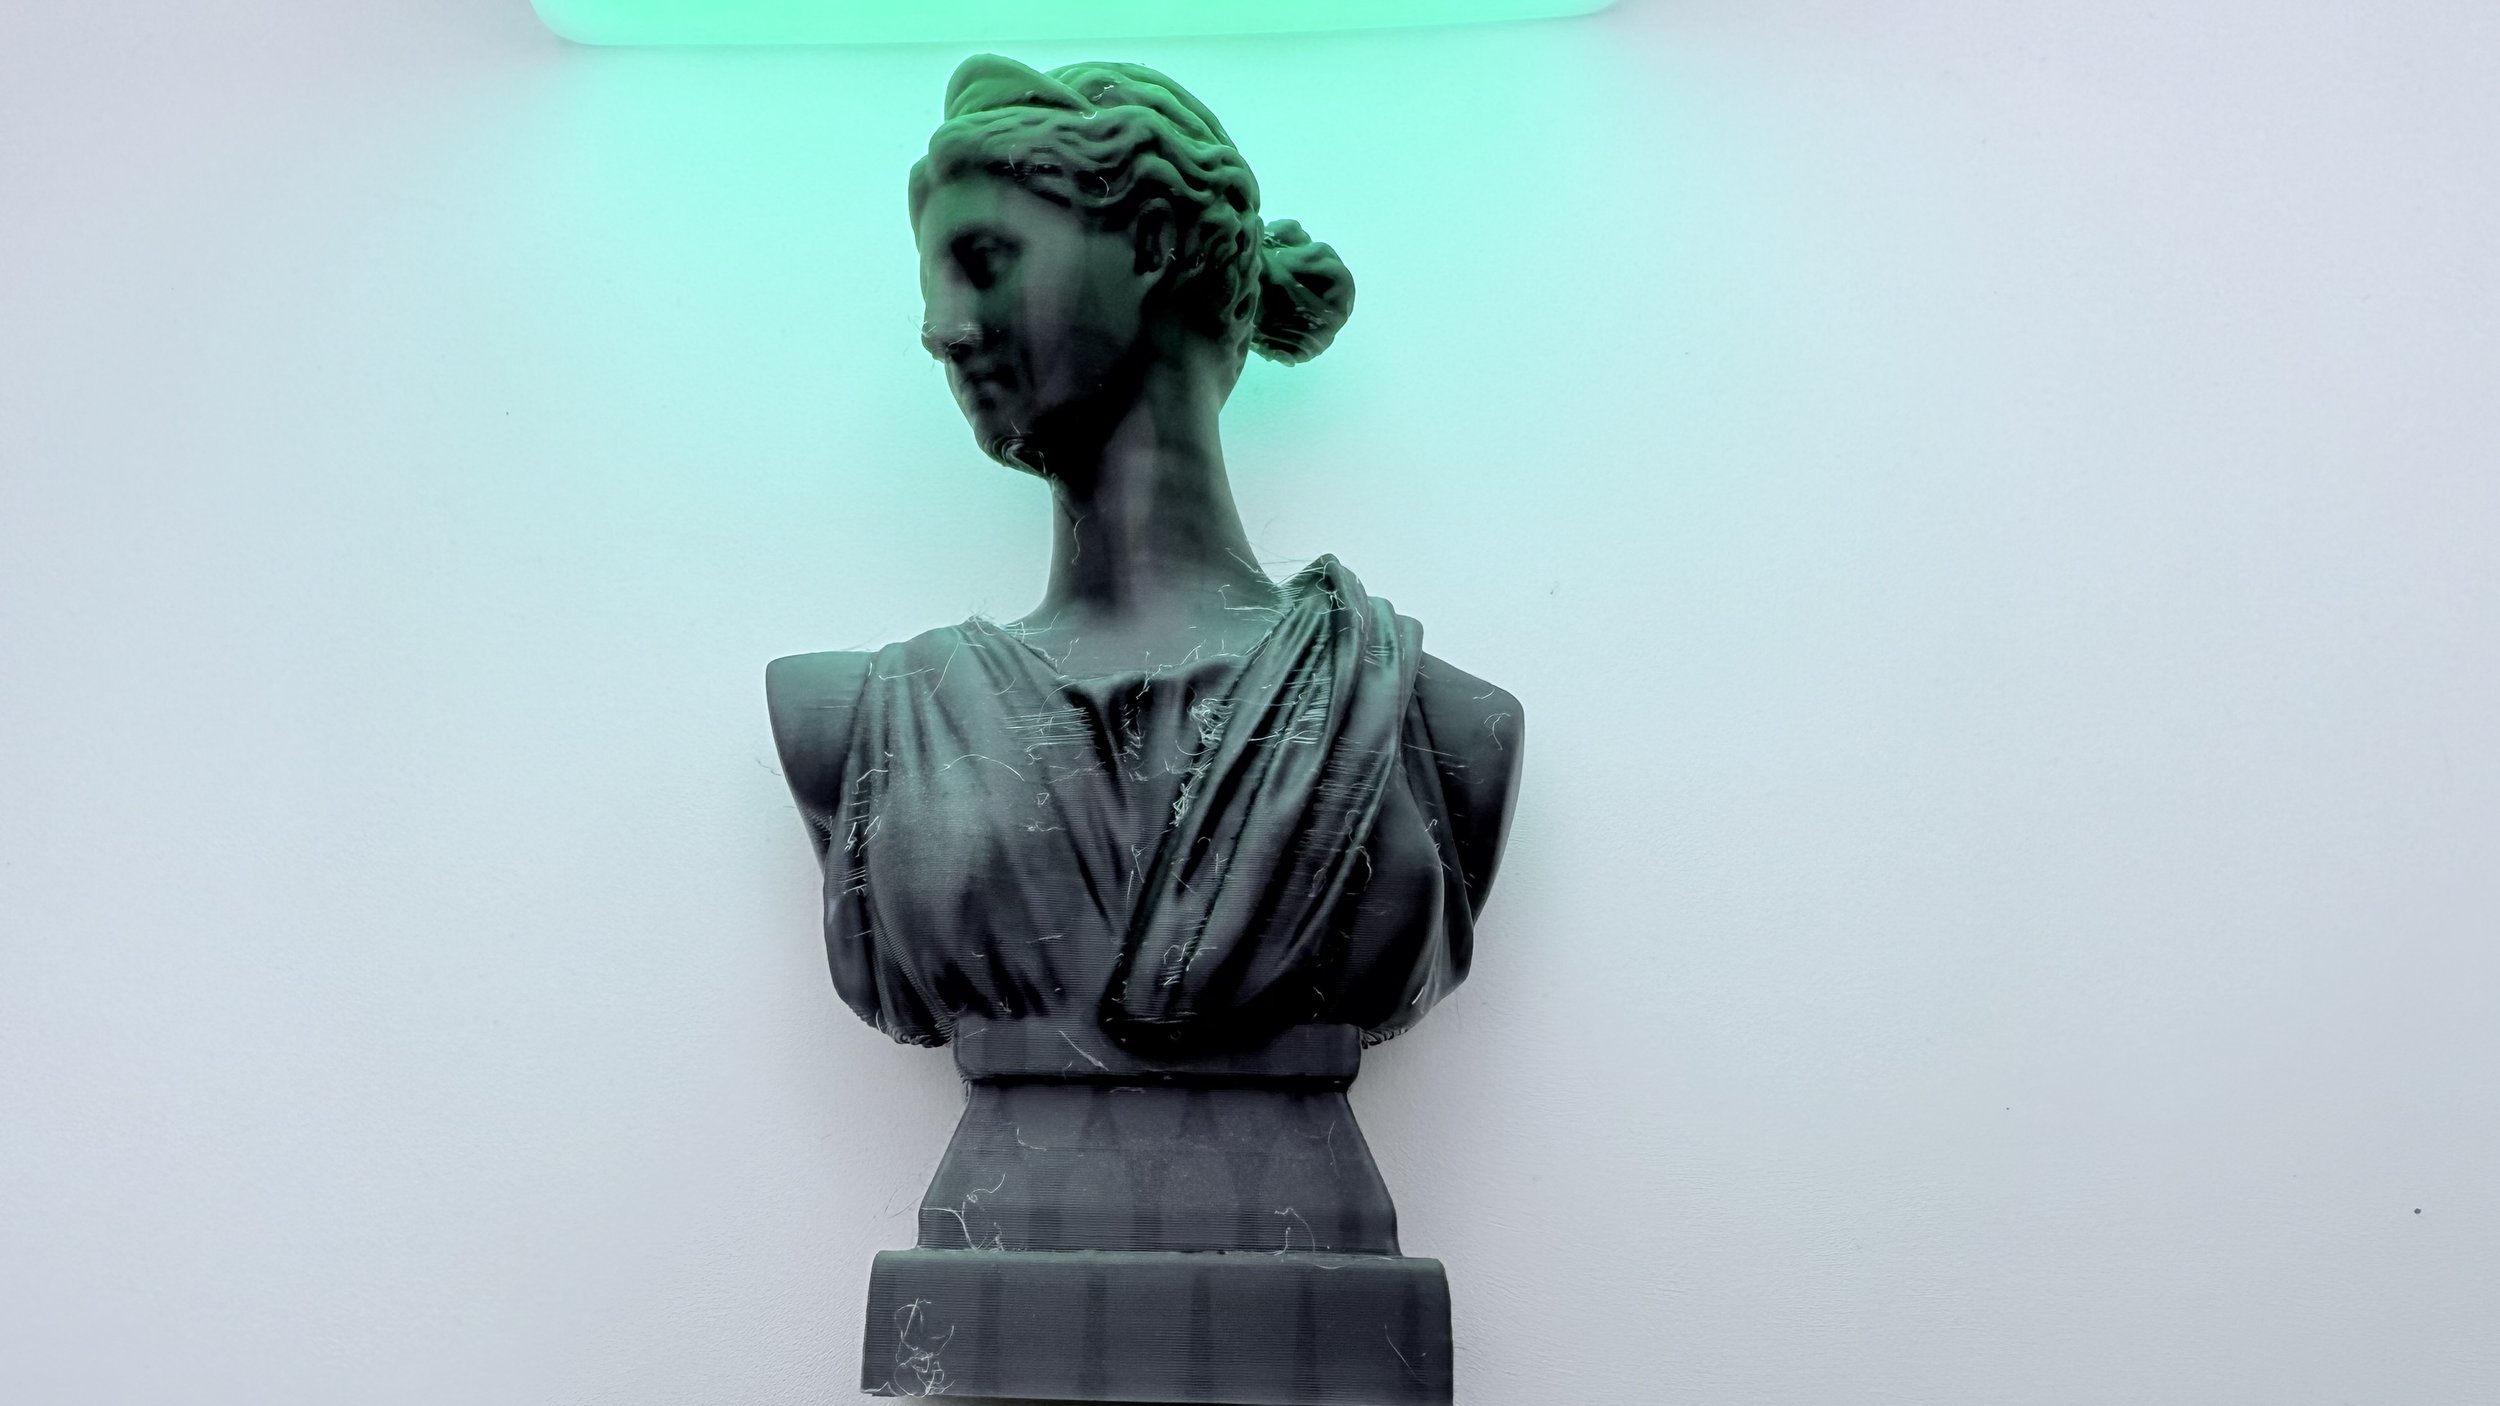
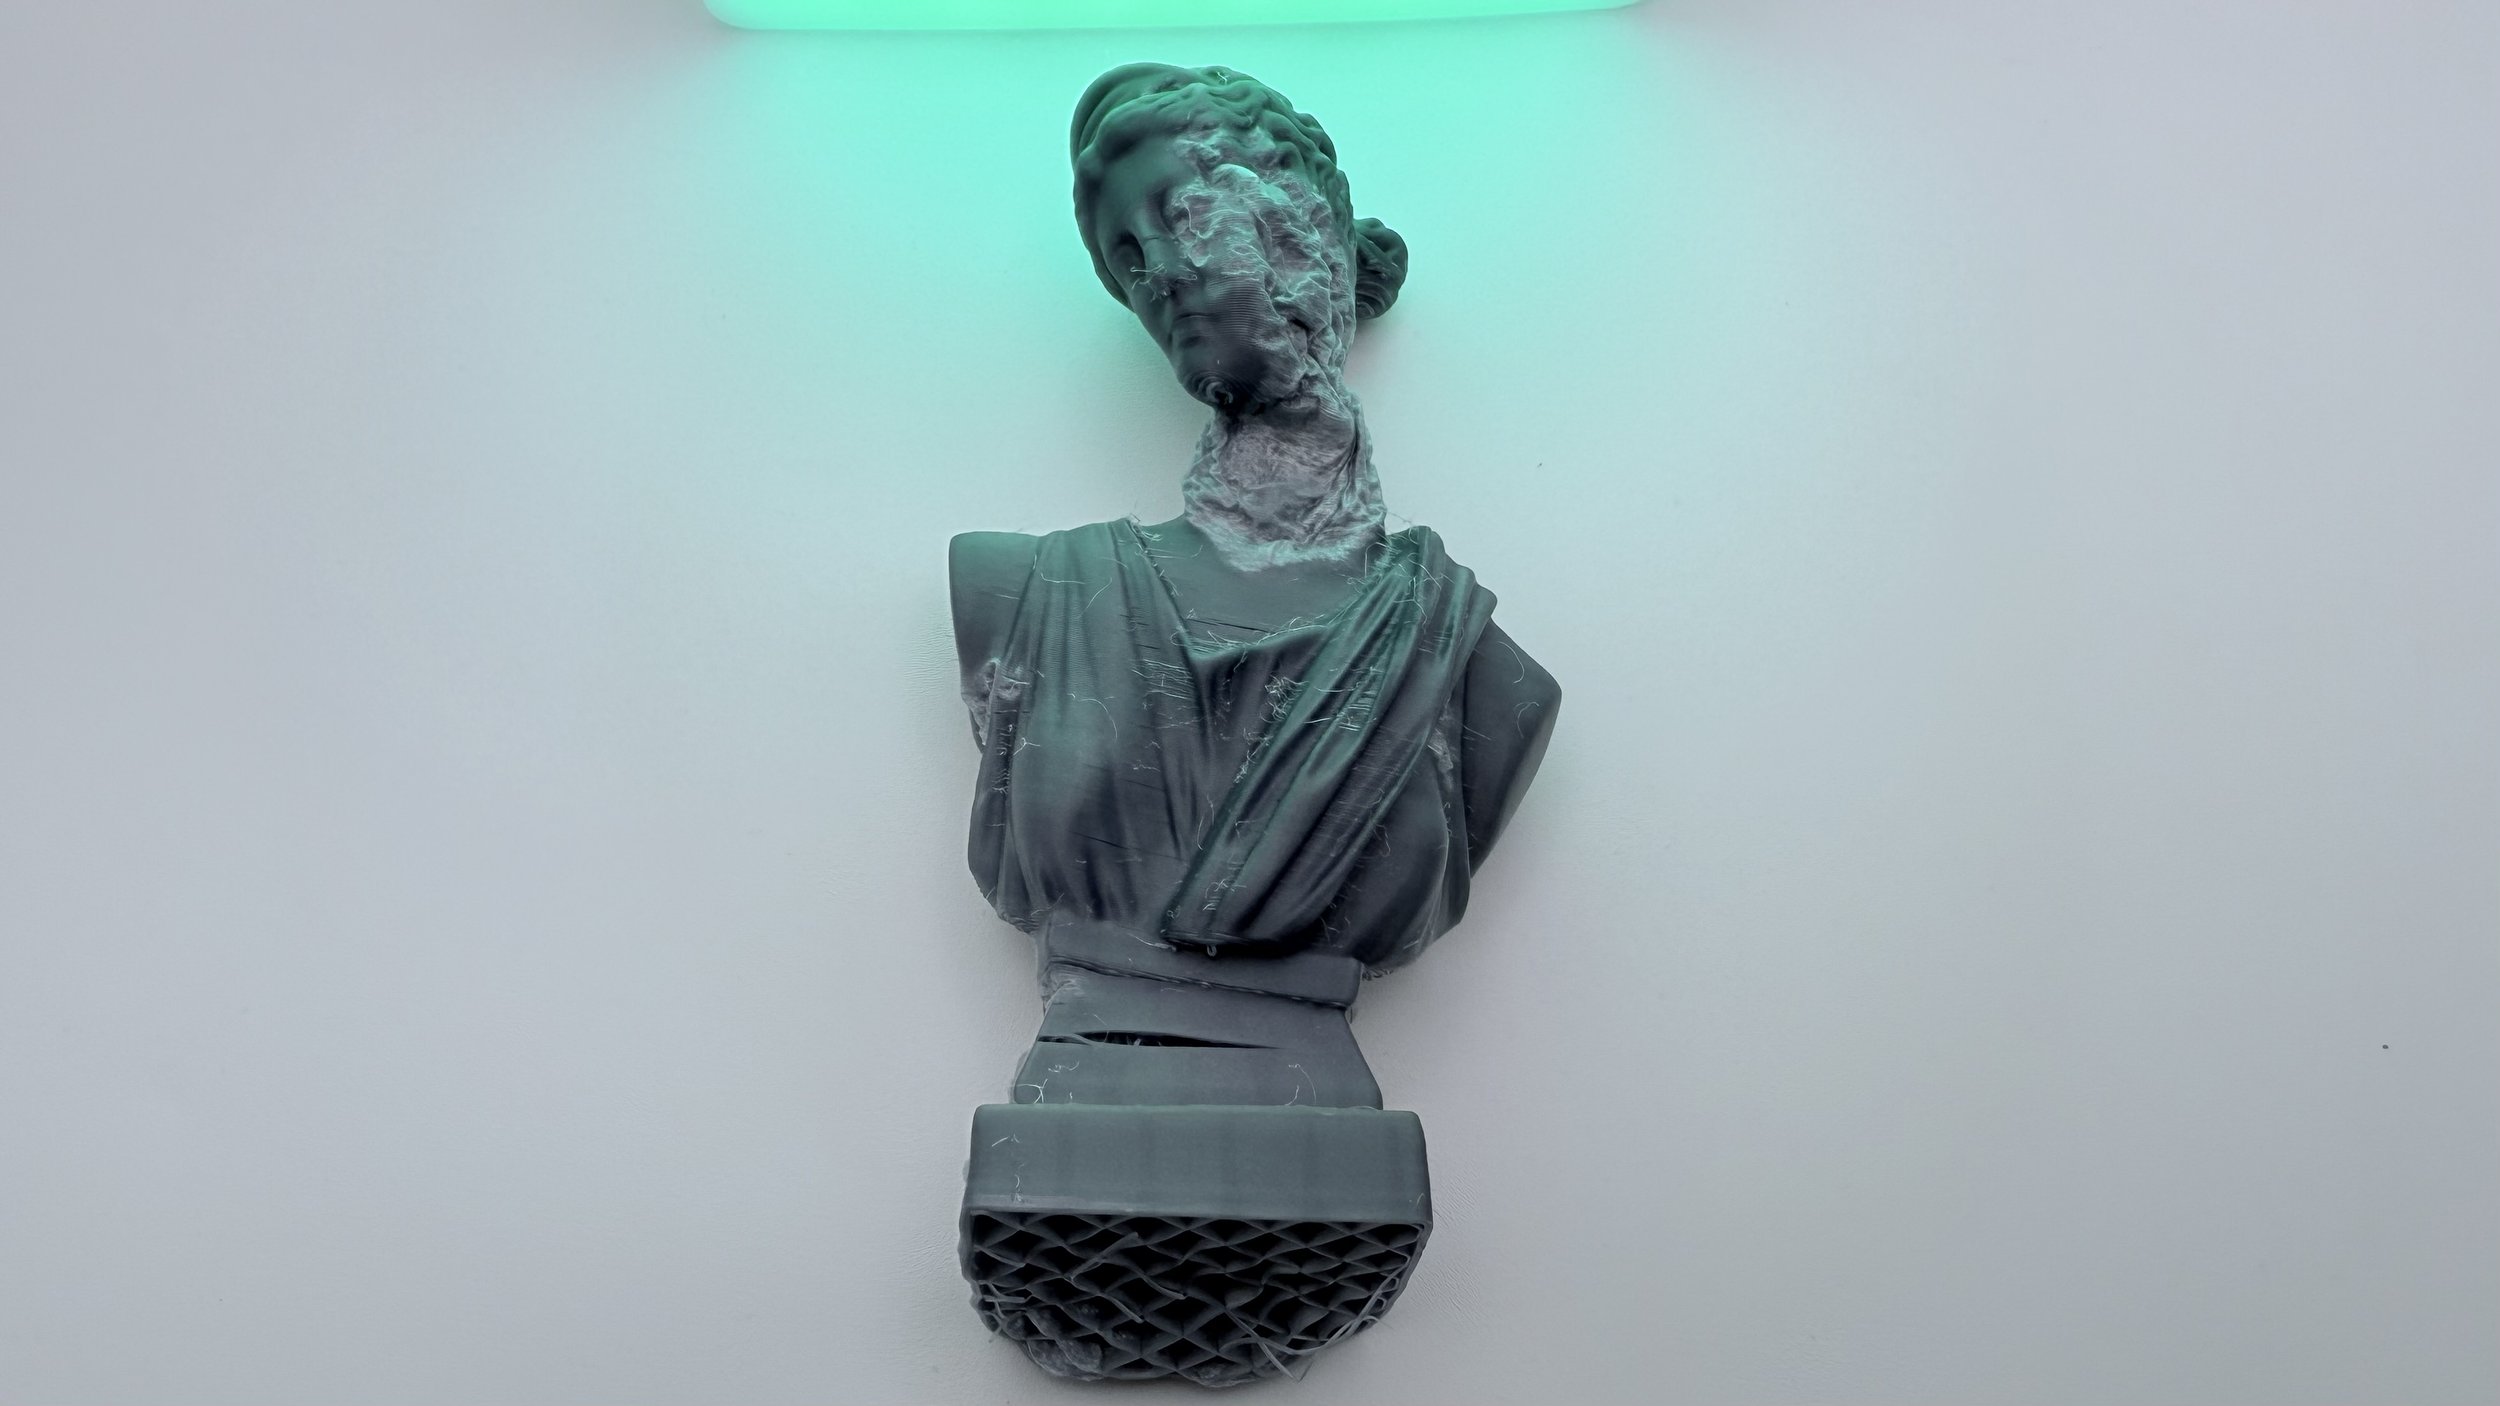
Printed figure before microwave treatment.
Printed figure after microwave treatment.

TPU on the left, TimeMass on the right.
Same flexibility, much higher potential.
Clean all strings with a quick dip in water instead of using toxic solvents.
Unlock the
4th dimension in
your 3D printer
Timed
Dissolution Times
• ACTIVE: Dissolves quickly.
• EXTENDED/DELAYED: Dissolves slower than active.
• PASSIVE: Dissolves slowly
Watch 3 benchies with 3 different disolution times.
TimeMass Support:

Elevating 3D Printing Beyond PVA
Advantages Compared to Other Supports
Higher molecular weight, resulting in significantly better printing resolution and reliability.
Flexibility similar to TPU, making it much easier to remove support structures in complex prints.
More cost-effective than PEG, BVOH, and other premium water-soluble supports.
Works with multifilament systems that pull, but it doesn’t work in systems that push. Pausing and changing filaments is an easy fix.
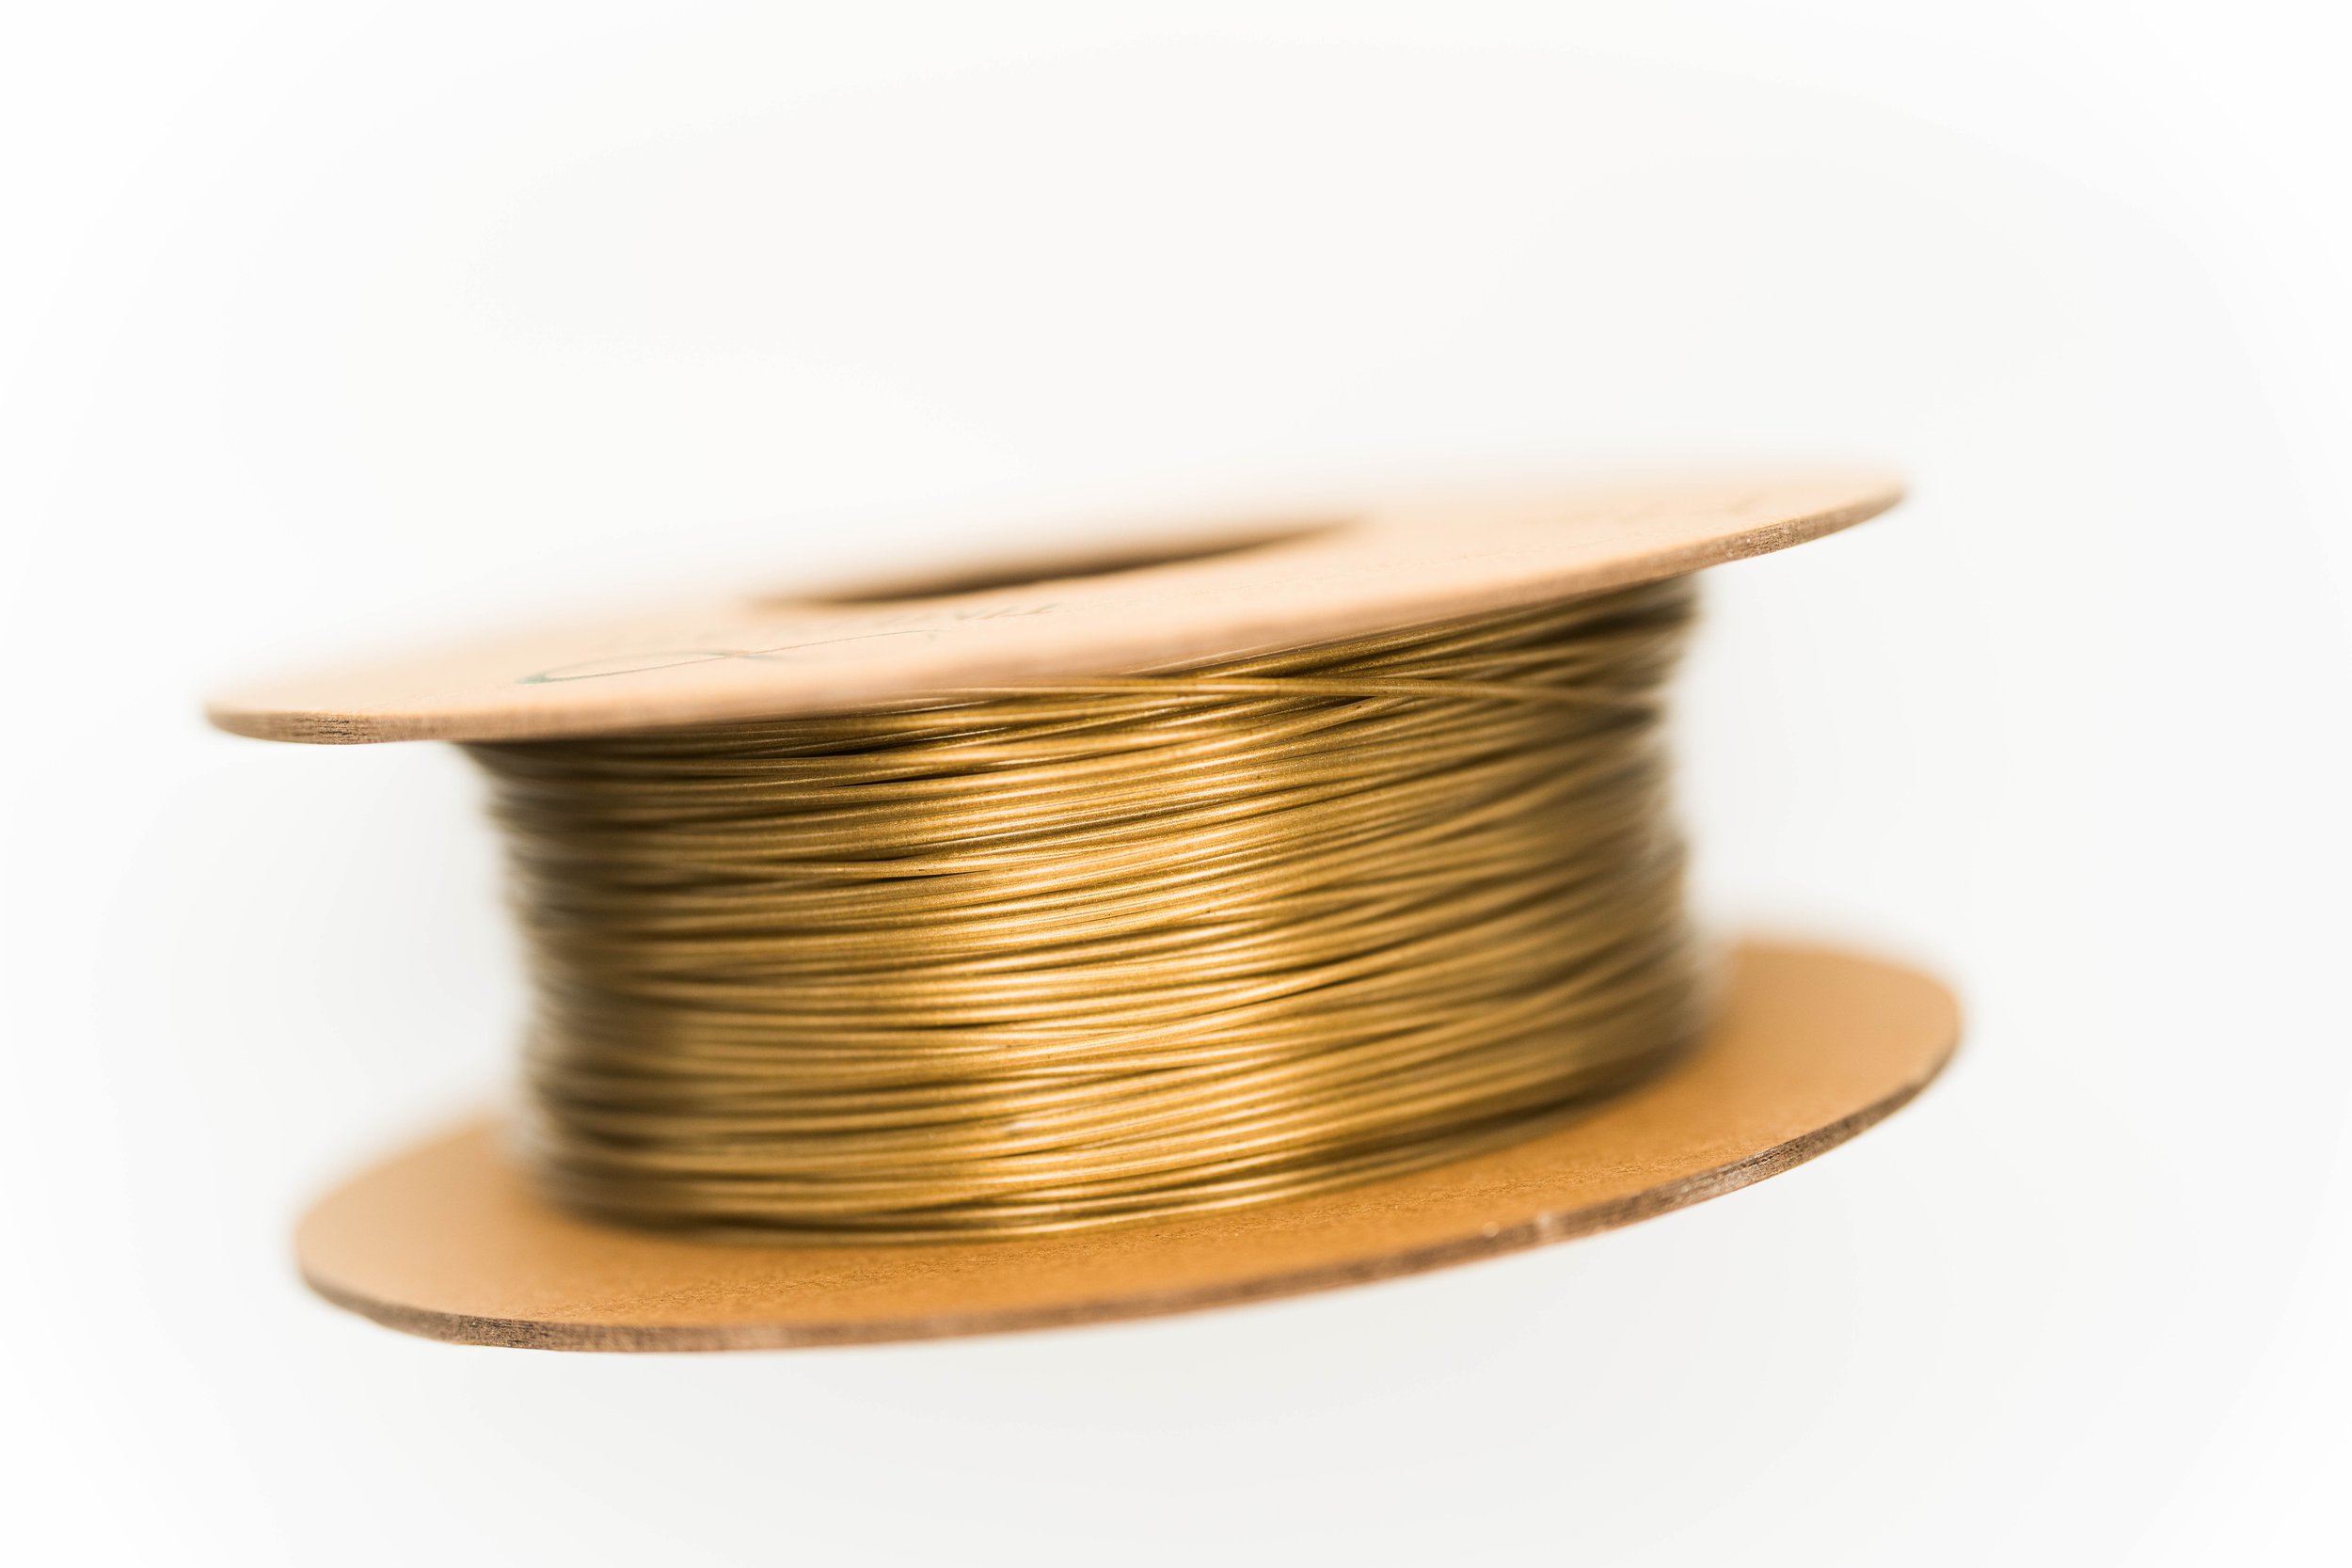
Manufactured
In-house
Your 24/7 TimeMass Printing Assistant
Need quick answers on slicer settings, troubleshooting, or filament tips? We’ve built a dedicated TimeMass ChatGPT assistant to support you anytime — just click below and ask your question:
Learn about our latest pieces.
-
Yes — we recommend drying for 2 hours at 100°C before use for best performance.
-
You can access our full User Manual with settings here:
👉 TimeMass User Manual (PDF) -
No. Microplastics are non-water-soluble at any size. TimeMass dissolves molecularly, leaving no microplastic residues.
-
Yes! For every 5 spools of the same filament type, you can request a custom color.
For example, 10 spools = 2 custom color options.Please note: custom color selections are final and not eligible for return.